
Orders List
On the main menu click on “Orders”.


Watch the video below to see the basics of order management using the "Order List" screen. Note that the dispatcher will often create jobs and copy orders directly on the schedule without using the order screens. That approach will be shown under the schedule documentation.
On the main menu click on “Orders”.
This view provides a means for viewing and searching for orders.

New orders can be created by clicking on the “Add new” button.

Provides a means for adding new orders and for viewing the detail of an existing order. Fill out the fields provided with the corresponding information such as ID, account number, delivery date, customer, quote, contact and PO number.
If you select a previously created quote to be assigned to the order, you will see a pop-up letting you know that this will change the status of the quote from pending to active. Select “Yes” if this is expected.
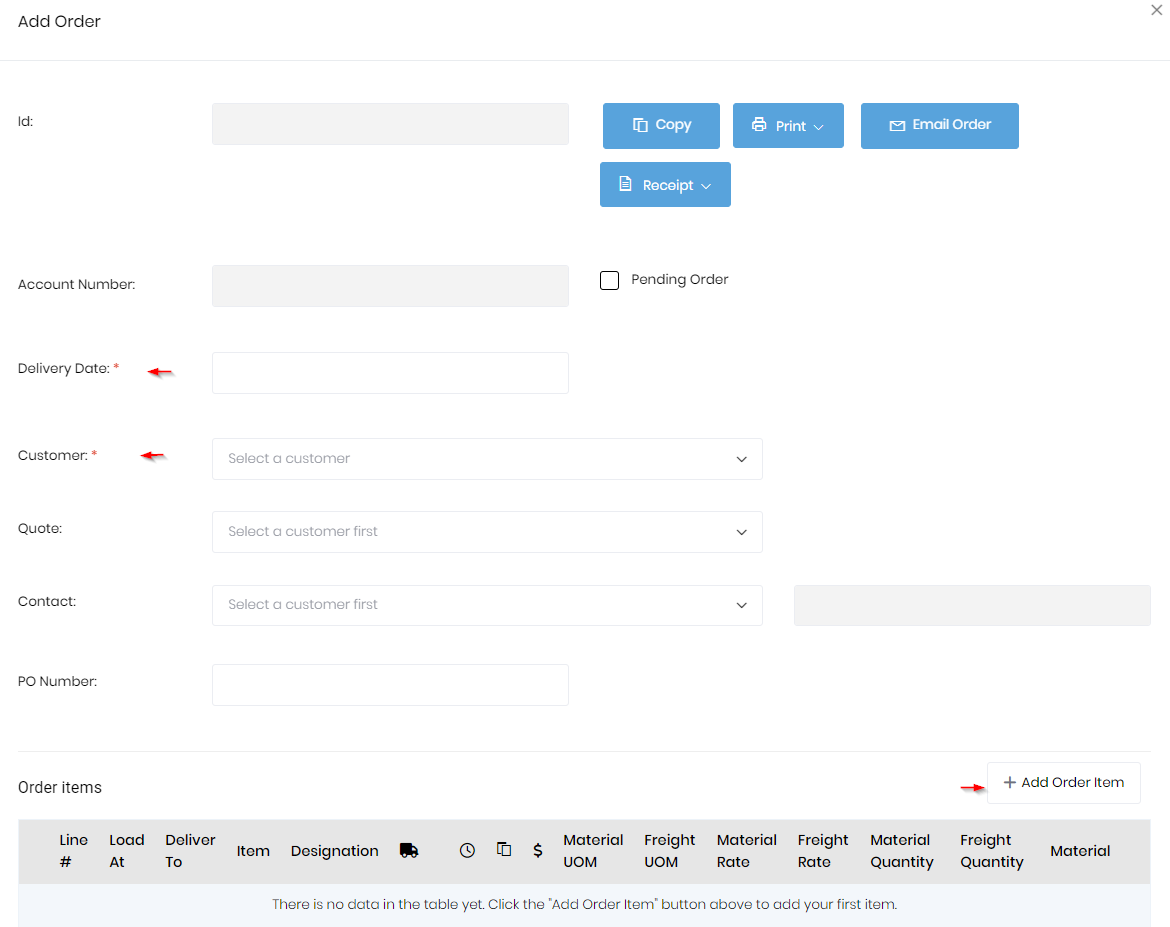
The down arrow in the customer field displays the list of customers, or you can put your cursor in the text area (of the customer field) and start typing and the item matching what you have typed will display.
When typing a name in the customer field you will see a “+” to add a new customer, in case the customer was not created yet. The quotes and contacts controls behave the same way except they do this for their entity which would be quotes and contacts. When selecting contacts, you will only see the contacts associated with the customer you entered above.
When creating a new order, after selecting the quote from the “Quote” dropdown click on the “Add Order Item” button, then it will display a list of all items from that quote. Click on the checkbox for the line items you want added to the quote.

If you want to select all items together then click on the “Select All Checkbox” that is displayed in the header.

Clicking on the “Add selected items” button will add all selected items to the “Order item” data table.
If you click on the "Add order item" a second time, you will see the same list of items to select from.

If you are using QuickBooks and the customer is already in QuickBooks, be sure the customer name matches what is in QuickBooks for the invoice import to work.
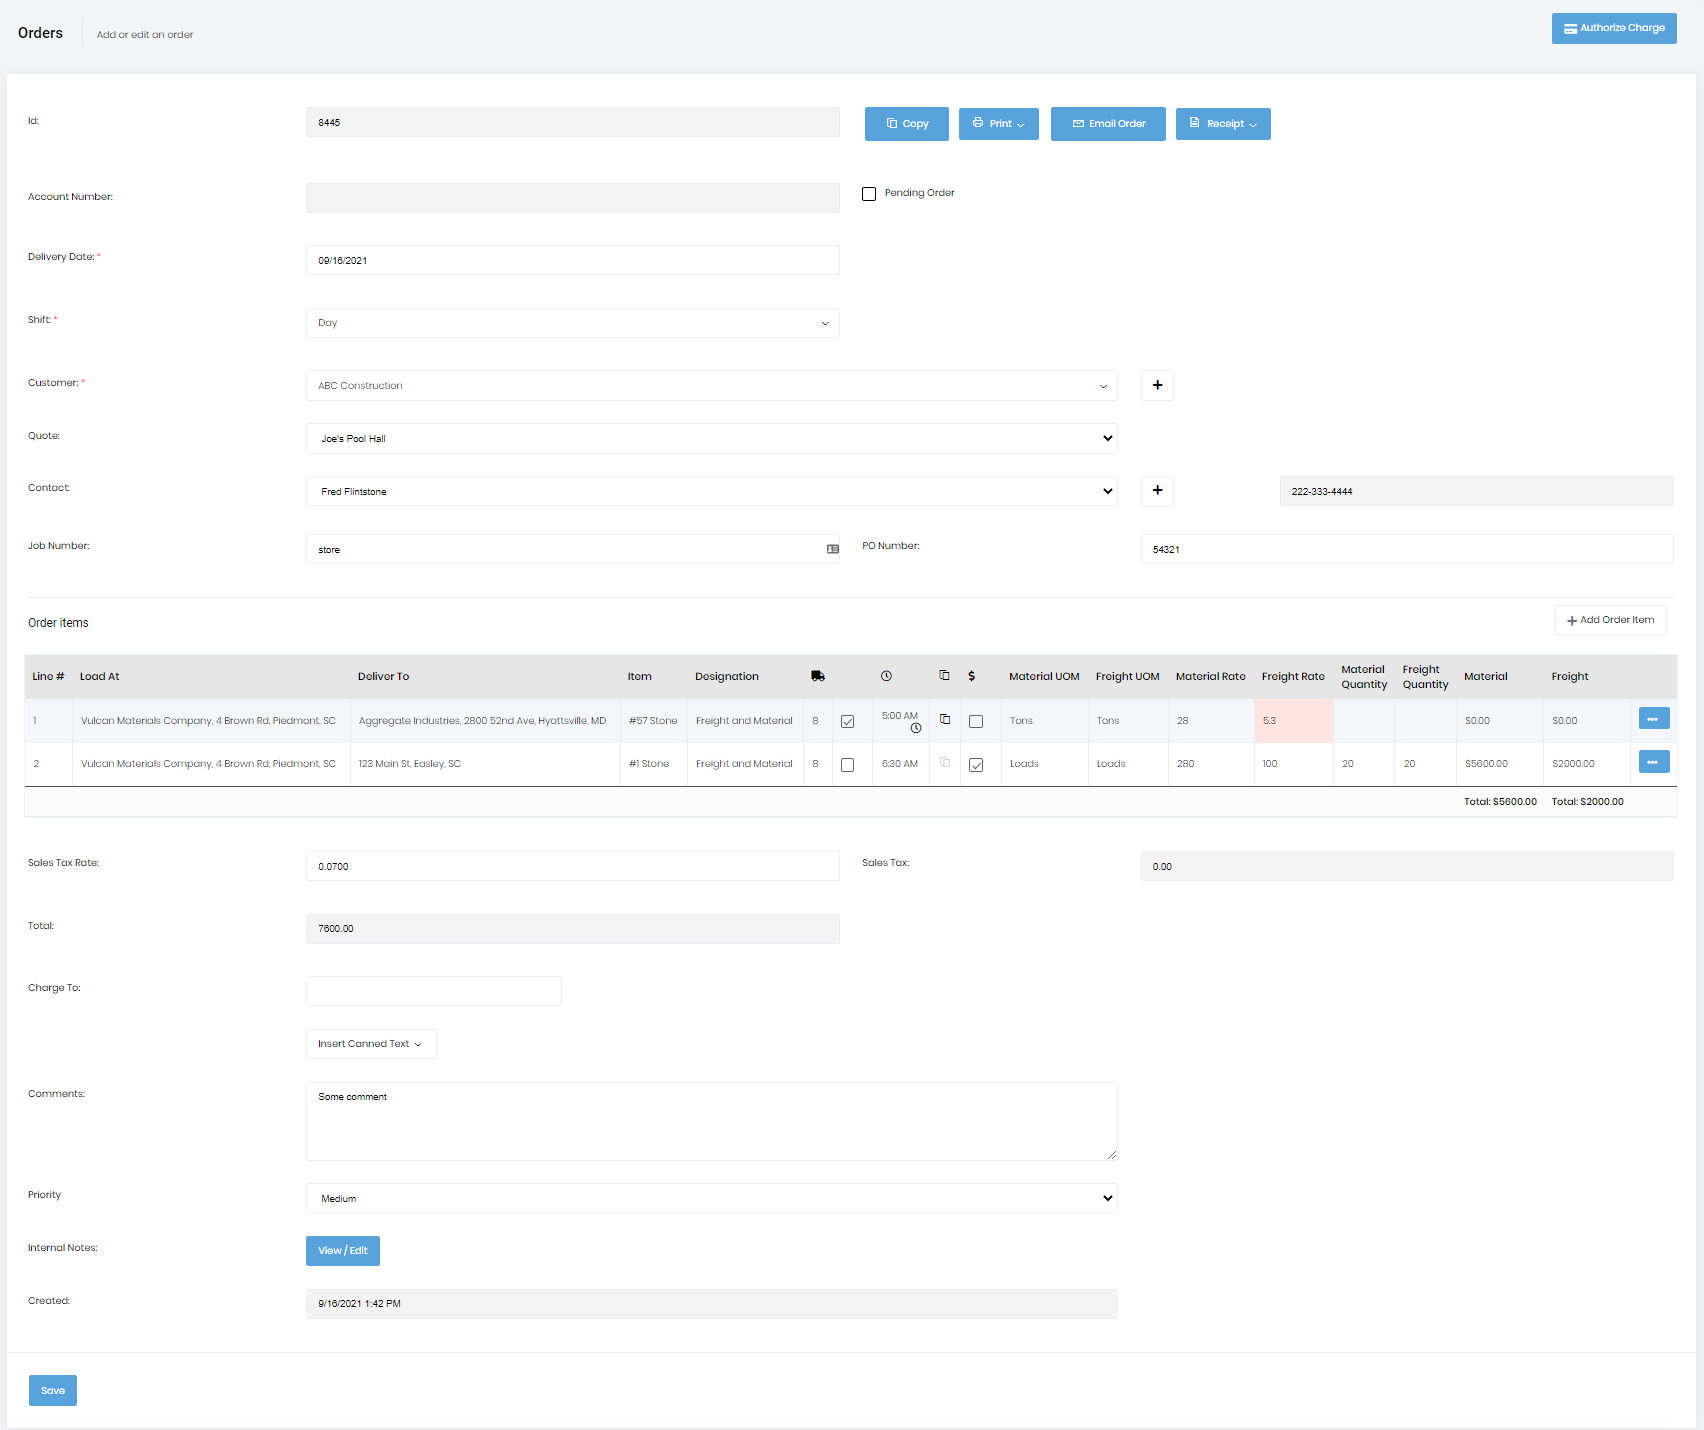
The total values on order are calculated automatically based on the values present in the line items and the sales tax. The sales tax rate should be entered, should you want sales tax calculated on the order. 5% should be entered as 5. The system will divide by 100, so do not enter .05 for 5%. The rate does not have to be an integer, so if the sales tax is 5.5% you would enter 5.5. The sales tax will be calculated automatically based on the sales tax percent and the total of material and freight.
If any line item has “Deliver to” or “Load at” value as “Job site” then it will be replaced on schedule & other reports (wherever applicable) with the “Job site” field value that was entered while creating the order.
While adding order lines on orders, material total and freight total are calculated automatically once you specify the material rate/freight rate and the quantity. However, if you do not want to have the automatically calculated values, you can simply enter the material and freight totals directly which will override the already calculated values. Once you override the values, changing the material/freight rate will not impact the overridden values.
Overridden values are shown in the misty rose background on order detail form which makes it easier to identify the order lines with overridden values.

If you click on edit for the same order line, you will be able to see the misty rose background on material and freight total fields indicating that they are overridden.

If the “Show Fuel Surcharge” checkbox is enabled on Settings, then the “Fuel surcharge calculation” control will be displayed on the Order detail view with the default value selected. By clicking on the dropdown the user can change the fuel surcharge calculation methods. If they don’t want to specify any method then they can select the blank value. For the selected fuel surcharge calculation method if the “Can Change” checkbox is enabled, then the “Base Fuel Cost” control will be displayed with its specified value. Otherwise, the “Base Fuel Cost” control will not be displayed.
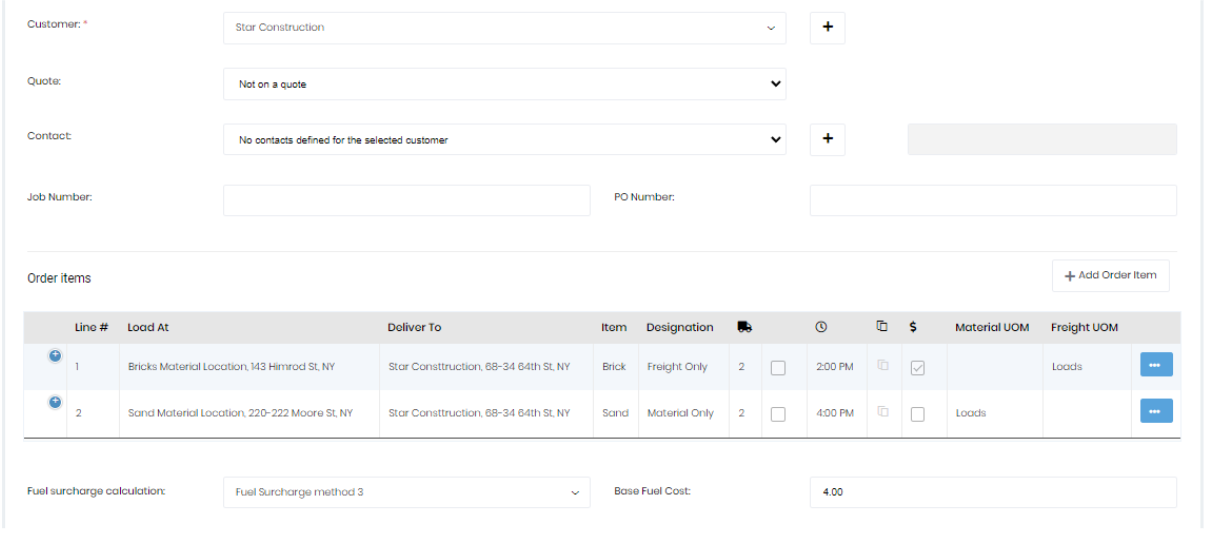
If the “Show Fuel Surcharge” checkbox is enabled on settings when creating an order with a quote, the “Fuel surcharge calculation” control will default to the quote's fuel surcharge value. The control will be disabled.

When the dispatcher chooses the option "Create Quote from Order", they get a prompt, “Are you sure you want to create a quote from this order?" Choosing "Yes", will create a quote based on this order.” This quote will have the same line items as the order it was created from. After they are created, the current order is associated with that quote.

