
Setting Up Lease Haulers
The 'Lease Haulers' tab lets you specify rates, enter broker fees, and set templates for lease hauler truck availability messages, if enabled on your plan.
The Lease Hauler functionality makes managing your lease haulers (subcontractors) easier. You can either manage the lease haulers yourself or give your subcontractors the ability to manage their assets themselves.
This article will discuss configuring and using the lease hauler functionality yourself and setting up your subcontractors to use the Lease Hauler Portal.
How to Enable and Set Up the Lease Hauler Functionality
Before you can use the lease hauler functionality, the features must be enabled for your tenant.
The “Lease haulers” tab is only shown if the feature is enabled on the tenant. This feature is not available in all plans. If you’d like to enable this feature, simply reach out to our support team, and we’ll activate it for your account.
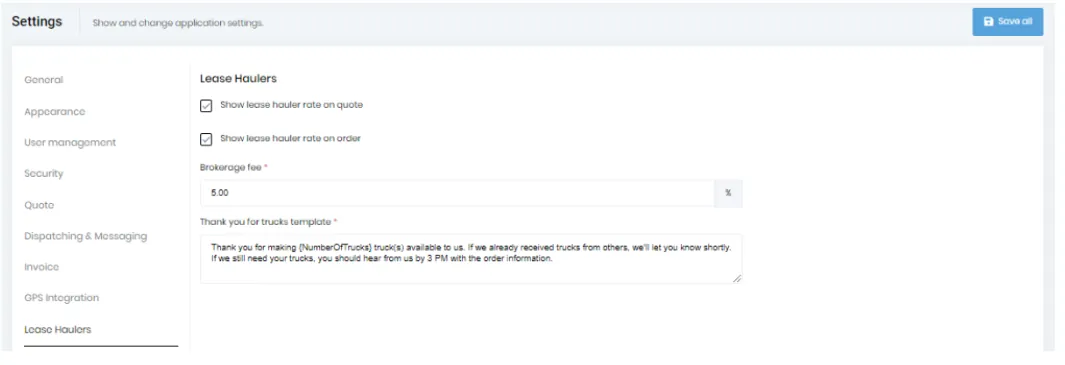
Enable these options:
- “Show lease hauler rate on quote”
- “Show lease hauler rate on order”
These settings let you specify the rates you’ll pay lease haulers. Your customers won’t see these rates. Your subcontractors will see the rates to understand what they’ll earn for each job. This transparency keeps everyone on the same page.
From this page you can enter the “Broker fee” and it will be reflected on the lease hauler statement.
You can also set the “Thank You for Trucks” template, which is the message sent when a lease hauler provides trucks for your jobs. Then, Save the changes to apply the updates.
Lease Hauler Portal
The Lease Hauler Portal makes managing subcontractors easier. Before, you had to request lease haulers and manually keep track of their trucks and drivers. Now, the portal allows lease haulers to manage these tasks themselves, saving you time and effort.
The Lease Hauler portal provides the following functionality:
- You can request trucks directly from subcontractors.
- Lease haulers can see which trucks and drivers are assigned to your jobs.
- Lease hauler drivers can use the app to stay updated and connected.
- Lease haulers can log tickets for jobs they’ve completed.
- Subcontractors can update their company information.
- Subcontractors can manage their fleet and driver details.
How to Set Up a Subcontractor in the Lease Hauler Portal
To set up a subcontractor so they can use the Lease Hauler Portal, follow these steps:
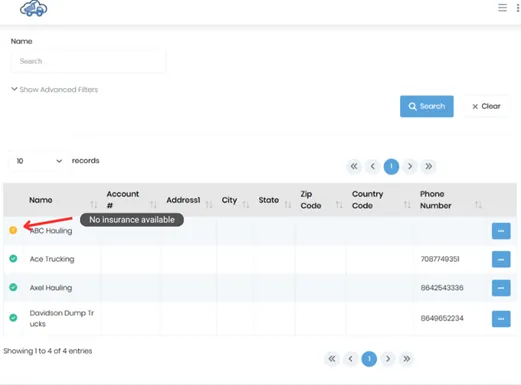
- Open the Lease Haulers screen from the main menu.
- From the main menu, click on the Lease Hauler option. This will take you to the configuration screen where you can add the subcontractor’s details. You will see the page below.
Note: Clicking the Export button will generate a CSV file containing all the records displayed on the page.
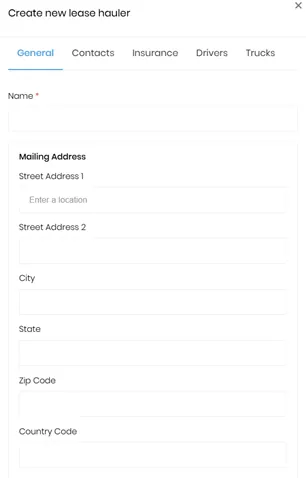
- Click the “Add New” button in the top-right corner of the screen to open the form for adding a new subcontractor. Then fill in the information on the General tab. See the form below.
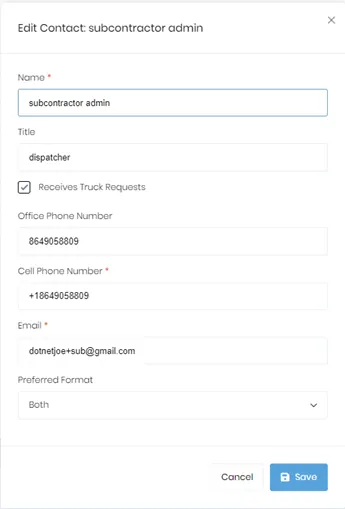
- When you go to the Contacts section, add at least one contact by clicking the “Add New Contact” button. Enter the name, title, office phone number, cell phone number, email, and preferred format. To ensure this lease hauler receives truck requests, check the “Receives truck request” box. Once all the details are entered, click the Save button.
- Navigate to the Insurance tab and enter the subcontractor’s insurance policy details. Click the “Add Policy” button. The form below will appear, where you can enter the insurance details.
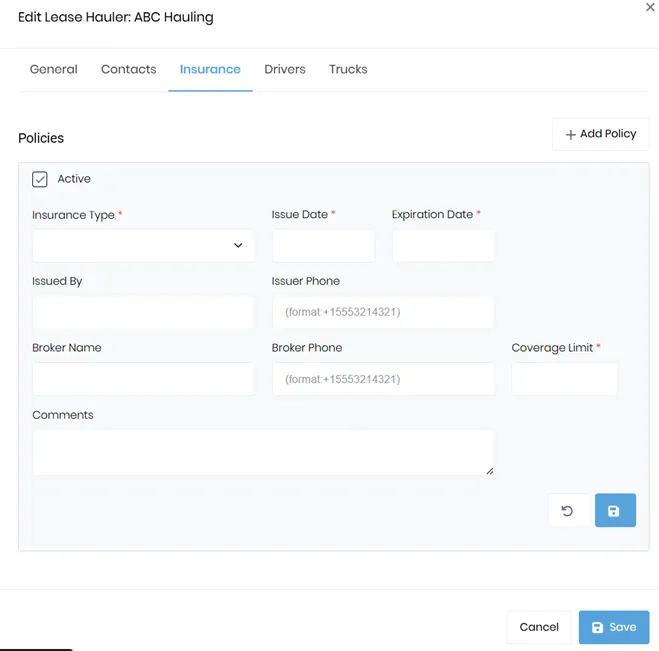
Fields marked with a red asterisk (*) are mandatory and must be filled out. After completing the form, don’t forget to click Save to apply the changes.
Note: If no insurance is added, a yellow question mark icon will appear on your dashboard as a reminder after you save everything. Once you complete the insurance information, the icon will change to a checkmark, indicating compliance.
- To create drivers for lease haulers, click the “Drivers” tab. You have the option to either add the drivers yourself or allow the lease hauler to configure their own drivers later. To add drivers, click the “Add New Driver” button. This will open a form where you can enter the driver’s details.
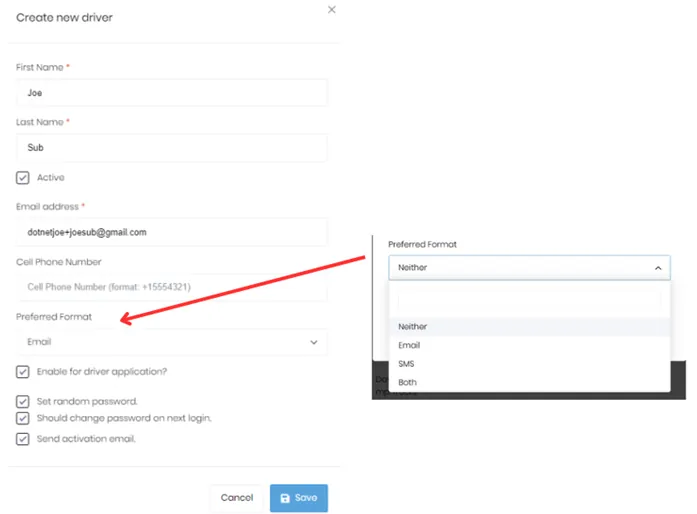
Make sure to include an email address, as it is required for the driver to have an account on the Lease Hauler Portal. The email is essential because it allows the driver to login and reset their password if needed.
You can also add a mobile number and select the driver’s preferred format for receiving SMS texts using the dropdown menu. If you check the “Enable for driver application” option, the driver will be granted access to the portal.
- To add trucks for the lease hauler, go to the “Trucks” tab and click on the “Add New” button. You or the lease hauler administrator/dispatcher can fill out the required information in the form.
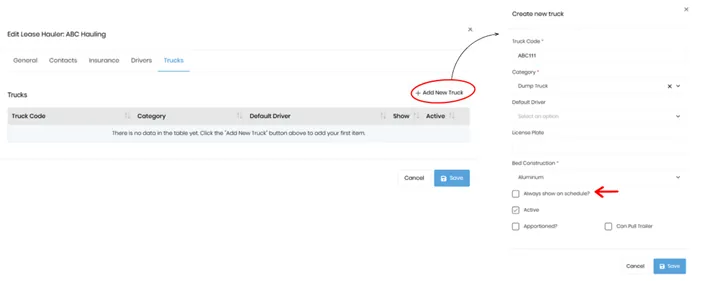
Check the “Always show on schedule” box only if the truck is always available and works exclusively as part of your fleet. This will ensure the truck automatically appears on your schedule every day, just like one of your internal trucks.
For trucks that also work with other companies or are not consistently available, leave this box unchecked. This helps keep your schedule clean and avoids unnecessary clutter. These trucks show as internal trucks for billing purposes.
Adding Lease Hauler Portal Users
You will need to configure all lease hauler users except drivers. Lease haulers can add their drivers, but they cannot create dispatcher or administrative users. This simplifies their process and minimizes security risks.
To add a lease hauler user, follow the same process as adding an internal user, but you must select one or both lease hauler-related roles. You will be prompted by a dialog to select a lease hauler company during setup to ensure the user has access to the correct portal.
- Click the “Administration” menu in the main menu to expand its options. Under “Users”, click “Create New User” and fill out the required information.
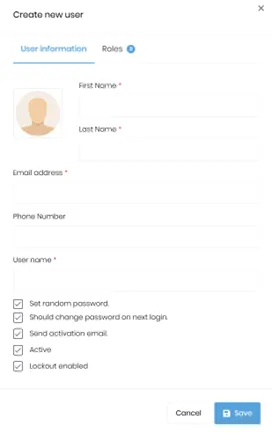
- Then, switch to the Roles tab. Below is a screenshot showing the two new roles for lease haulers. The Lease Hauler Driver role is automatically set when a driver is added from the “Drivers” Tab of the “Edit Lease Hauler” form discussed earlier.
Configuring Lease Hauler Emails
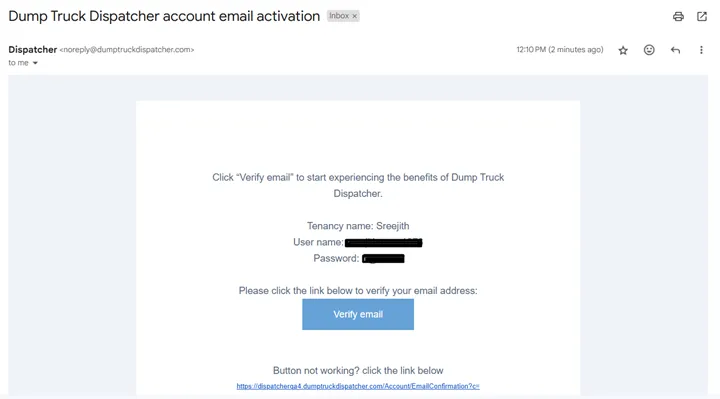
When you create a Lease Hauler Administrator/Dispatcher user, an email titled “Dump Truck Dispatcher Account Email Activation” will be sent to their provided email address. The user (Lease Hauler Admin/Dispatcher) must verify their email to activate their account and log in as a Lease Hauler Administrator or Dispatcher.
Summary
Once the lease hauler functionality is configured, you can either keep the data updated or you can enable the lease hauler to manage their own data. The lease hauler request process and the scheduling of lease hauler trucks are covered in other articles.