This documentation is for the Vista GPS system. If you have a subscription to our other GPS system, view Dump Truck Dispatcher GPS for that documentation.
You will log in to https://gps.dumptruckdispatcher.com with the credentials you have been provided.
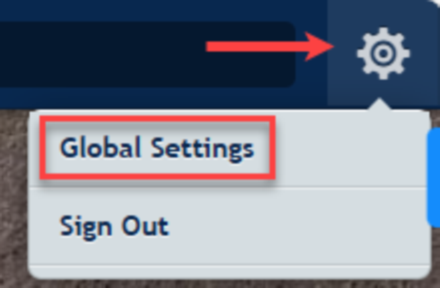
Click on the Cog in the upper right corner and click the “Global Settings” menu option.
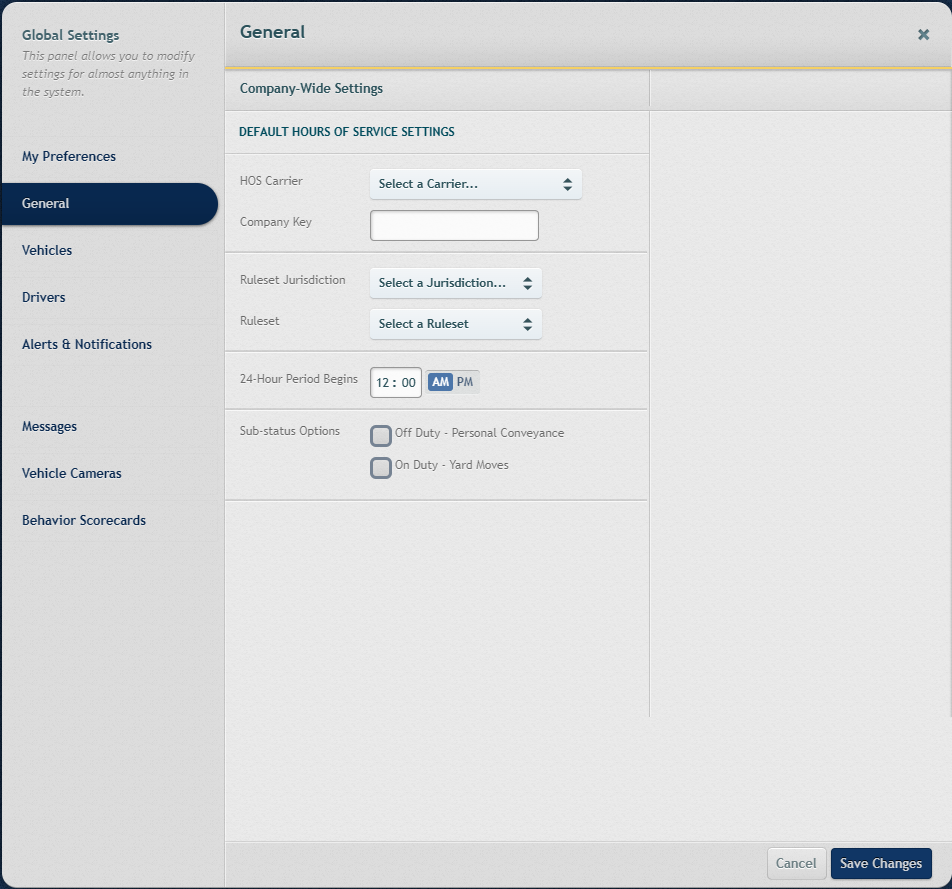
If you are using ELDs, you’ll need to enter/verify the data on the “General” tab. The company key will be provided if you have the ELD subscription.
Click on the “Vehicles” tab to configure your vehicles.
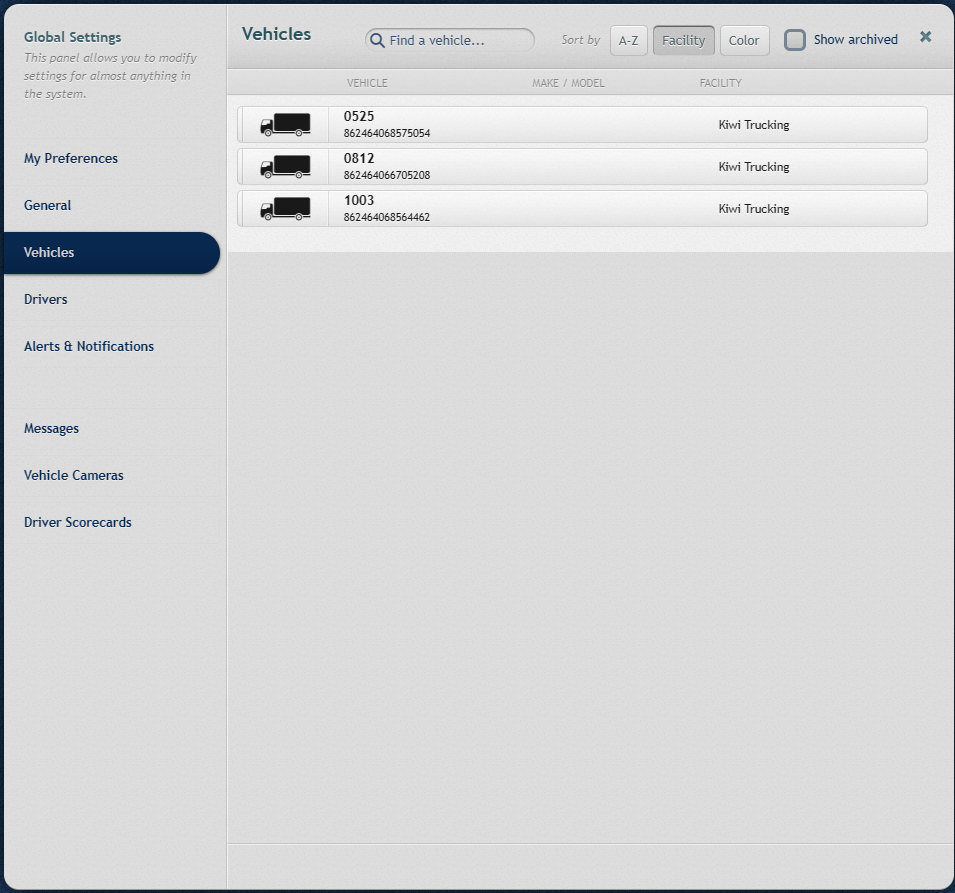
Click on the desired vehicle and update the desired information. If you have a Vista Work or DVIR subscription, you’ll be able to select a DVIR form. If you don’t have this capability and want it, let us know. You aren’t required to fill out any of this information other than the vehicle name which should correspond with the “Truck Code” in Dump Truck Dispatcher. It is also recommended to enter the current odometer reading and engine hours.

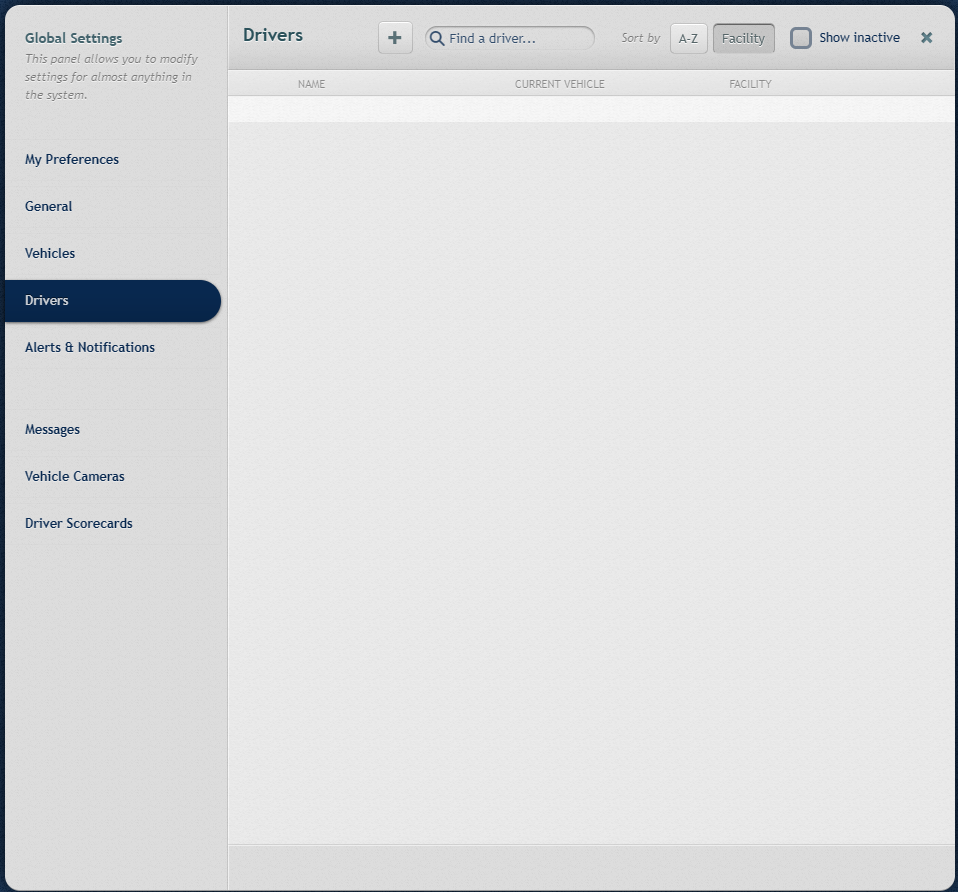
If you are using the ELD/HOS functionality or DVIR, you are required to fill out the drivers. Drivers are optional if you are only using the GPS functionality.
You add a new driver by clicking on the “+” button at the top of the form. You edit a driver by clicking on the driver you want to edit.
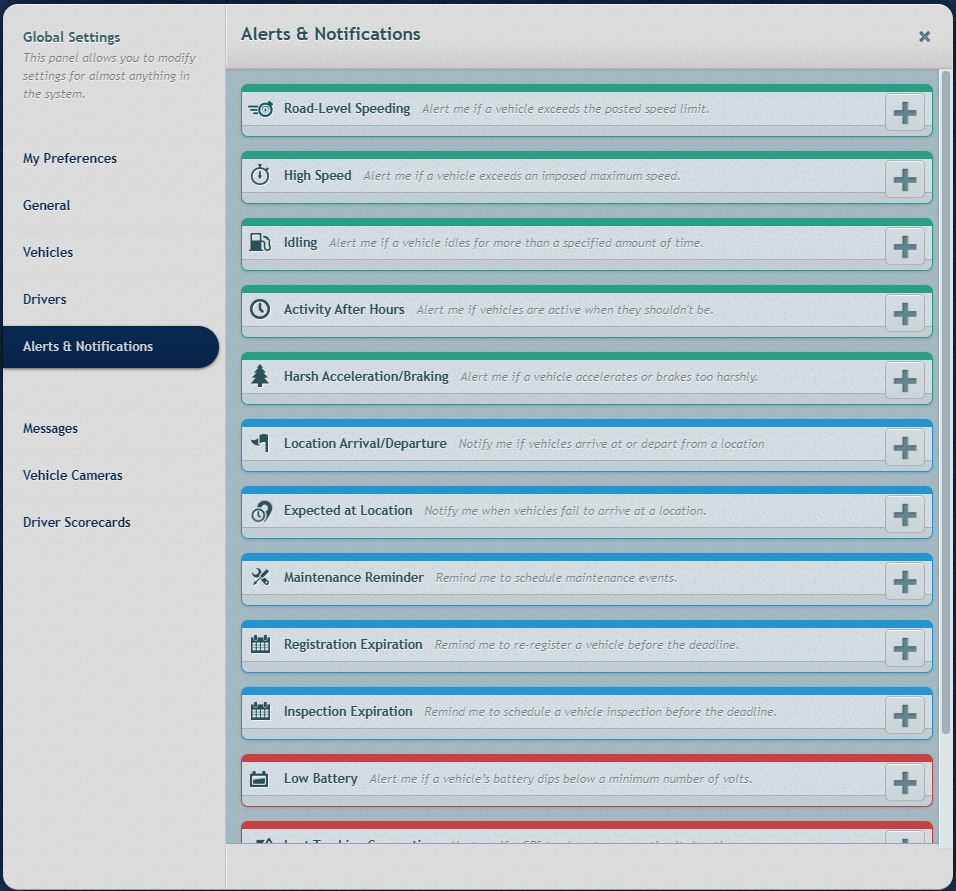
The “Alerts and Notifications” tab is where you can configure what alerts and notifications are sent to you. Click on the “+” button on the right of the desired alert/notification and specify the parameters for when you’ll receive a notification or alert.
The “Messages” tab only applies if you have the “Dispatching and Messaging” functionality enabled. Generally, if you use Dump Truck Dispatcher, you won’t have this available as this functionality isn’t as robust as the Dump Truck Dispatcher scheduling and dispatching. It also doesn’t tie into the tickets and billing functionality in Dump Truck Dispatcher.
If you have our cameras, you can configure events on the “Vehicle Cameras” tab.
If you have the driver coaching module, you can configure the settings for coaching on the “Driver Scorecards” tab.
After logging in, you’ll see a screen like the following.
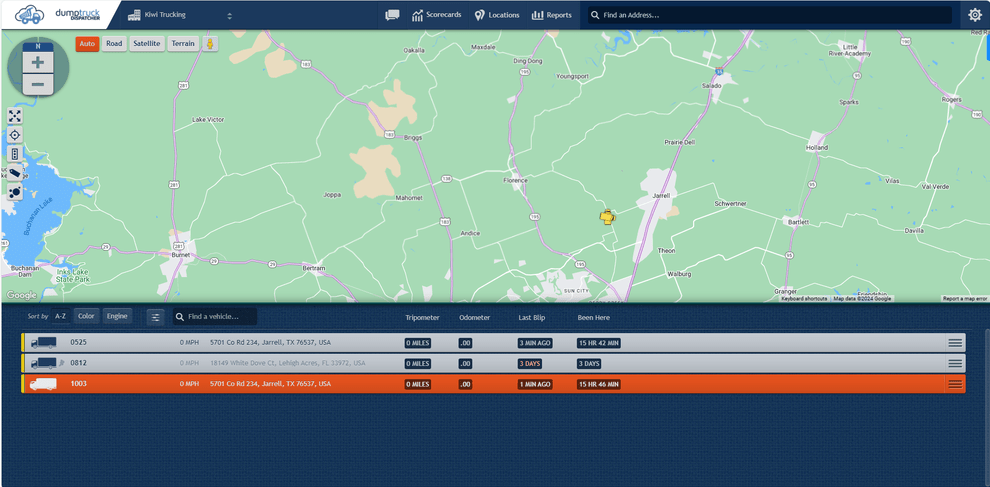
If you have multiple facilities, you can select the facility using the facility selector shown below. This will filter the trucks being displayed to those associated with that facility. If you need to have a facility that you can assign trucks to, let us know and we’ll add them for you. If you aren’t assigning trucks to them, you can add facilities under locations as described below.

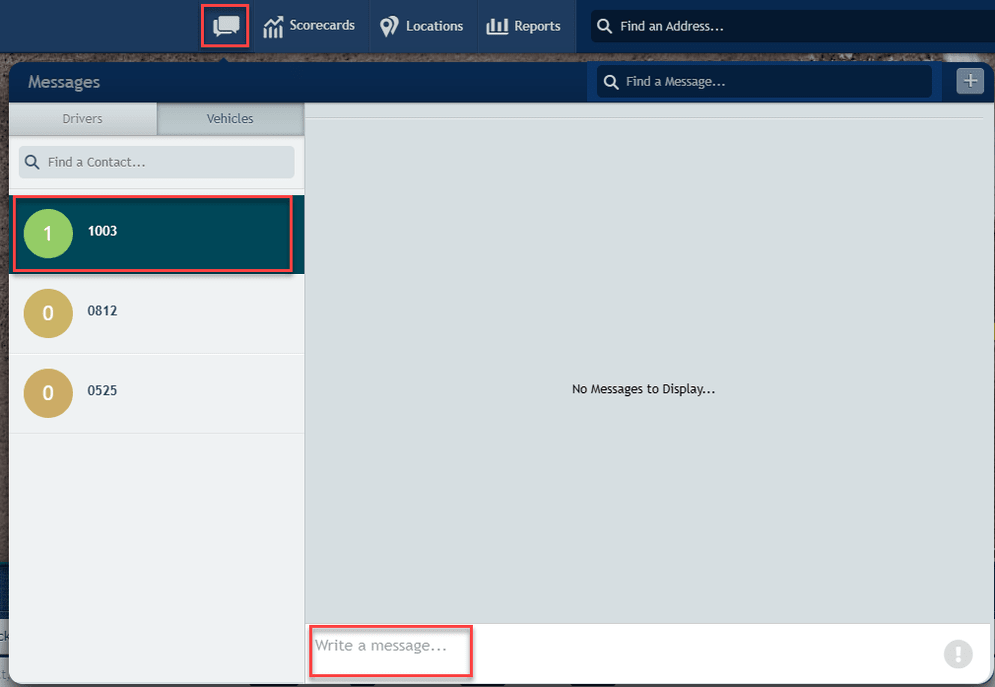
If the messaging functionality is enabled, you have permissions, and the truck has a device capable of receiving messages, you can send a message to the truck. To send a message click on the icon, click on the truck you want to send the message to, enter a message, and press the [Enter] key.
Click the “+” button in the upper right corner to send a group message.
Clicking the “Scorecards” icon shown below will open a tab with the “Driver Behavior Scorecard” if you have this functionality enabled.
![]()
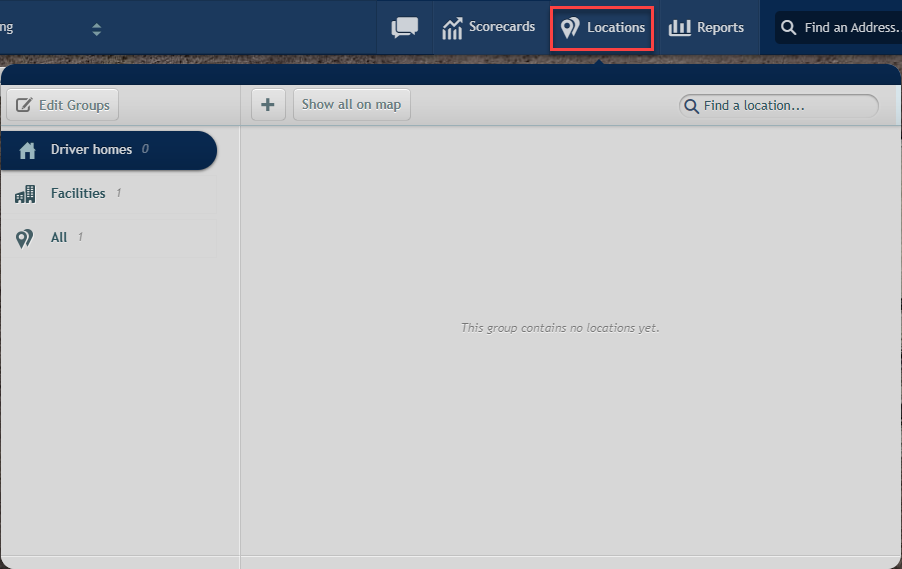
Clicking the “Locations” icon shown below will open a dialog that allows you to add and edit locations.
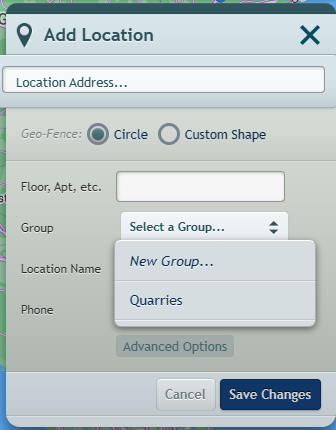
The system comes preconfigured with facilities and driver homes. You add locations to a group by clicking the “+” button. Enter an address and press the [Enter] key. This will display the location on the map with a pin. Select a group or add a new one, and give the location a name.
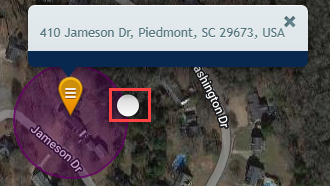
You have 2 options for how to define the boundaries for the location. You can leave it to the default circle. If you want a larger circle to define the boundaries, you can drag the white circle to the appropriate radius as shown below.
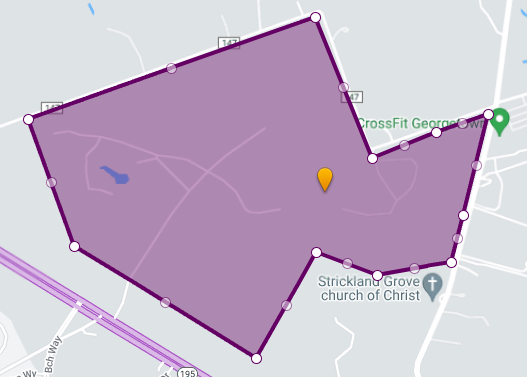
If you want the location boundaries to be other than a circle, you can change the “Geo-Fence” to “Custom Shape”. Clicking on a white circle and dragging it will adjust the boundaries. When setting these boundaries you will want to avoid making the geofence cross major roads. If you cross major roads, you may have trucks passing through a geofence even though they aren’t working within that location. This will impact the accuracy of your geofence-based reports.
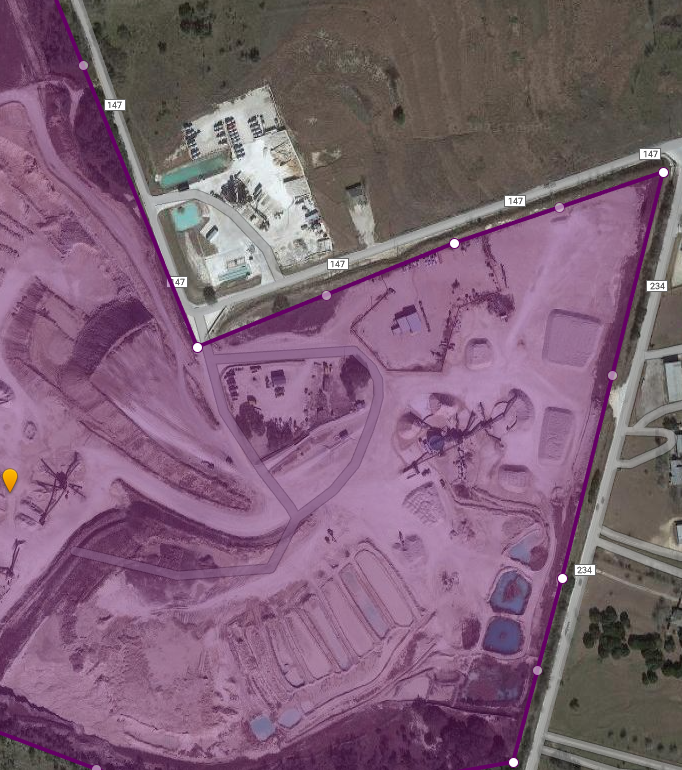
In the following image, you can see that the boundaries avoid crossing major roads. The only roads it is crossing are those within the quarry.
Below is a more detailed view of part of the above location. Notice how you can use the satellite view to make out the boundaries of the quarry better.
Click the “Save” button before exiting the “Edit Location” form.
To show all the locations on the map, click the “Locations” icon. Then click the “Show all on map” button.

Or you can select an individual location to show on the map, by clicking on the “Locations” icon and then clicking the location you want to display. This will display the location and a dialog shown below.
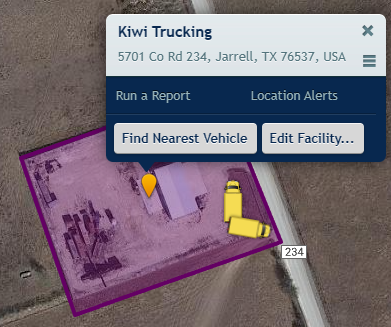
From the dialog, you can:
Note that some options aren’t displayed until you click the menu button.
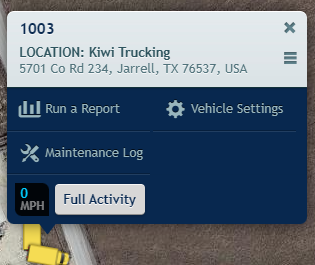
Clicking on a vehicle will allow you to see its location and will give you options to:
Note that some options aren’t displayed until you click the menu button.
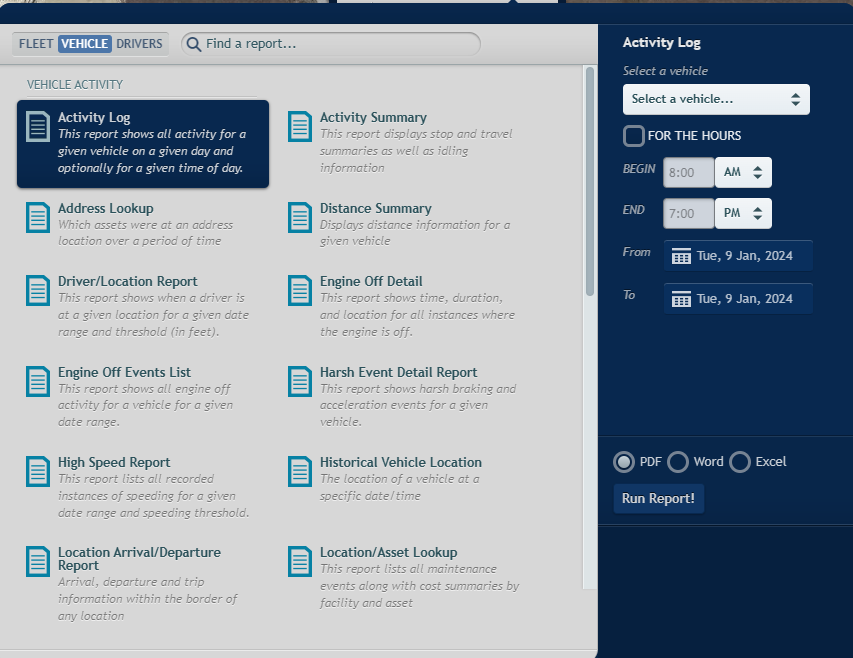
Clicking the “Reports” icon will display a dialog with the wide variety of reports you can run.
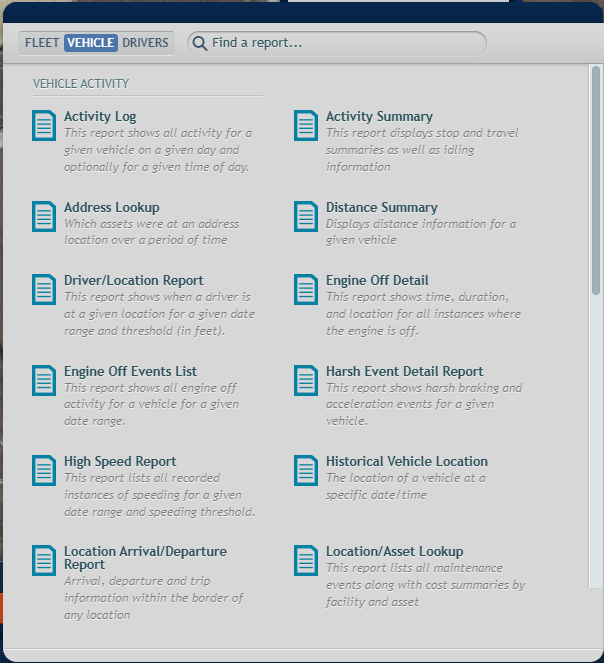
Once you select a report, you will see the options you can configure to the right as shown below.