The invoicing feature must be configured for your company, and you must have the necessary permissions to access the “Invoices” menu. If you don’t see this and think you should have access to invoicing, let us know.
Invoices can be created in 2 ways:
The dispatcher should be sure that at the end of the day, all the jobs for that day have either been moved, canceled, or completed. This can also be done at the beginning of the following day. However, it must be done before the back office tries to process invoices for the prior day.
Review the tickets using the “Tickets by Driver” screen. This should be done daily when it is fresh in everyone's mind. Trying to reconstruct what happened a week later will be more difficult.
Before creating invoices, you want to be sure you aren't missing tickets for any of the jobs you worked. If you run the "Jobs Missing Tickets" report for the desired time frame, you can see which jobs don't have any tickets. These jobs might be displayed for a couple of reasons. If the dispatcher didn't cancel or move jobs that didn't get run, they will show as jobs with no tickets. Also, the job may be one that was worked, but the driver didn't enter the tickets. In that case, you need to add the tickets before continuing with this invoicing process.
It is very important that the tickets are correct before invoicing or processing driver pay. Correcting them after the invoicing process is copleteis much more difficult than verifying they are correct before invoicing.
Navigate to the Ticket List.
Set the search criteria to the desired values, including
Press the “Search” button.
Before invoicing, check the following on the “Tickets List.”
You will be redirected to the "Invoice List" once you have created the invoices in the above steps.

Set the "Status" search criteria to draft and click the "Search" button to see the newly created invoices. Review these draft invoices to ensure they are correct.
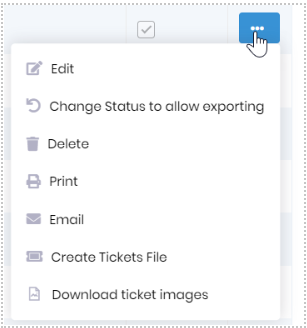
You can edit existing invoices by clicking on the “Edit” option at the top of the menu. This will open the invoice and allow you to edit it.
There are options to delete, print, or email the invoice. The “Delete” option will not be available if the invoice has been deleted.
The “Change Status to allow exporting” allows you to export an invoice already marked as exported. This may happen when you export the file and then have errors in the file when you try to import it into the accounting system.
The “Create tickets file” will create a csv file with a list of the tickets. You can send this data to your customers if they want all the ticket information.
The “Download ticket images” option will download a zip file with images of all the tickets on the invoice.
Click on the “add new” button to create a new invoice.
Fuel Surcharge on Invoice :
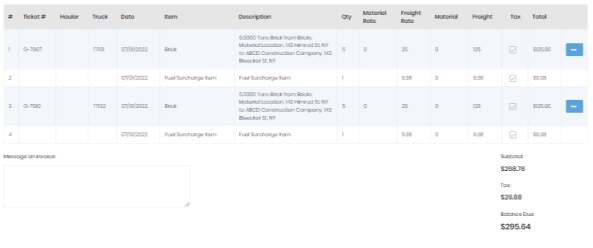
If the “Show Fuel Surcharge” checkbox is enabled and if “Show Fuel Surcharge on Invoice” is specified as “Line item per ticket,” then on the invoice detail view, there will be one fuel surcharge line for every ticket if there is a fuel surcharge amount for that ticket. The fuel surcharge amount will be reflected in the total.
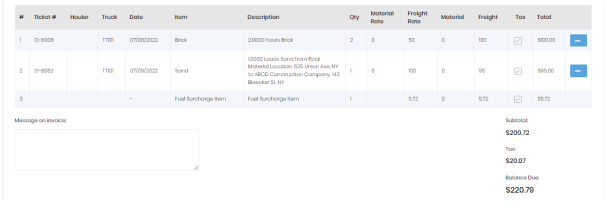
If the “Show Fuel Surcharge” checkbox is enabled and if “Show Fuel Surcharge on Invoice” is specified as “Single Line item at the bottom,” then on the invoice detail view, there will be one fuel surcharge line at the bottom of the invoice. The fuel surcharge amount will be reflected in the total.
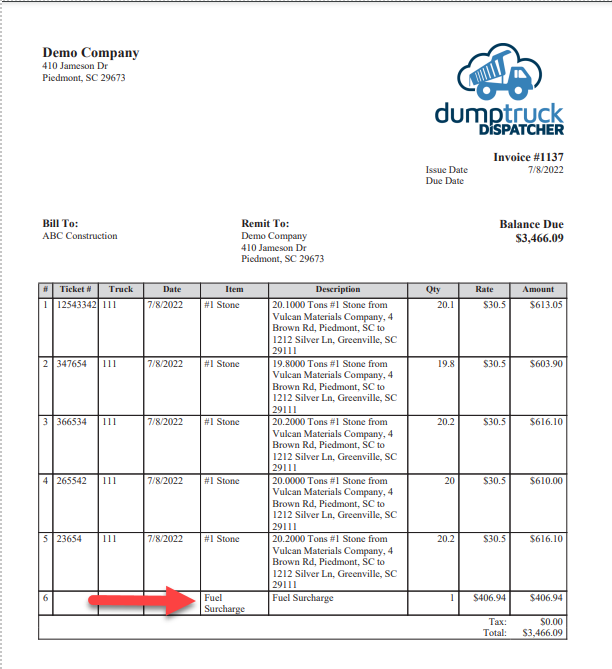
Below is how the fuel surcharge might look on a printed invoice.
Visit the "Fuel Surcharge" documentation for more information about setting up and using fuel surcharges.
Visit the "Invoicing via the Invoice List" documentation for information on creating invoices one at a time via the "Invoice List." Note that doing them one at a time via the "Invoice List" is the slow way to create invoices. The process mentioned above is much more efficient.
