To create the invoices directly, click on the “Invoices” menu under orders. Note that this is not the preferred method for creating invoices as it is much slower than automatically creating them from the "ticket List." This approach should be used only to invoice a customer or two. Visit the "Invoicing Process" documentation for more information about the preferred invoicing approach.
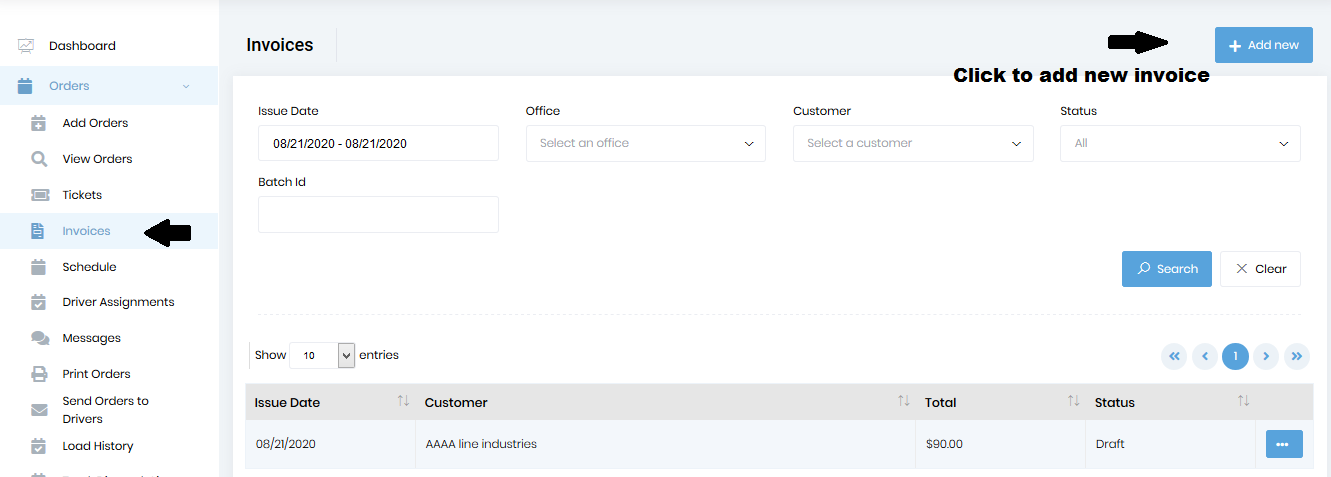
Click on the “add new” button to create a new invoice.
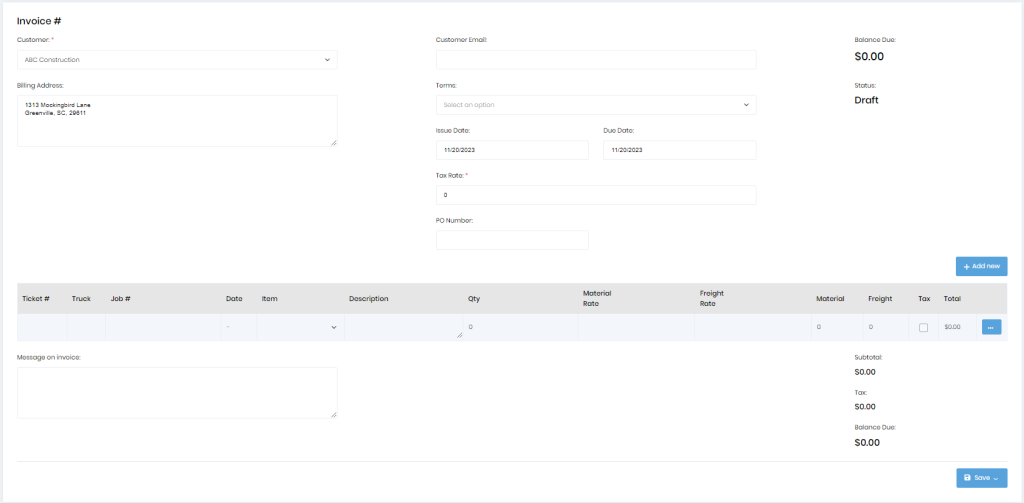
Select the customer for which the invoice needs to be created. The billing address, customer email, and terms will get populated automatically if that information is available for the customer. However, you can edit these values on the invoice.
You can either add unbilled tickets by clicking on the “Add unbilled tickets” button or add new line items manually by clicking on the “Add new” button, which will add a new line to the table. When you click “Add unbilled tickets,” you will see a dialog with all the unbilled tickets.
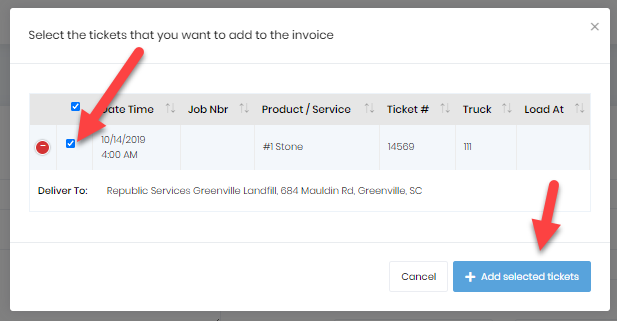
After checking the checkboxes for the tickets you want to invoice, click the “Add selected tickets” button to add these tickets to the invoice.
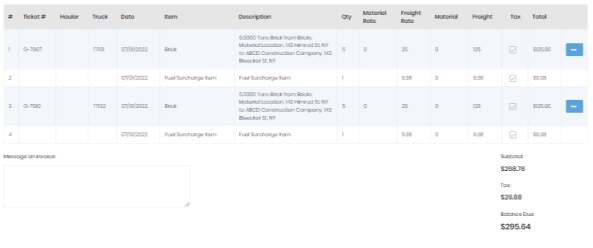
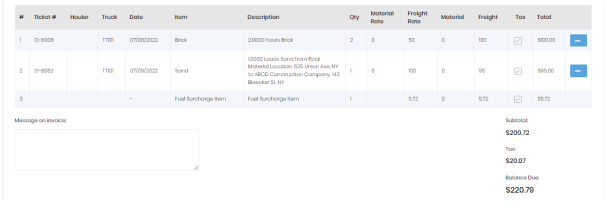
These lines can be edited directly by going to the cells in the table.
These lines can also be deleted by clicking the menu (ellipsis) button for the desired ticket and then selecting delete. Details of “Associated tickets” can be checked by selecting the option “view associated ticket” under the ellipsis button. The checkbox under the “tax” column can be checked or unchecked, and taxes will be applied to items based on the tax method set in the “invoice” tab of the settings page and based on the designation of line items.
Once all the changes are done, you should do one of the following actions from the “Save” menu button.
Fuel Surcharge on Invoice :
If the “Show Fuel Surcharge” checkbox is enabled and if “Show Fuel Surcharge on Invoice” is specified as “Line item per ticket,” then on the invoice detail view, there will be one fuel surcharge line for every ticket if there is a fuel surcharge amount for that ticket. The fuel surcharge amount will be reflected in the total.
If the “Show Fuel Surcharge” checkbox is enabled and if “Show Fuel Surcharge on Invoice” is specified as “Single Line item at the bottom,” then on the invoice detail view, there will be one fuel surcharge line at the bottom of the invoice. The fuel surcharge amount will be reflected in the total.
Visit the Fuel Surcharge documentation for more information about configuring and using the fuel surcharge.
