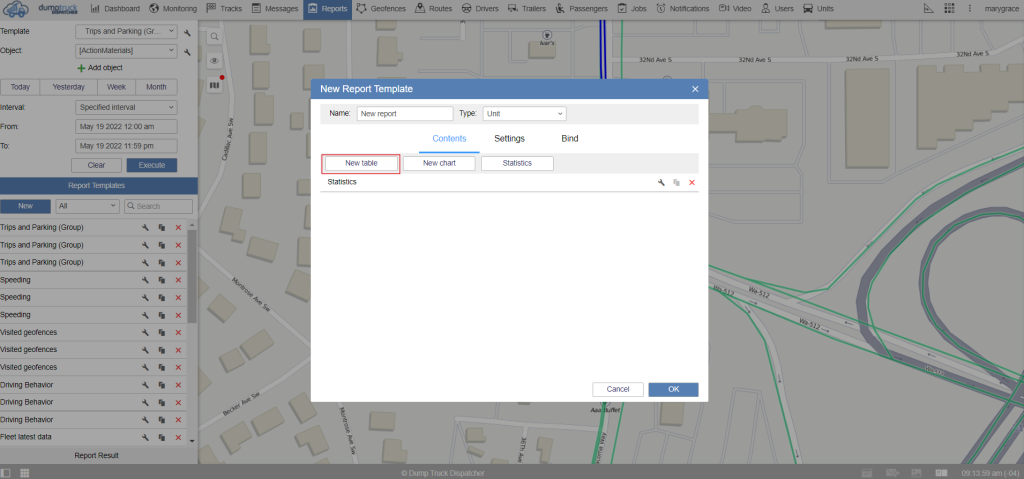
Start by selecting the new button.
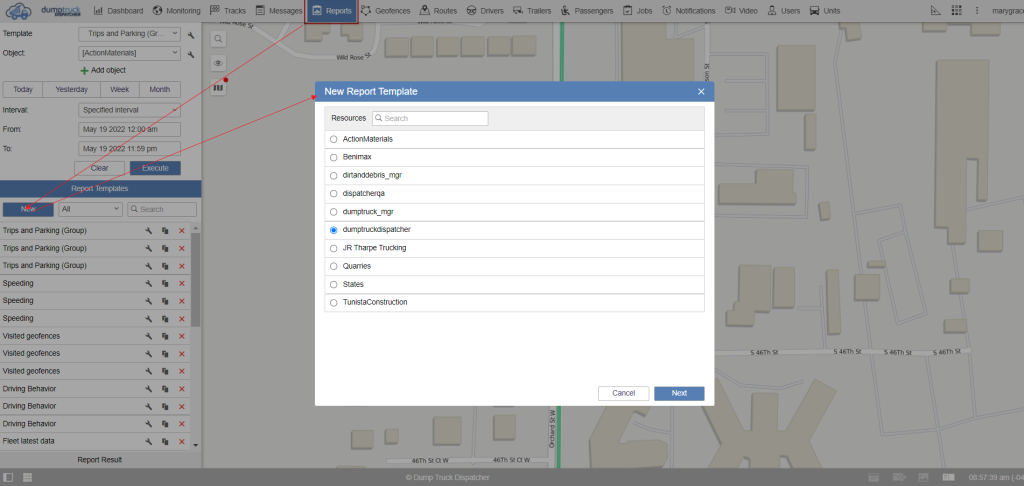
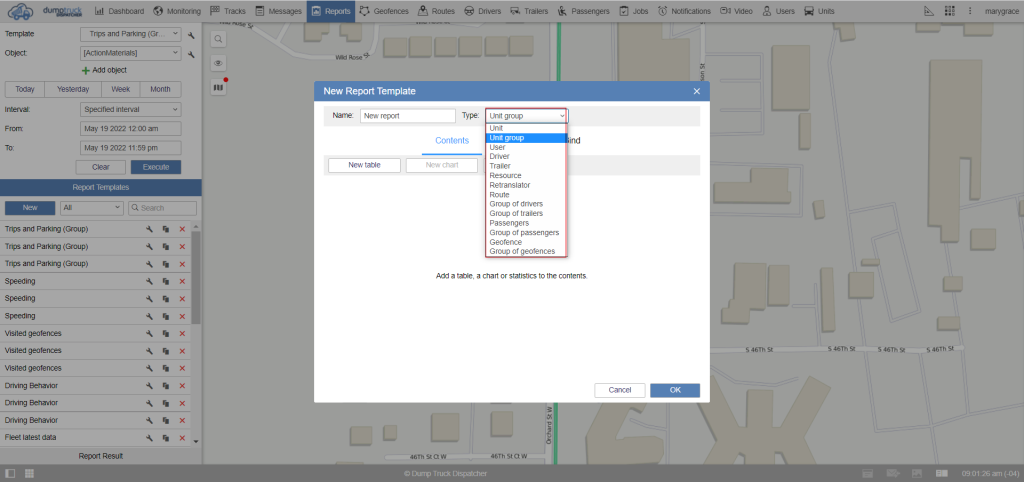
Then name the report you will be creating. Next, select the type of report in order for us to run the report across multiple units. We’ll need to select the unit group type report for example.
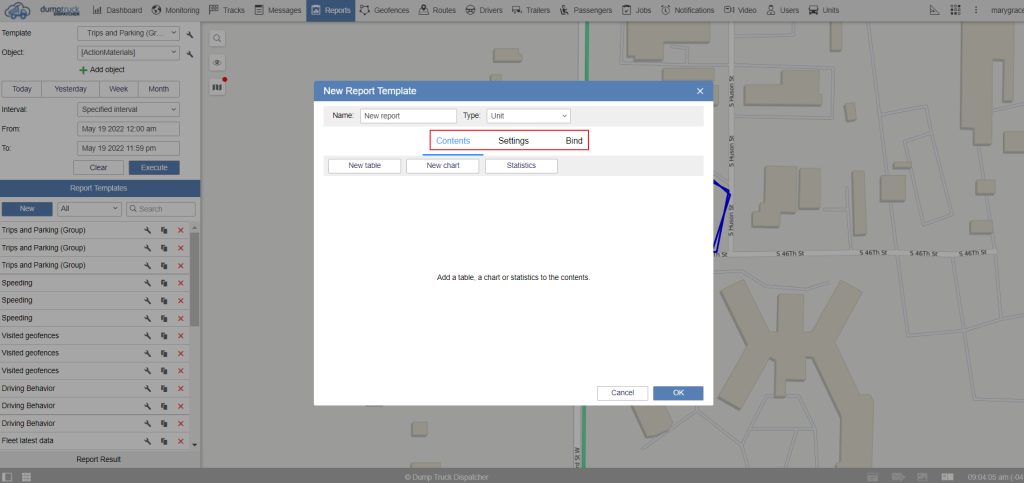
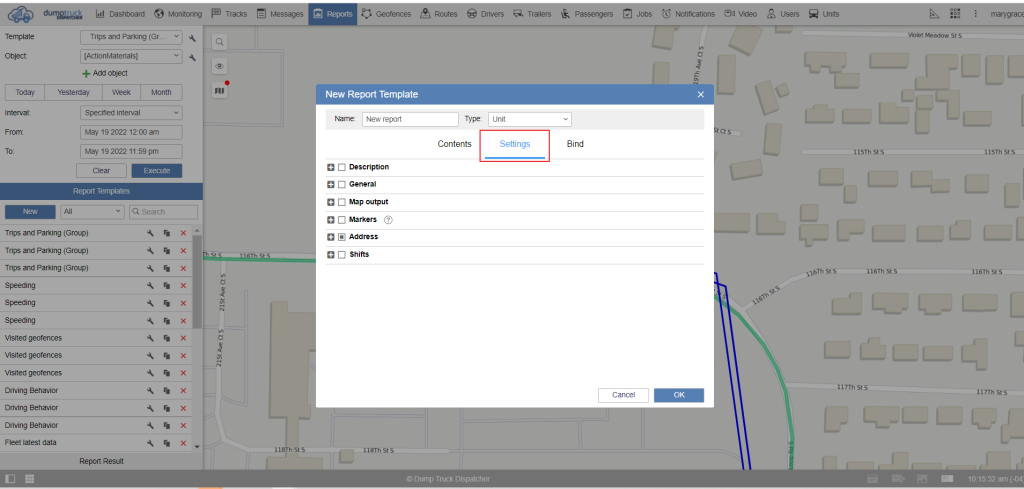
Now that we have the base of the report set up, Reports will have 3 different control points; contents, Settings, and Bindings.
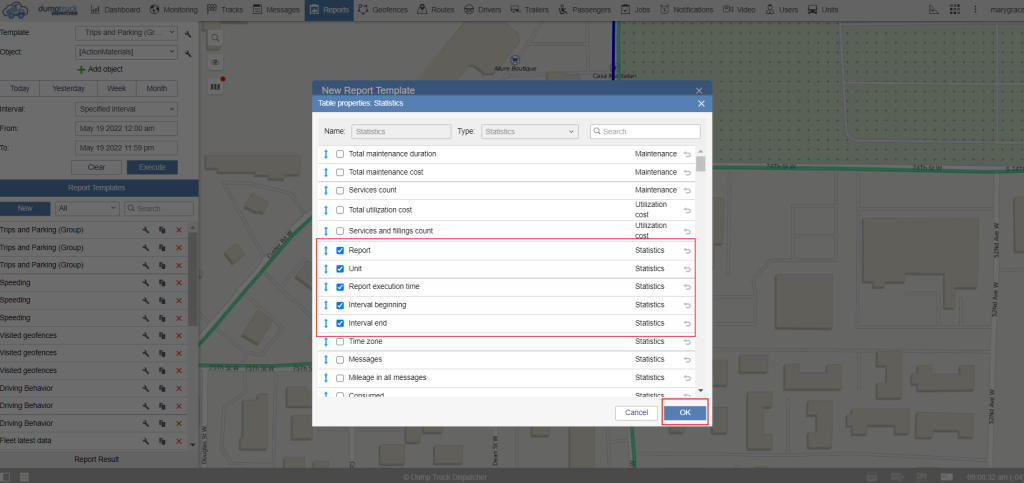
If you plan to export your reports print them or send them by email. It is recommended to start off with a statistics page. This is a cover page for the report and gives a summary of what the rest of the report will be about.
By clicking on the statistics button we can add the report name, The group of units being run on it, the starting interval for a report, the ending interval for the report, and the execution time of the report.
Once we’ve added the data we wish to the front page, we’ll click OK at the bottom.
Now let's add a new table. A report can hold many different tables, but in this case, we’re only going to use one. Now, let's select a type of report or table we are going to have. You can also edit the name of the table if you need to.
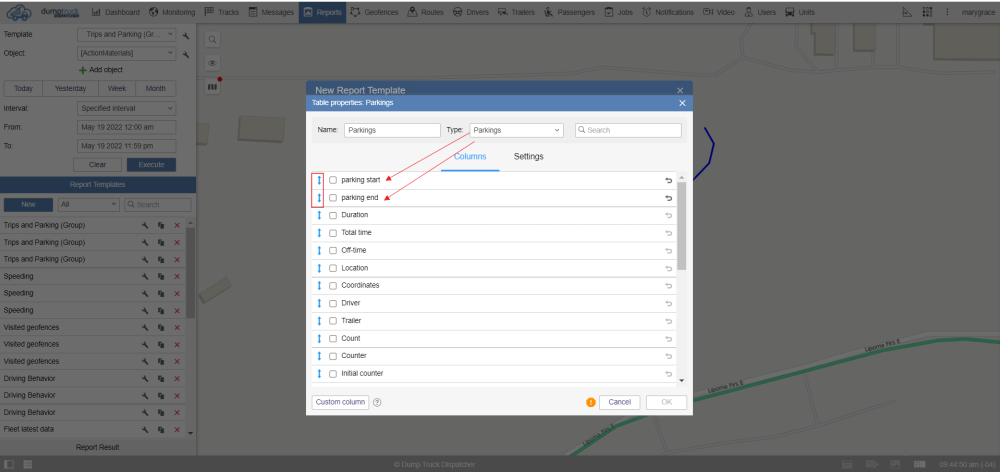
Now you can select the columns that we want to go on our report. For example, You want the beginning where you’ll rename it to parking start by clicking on the name of the column. “end” which you’ll rename to parking end, “duration” which you’ll rename to Park time, and “location”.
You can also customize their order. For example, you want the location to be first, You can rearrange it by selecting the drag up/drag down icon and pulling the location column to the top of the list.
Rows are formatted by creating groupings.
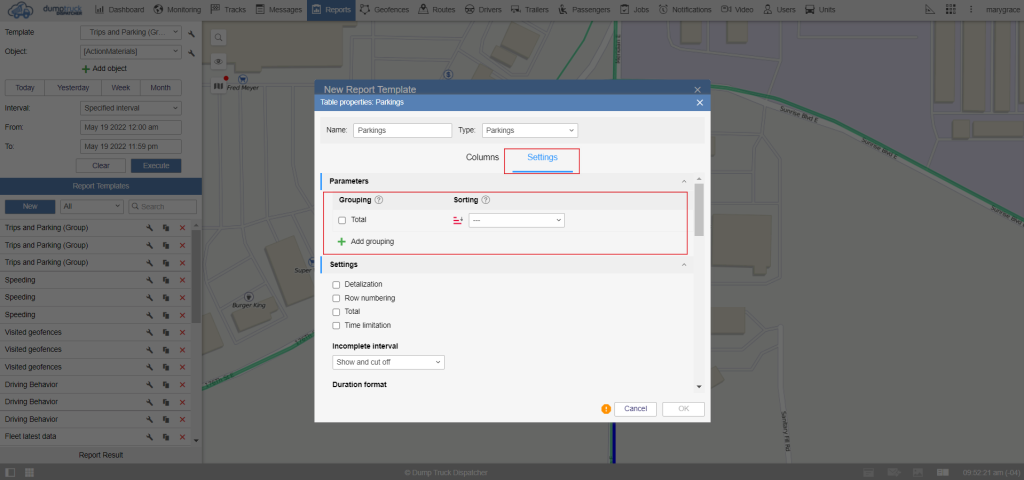
For example, you want to add 2 units including unit and date. This will create 2 new rows in your report
In the settings, you’ll select “destabilization” which will separate each parking into its own row. Lastly, you select “row numbering” this creates a little more organization when reading down the table. Just make sure that everything is saved by pressing the OK button in the bottom right of each window.
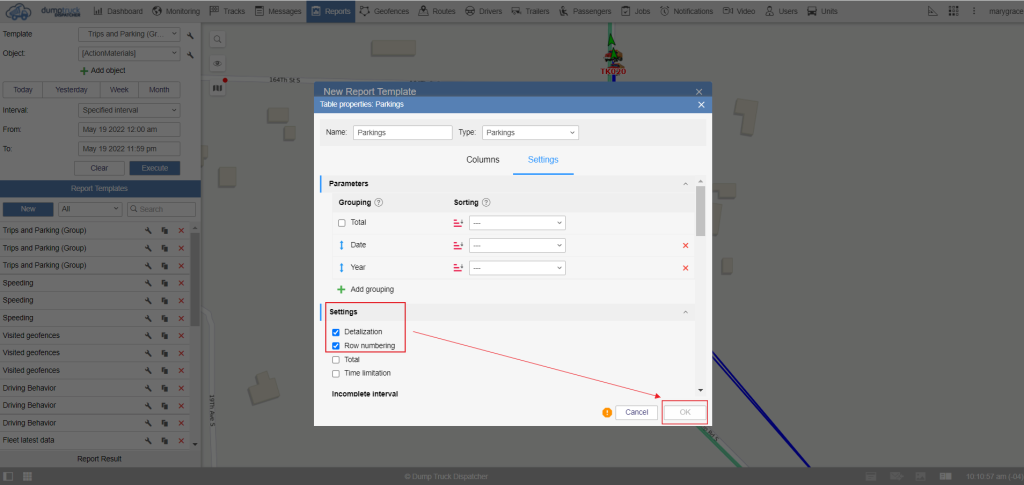
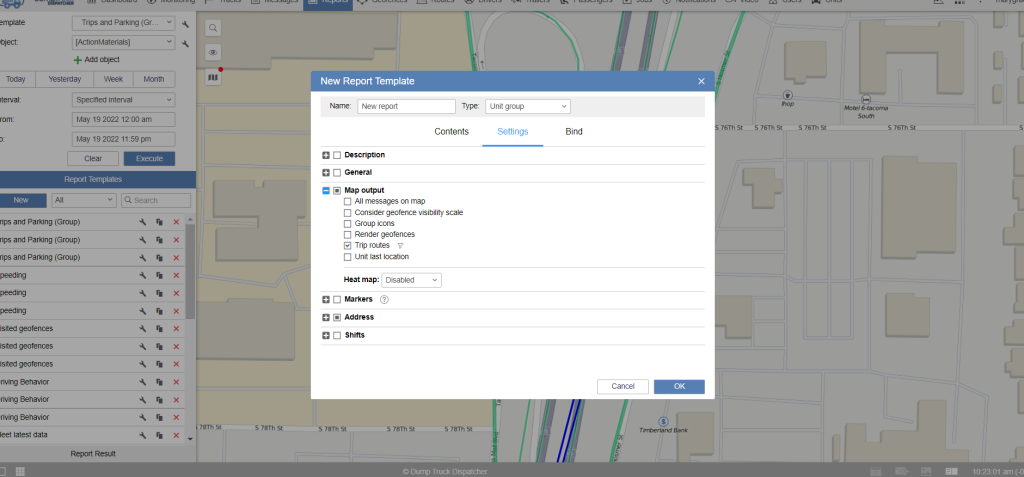
Now let's go to the settings page, next to the contents page.
You can expand the map output options and select parking meters and trip routes. To close this out and save properly just hit OK in the bottom of the window.
Now you can verify a report template saved in the report template panel below.

Let's start by selecting the report template in the box labeled template. We will be executing the same report that we created in the report creation basic tutorial the parking time report.
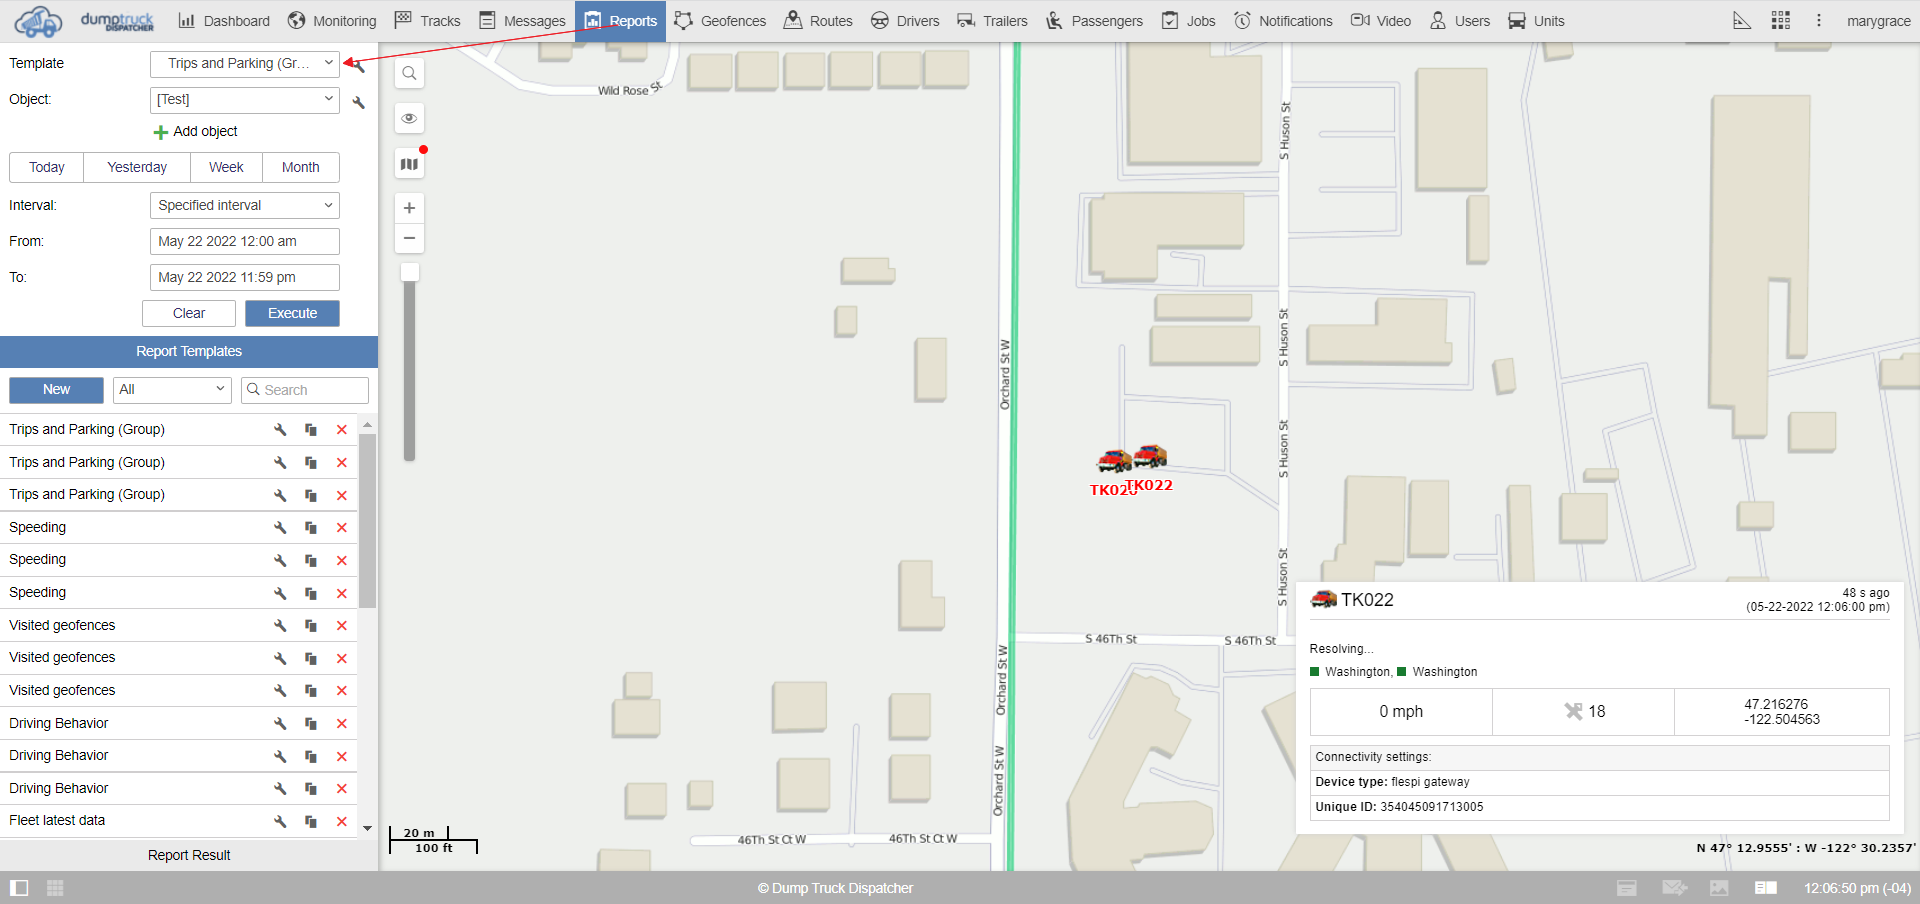
Next, we’ll select the object, which is dependent upon the report type. For a short example, the unit group type report can pull data on both a unit and a unit group.
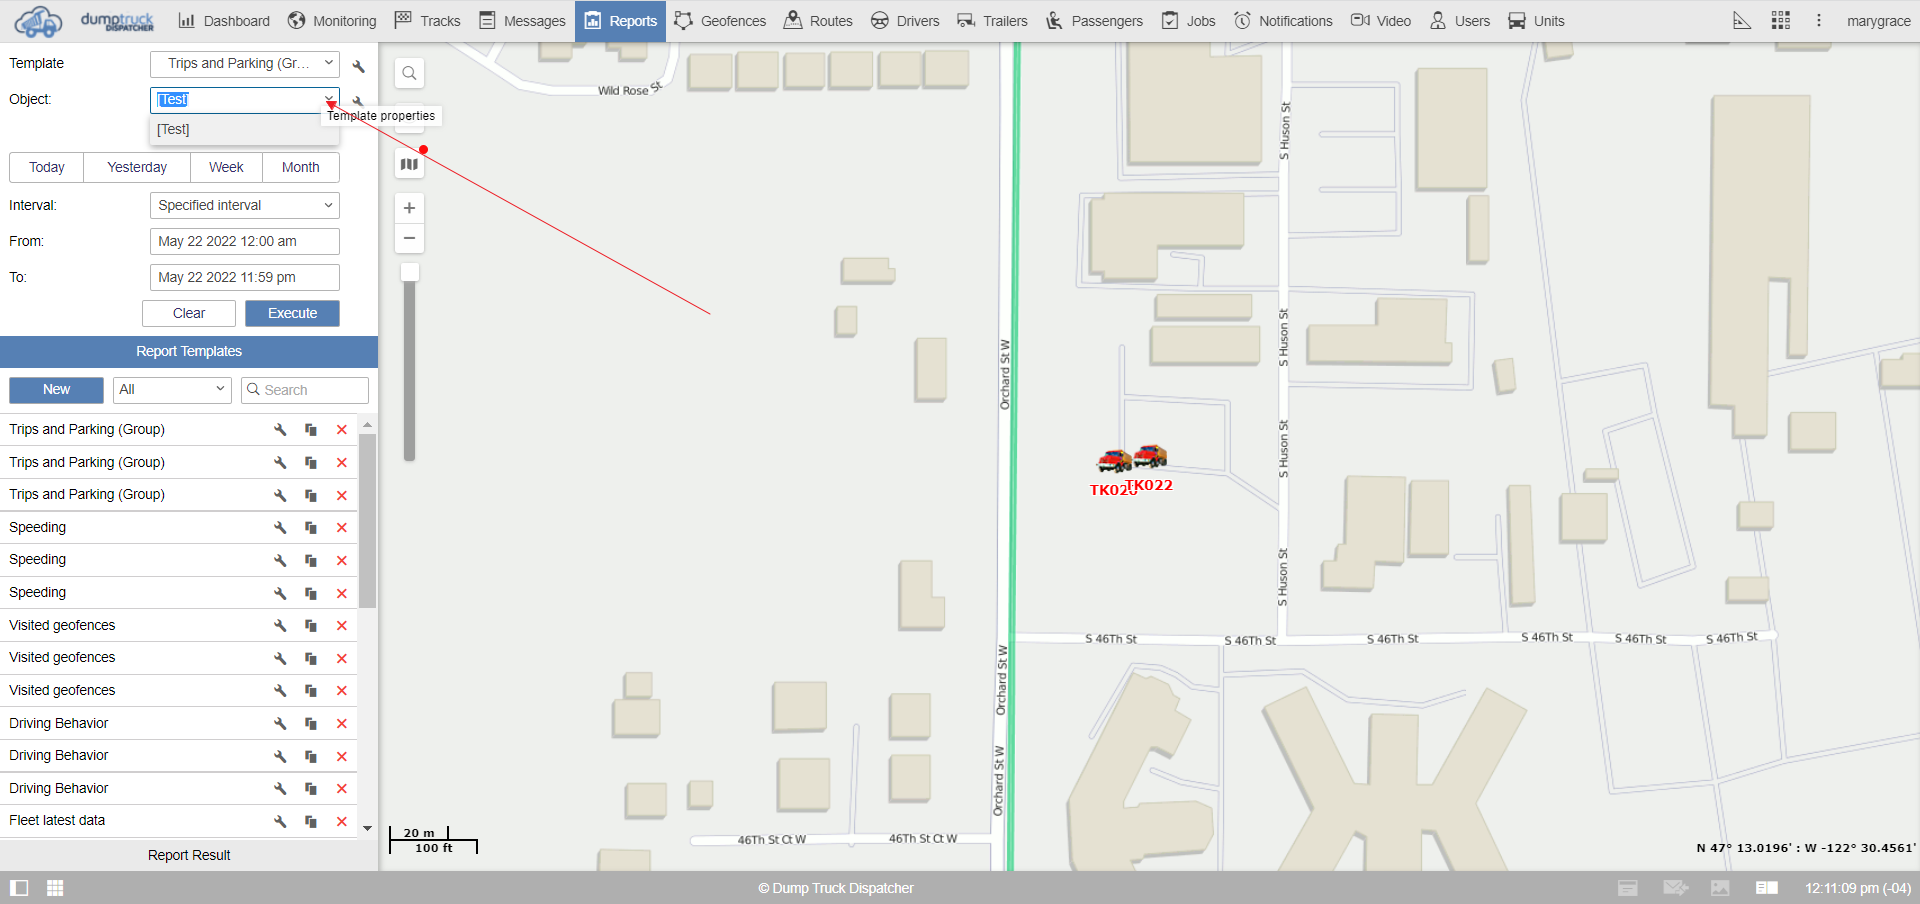
Now we have the date tool, there are several ways to operate this tool.
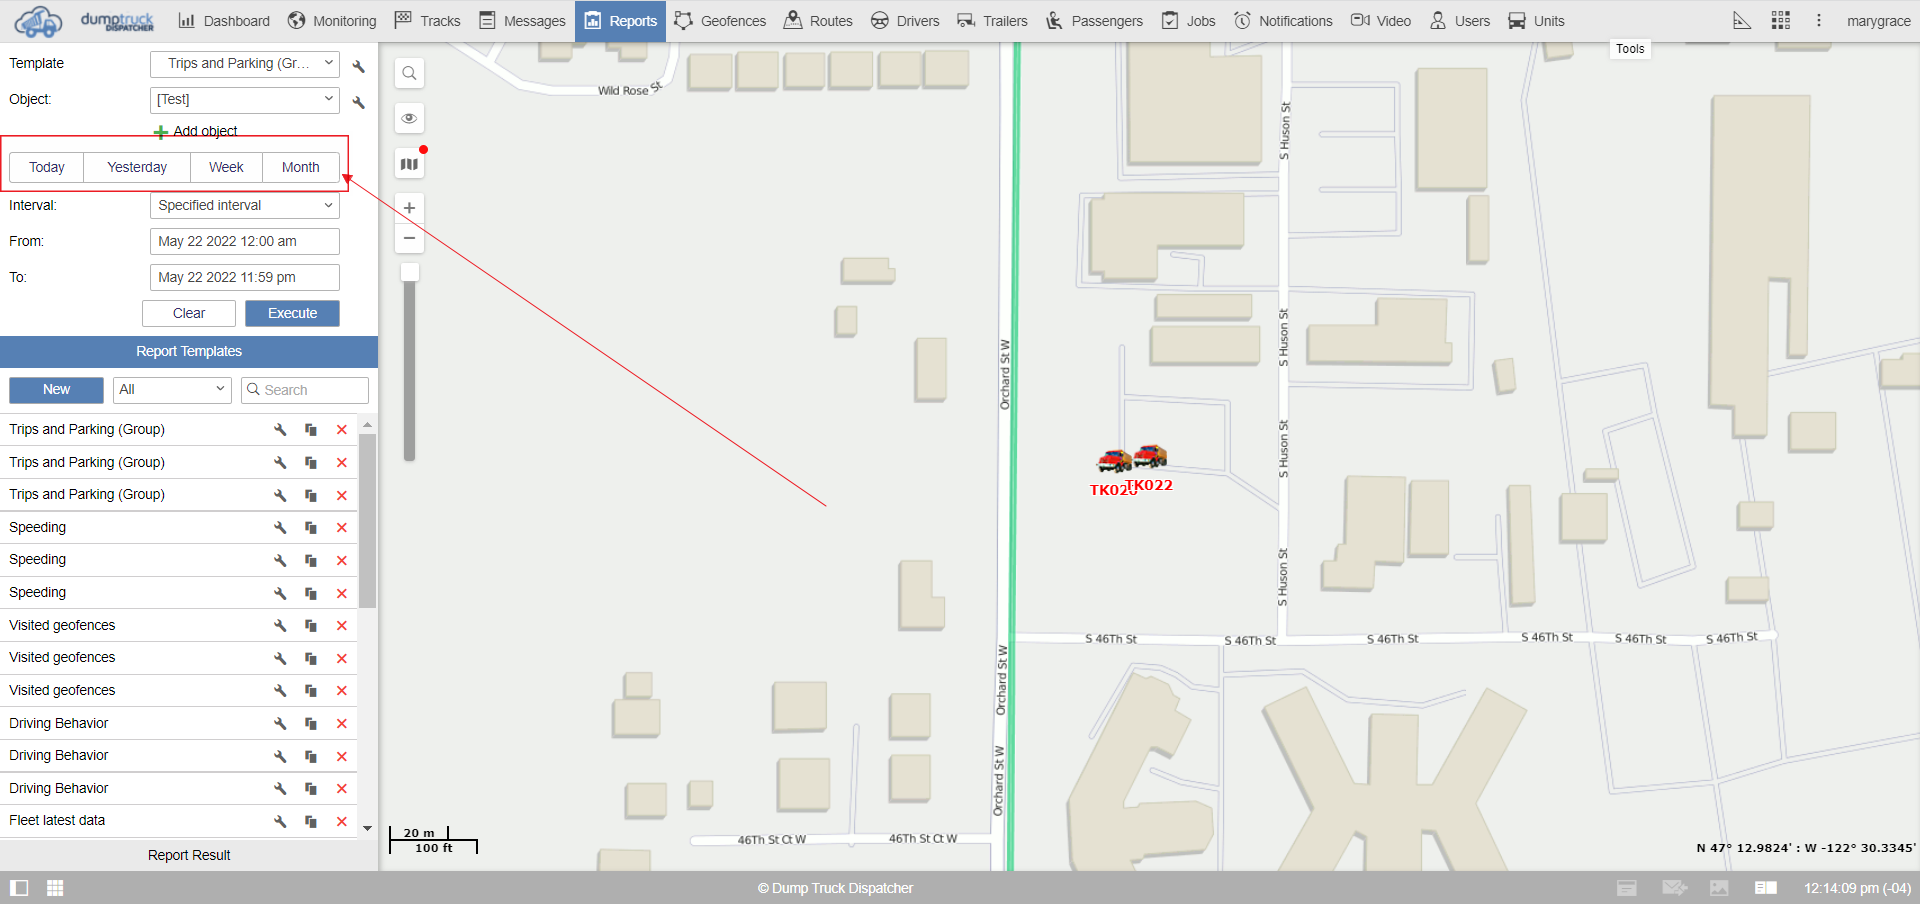
First, we have specified intervals after clicking the time input box, a calendar will pop up. First, choose the start and end time for your report and then click on the correct date.
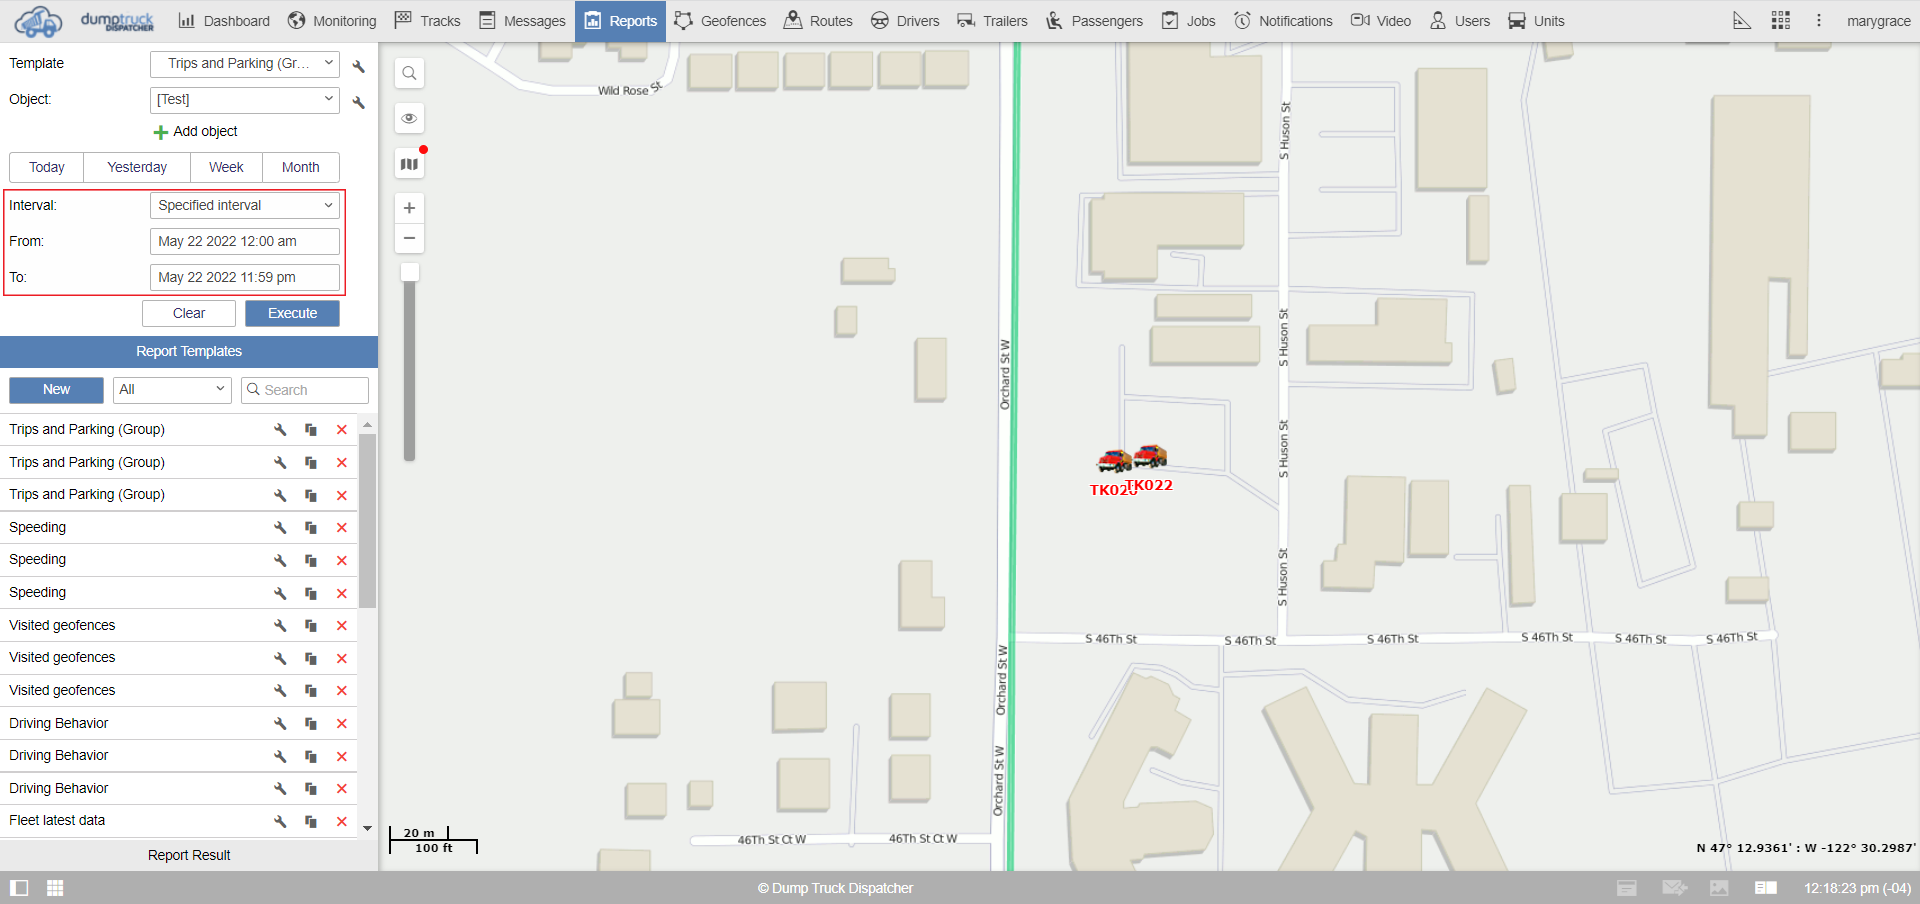
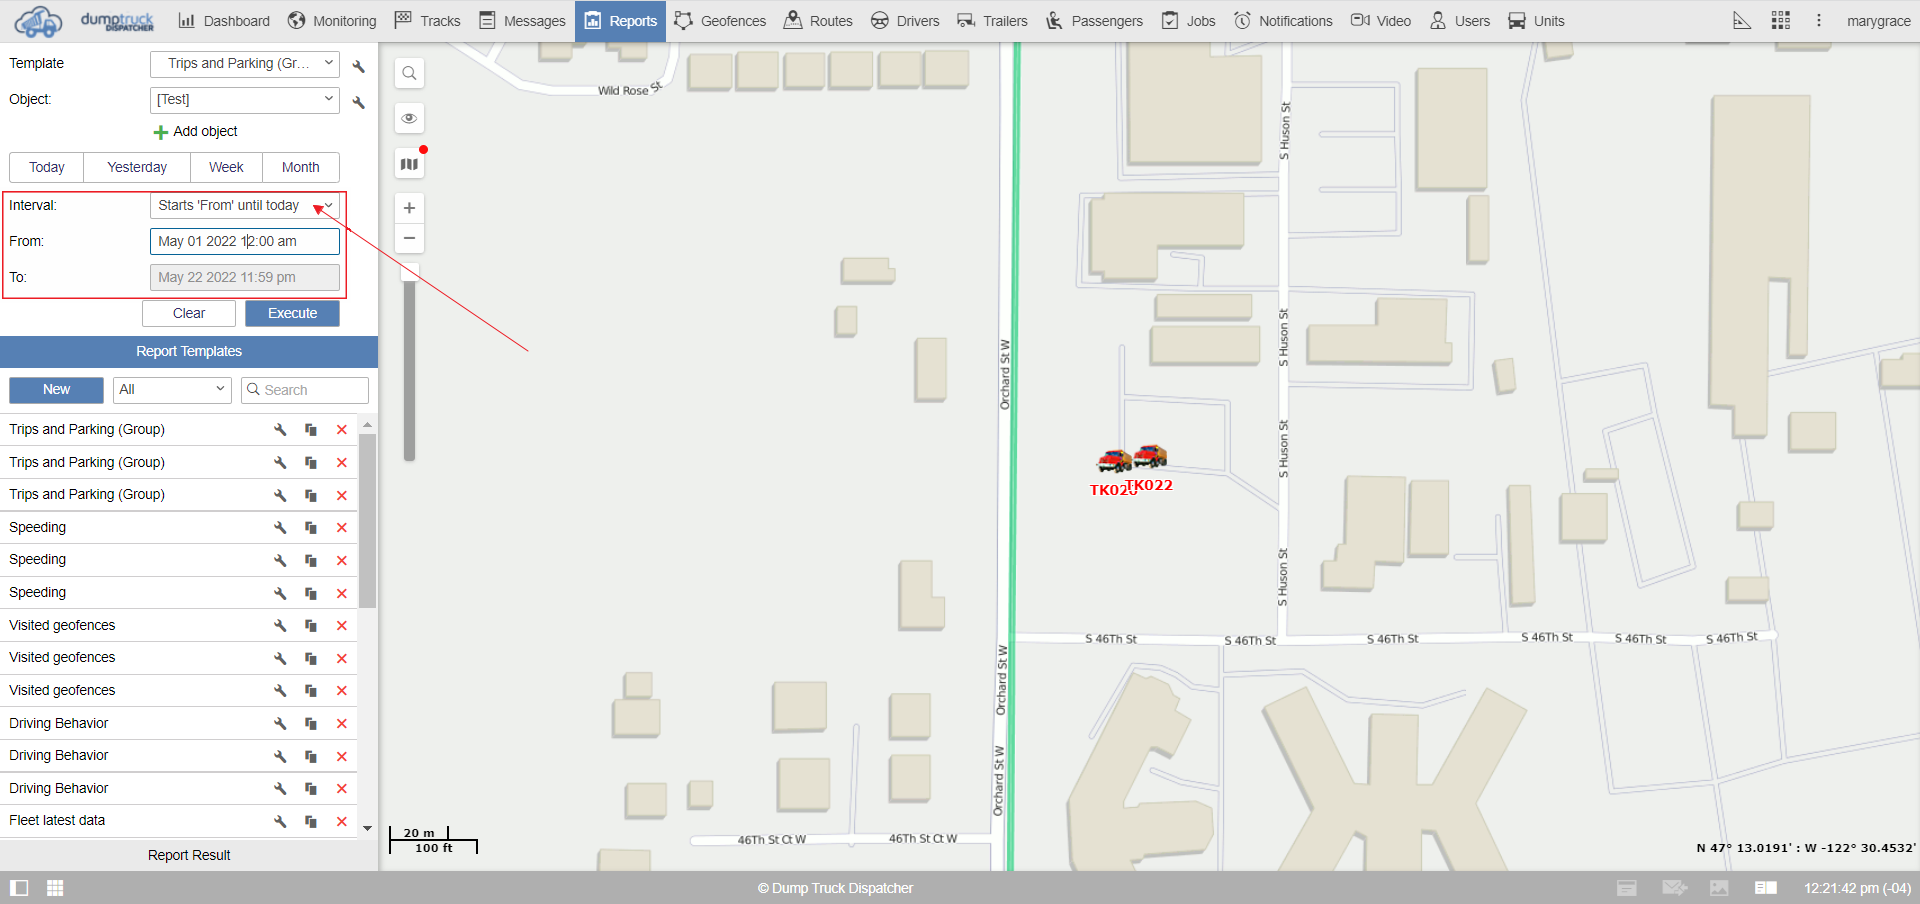
The second option starts today. Just like the specified interval, you’ll enter the from the date and it will pull all the information from that date until your current time.
The last of these 3 options is the most useful intervals, It even captures how reports are usually requested, all you need to do is select the quantity of time and then the unit of time whether that be a minute, hour, day, week, or month.

Lastly, on the bottom, You can select the check box including current. This way you choose to include the current unit of time.
For example, if a report lasts two weeks than by choosing this box you will see data for this week and the previous week, whereas without it you would only see data for the previous week and the week before that.
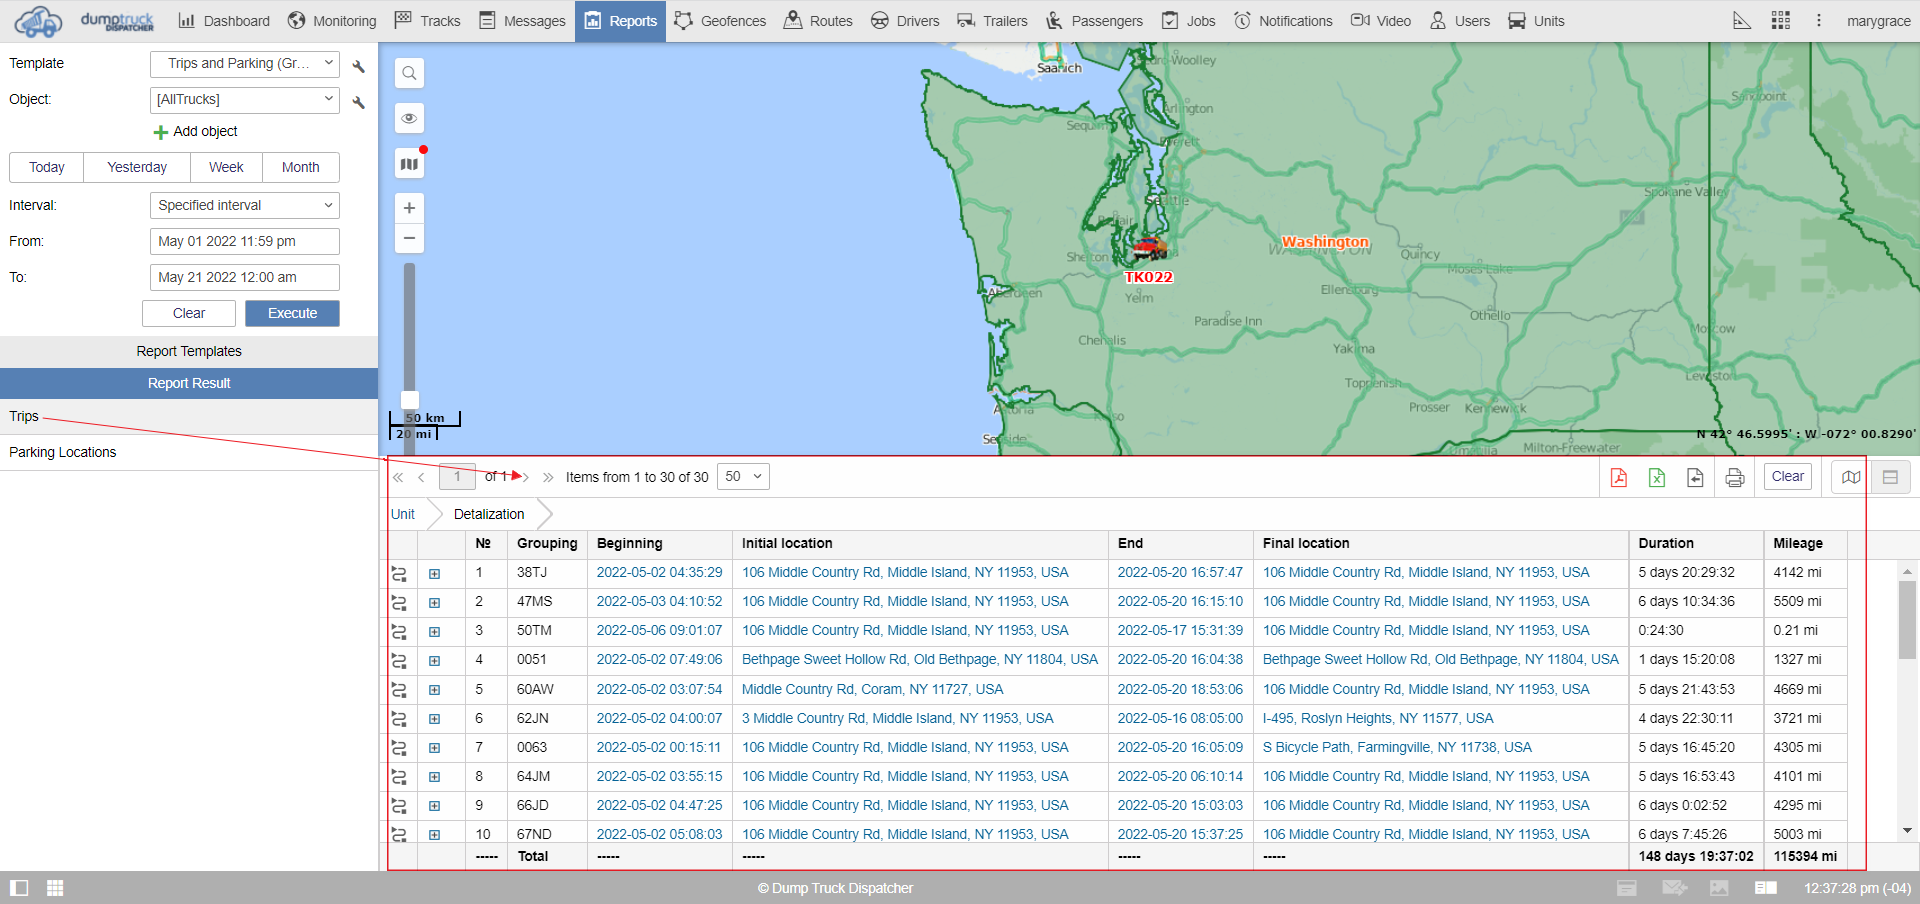
Now you can execute the report on the object selected, into the right we’ll see our second panel render this is how we know that our report pulled successfully.

Report results will be broken down into two panels, One is the list of contents. This will be all the tables and charges we told the system to queue.
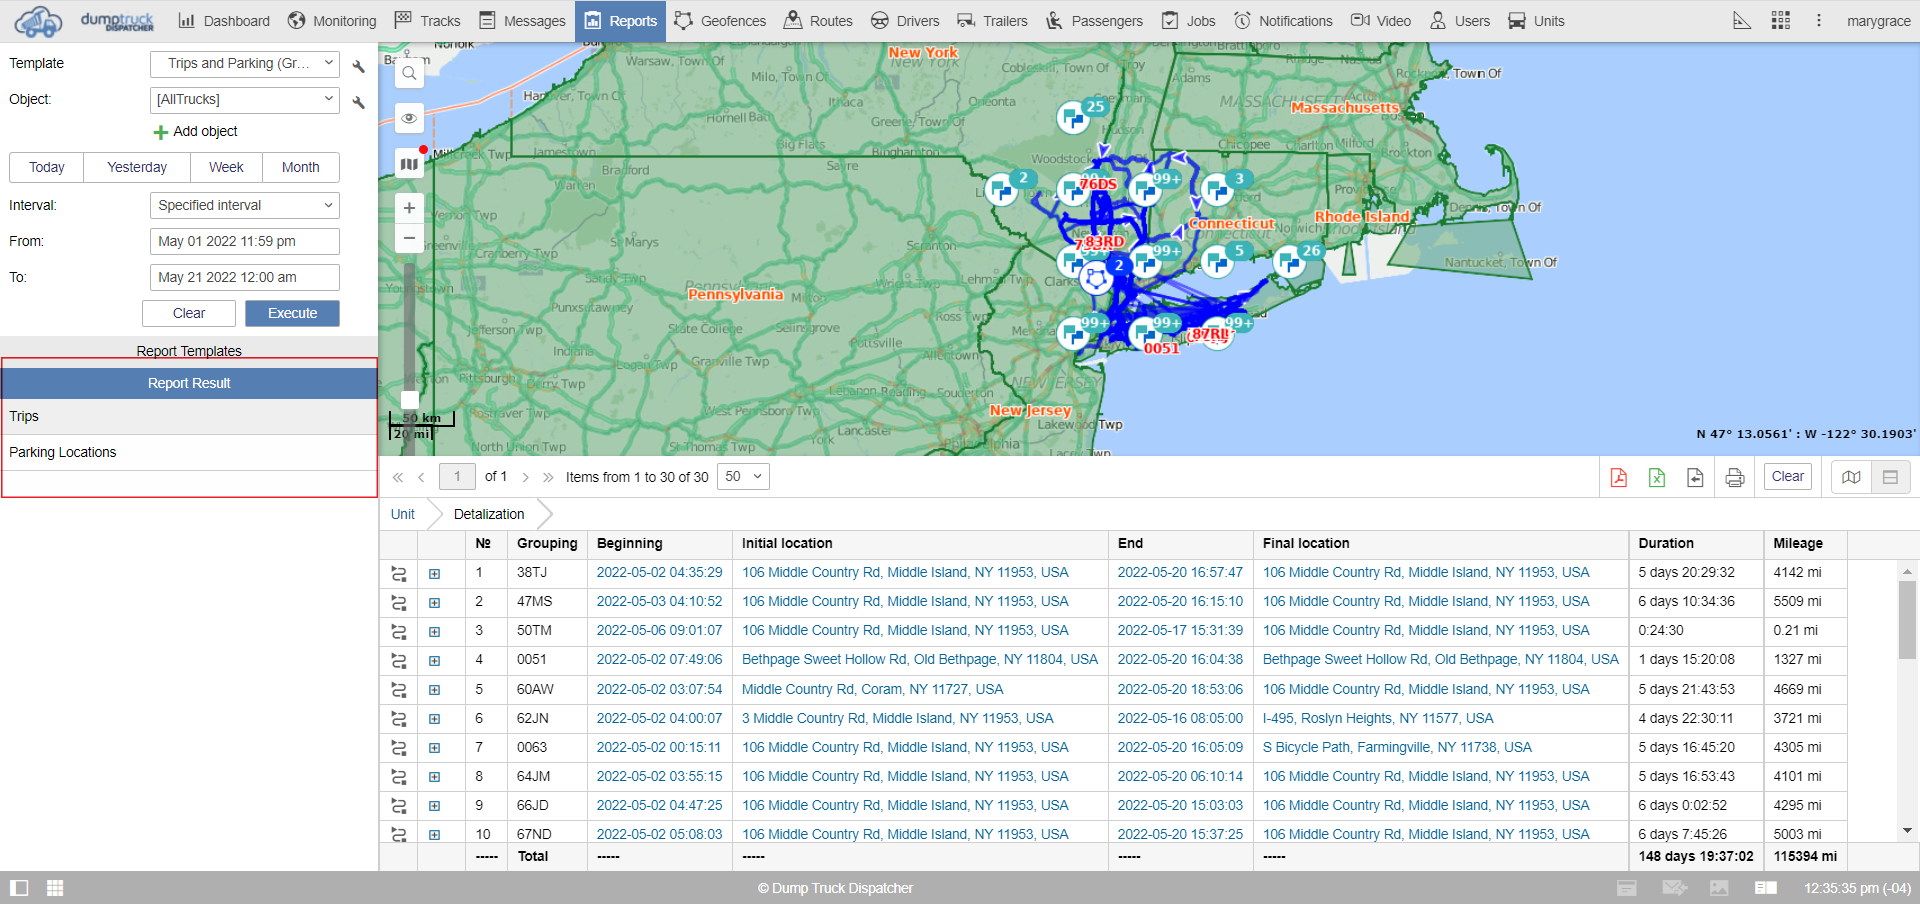
The second panel is the table breakdown. Here we can see whatever table we’ve selected.
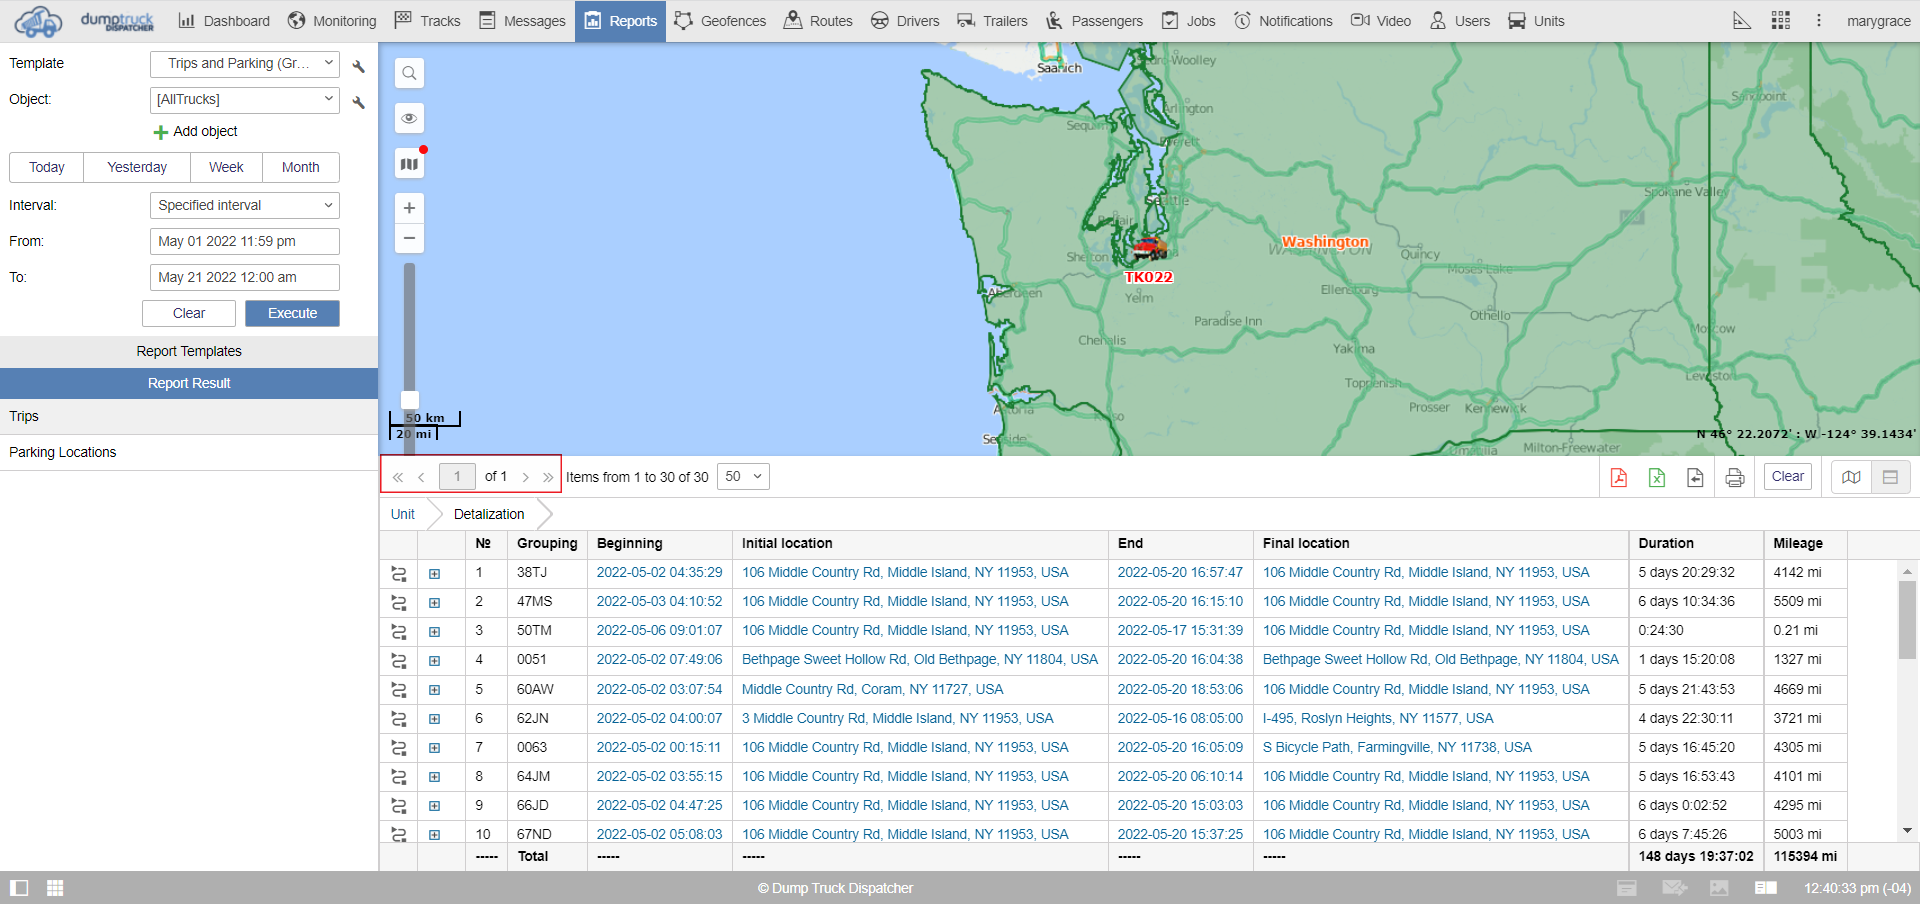
Next, we'll go over table options which are the top section of buttons on the table panel. Tables can be pretty long depending on how much information you pull.
In some instances they can be several pages, The first button is the first-page button, here is the previous page and in the middle, you can enter the page number manually, then the next page, and finally the last page button.
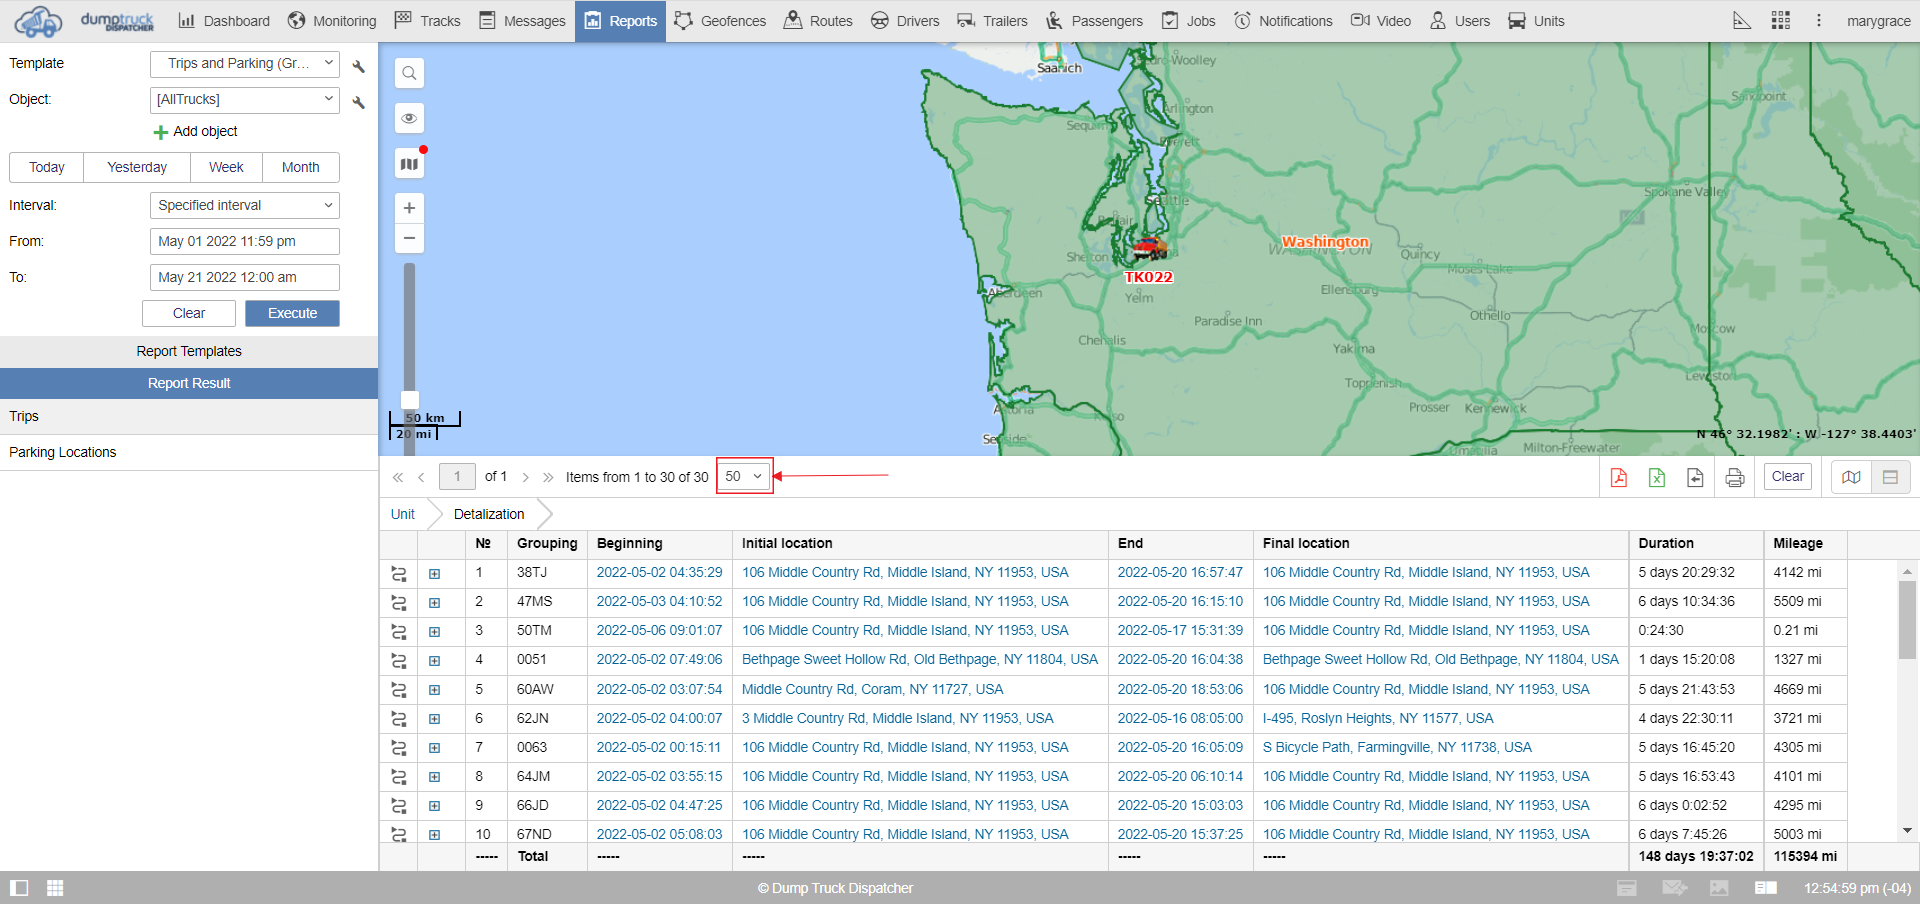
Here you can see the number of rows or items on your current page. While on the dropdown button you can control how many rows load per page. Although if you choose to queue a high number like 500 and also have a high number of columns, you can greatly increase your load times.
You can use this button below to export the pdf or this one to excel. The last button is for exporting to more than one file type including HTML, XML, EXCEL, PDF, CSV,
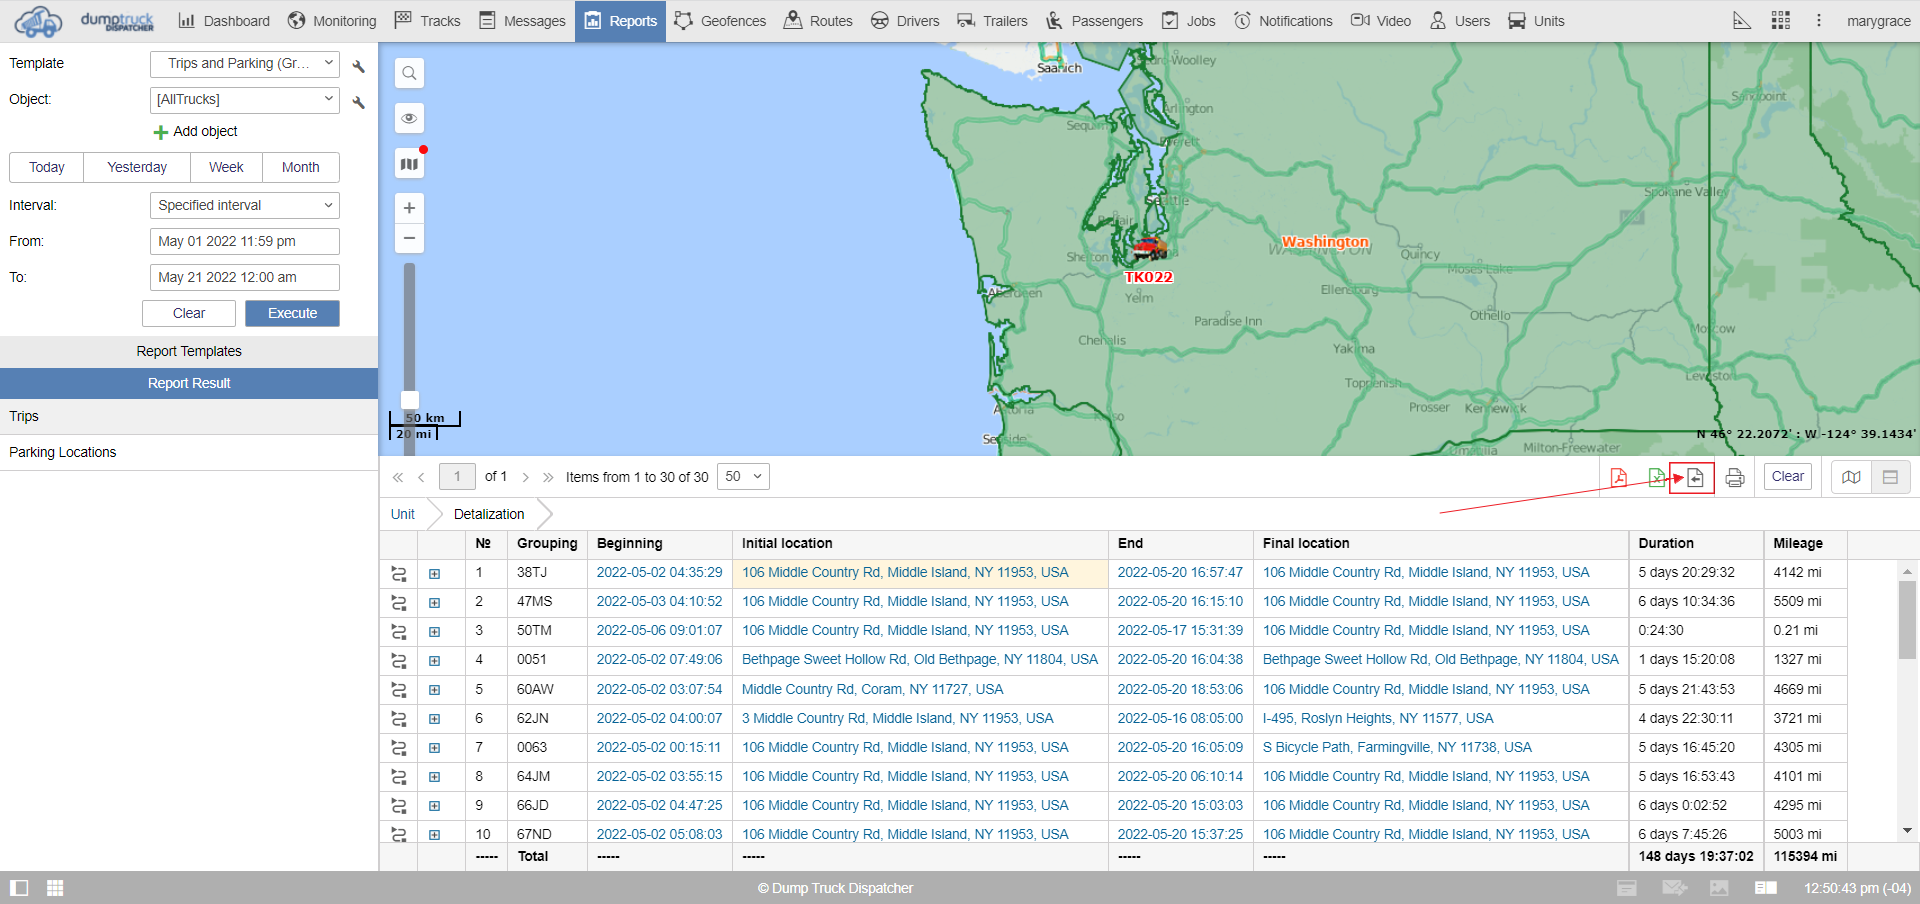
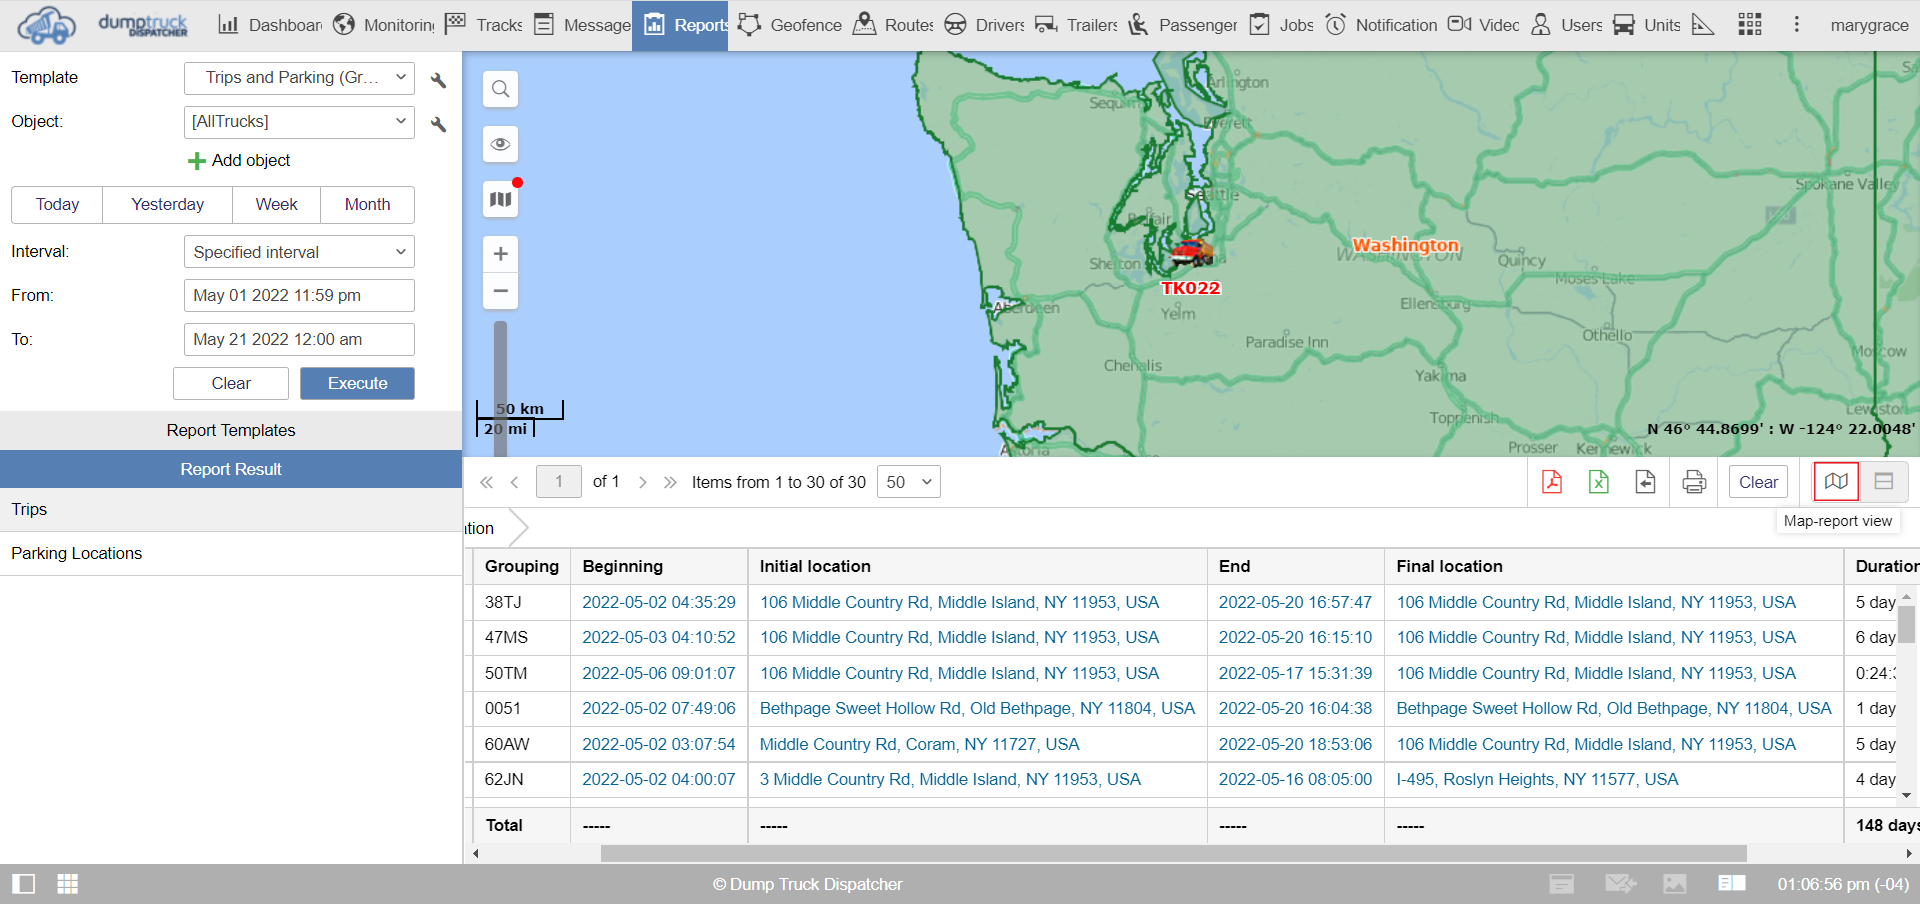
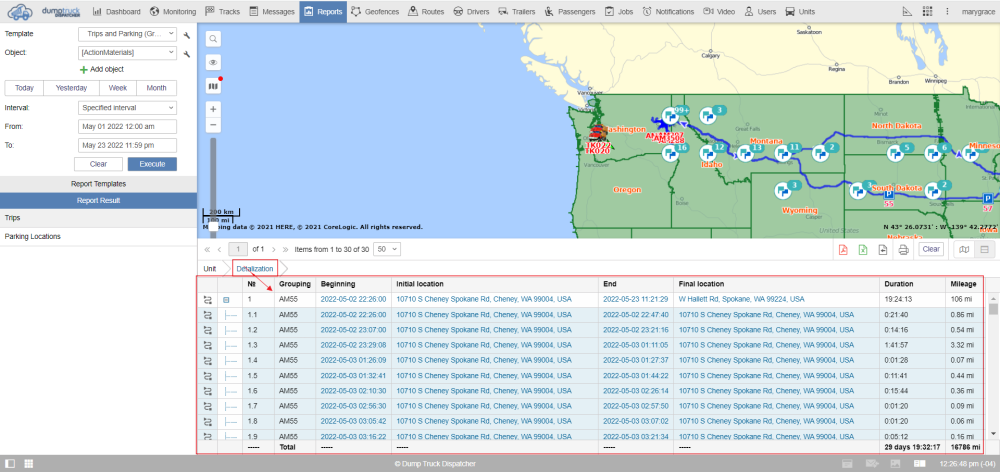
Here you can print a report directly from this page by selecting the print button. Next to the print button is a clear button, here you can clear the current report that’s queued and the last of these is the map report view and the dual report view.

The map report view is what you can see below. where there is a half panel showing report and a half panel showing the map.
The dual report view is what you can see below. In this view it allows you to see two different tables from the same report. And the second table will take the place of the map.
![]()
Now let's take a look at our first table statistics. Statistics tables are always two columns. The label on the left and the information on the right. This is a bit different than other report tables.
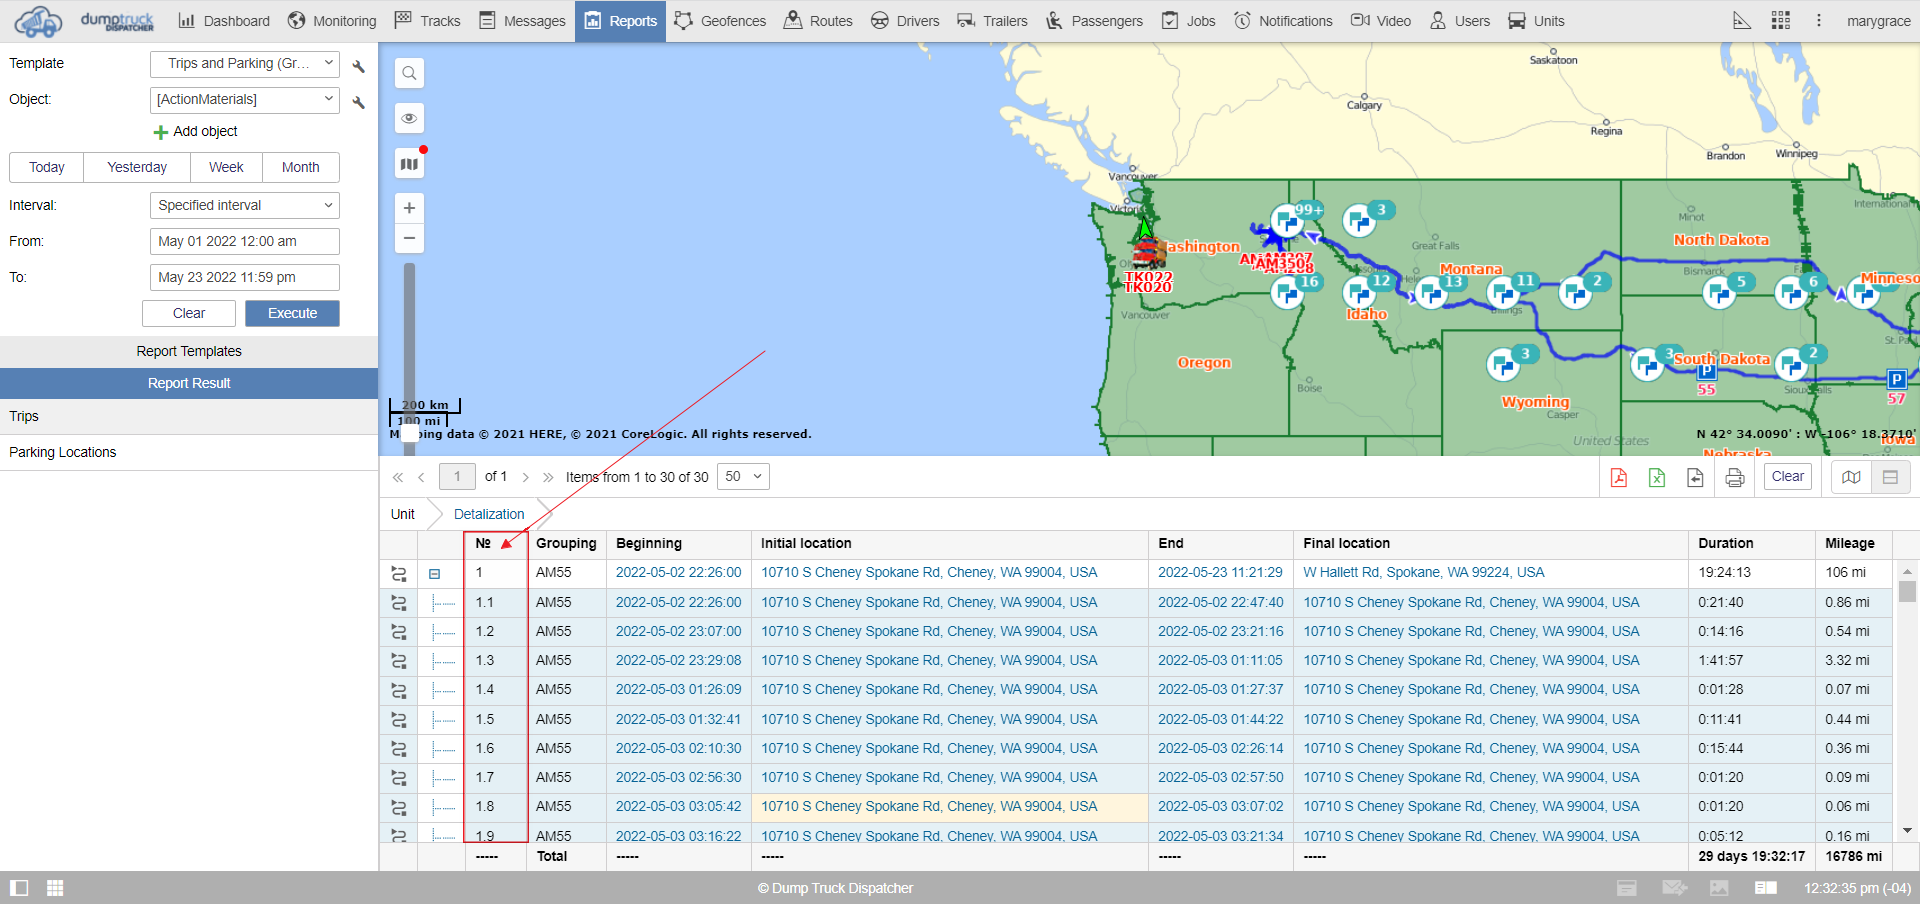
Now let's take a look at the parking times table. You’ll notice the top section, these are different groupings such as unit, date, and destabilization. These are different branches and they make up a report tree.
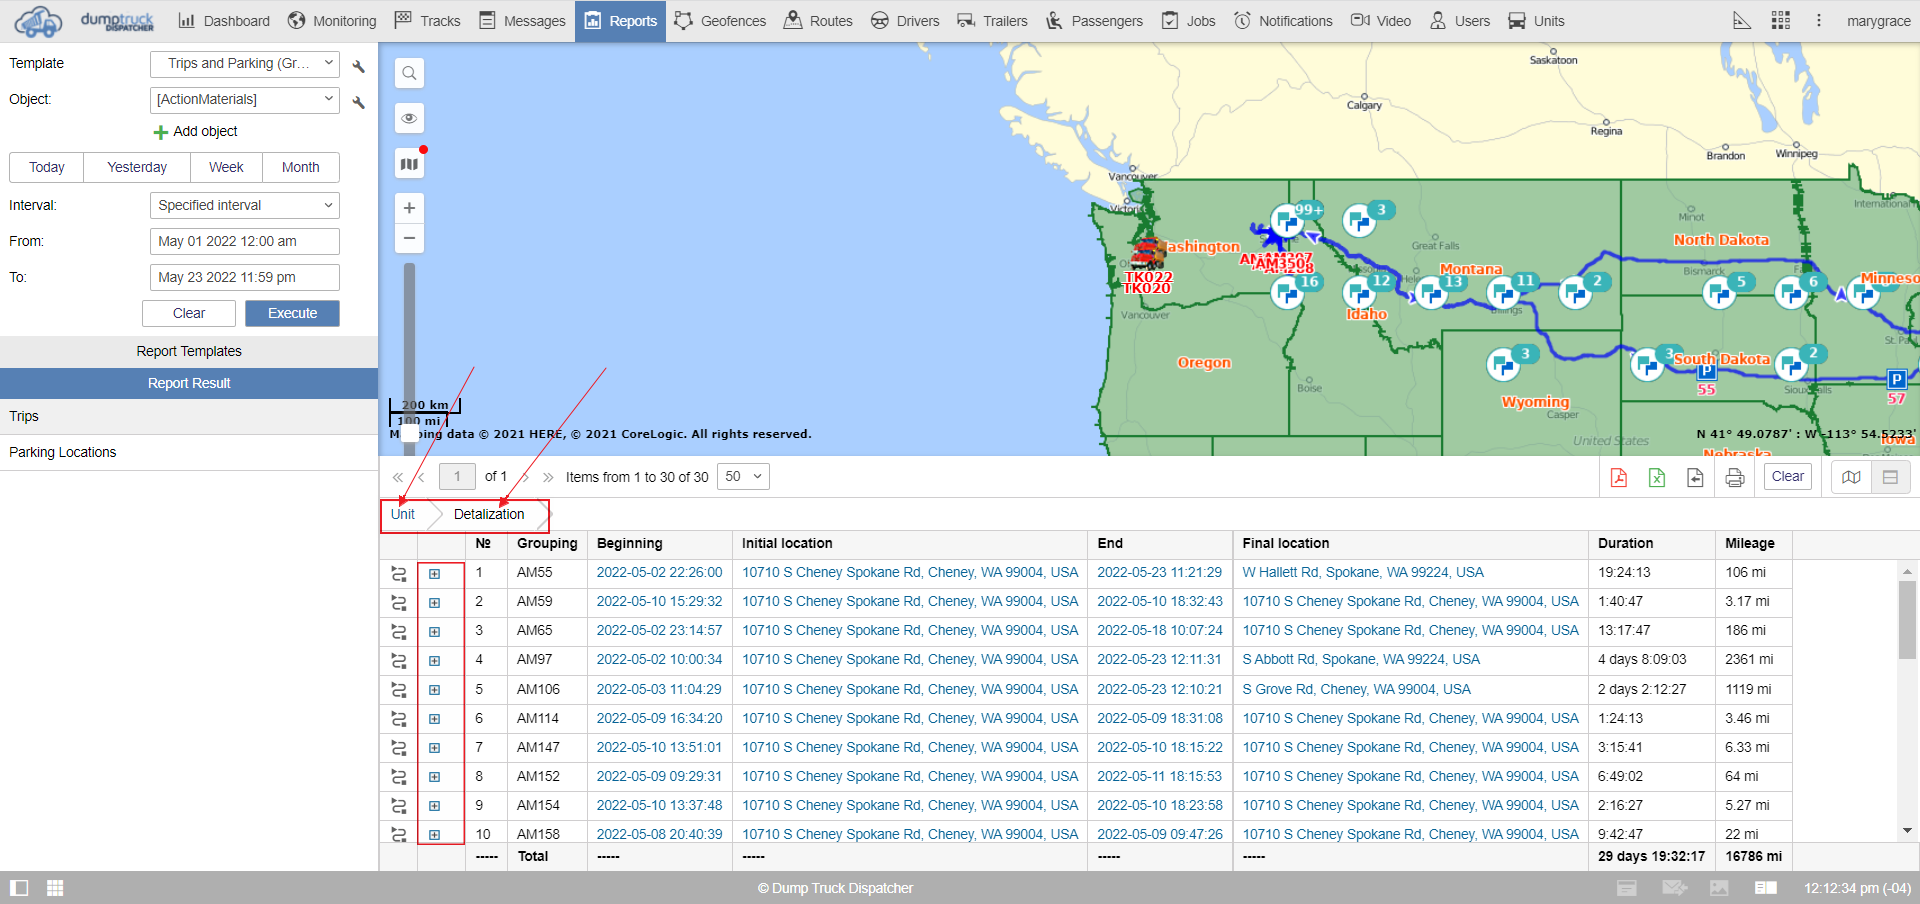
You can click on any of these tabs to expand all of the trees related to that branch or you can expand the pieces individually by clicking on the small plus symbol next to that row of information. Tables on the other hand are pretty simple. Labels are on the topic and the information pull is below.
Some of the names of the column should look familiar from the report creation tool such as parking start, parking end, and parking time.

If you also remember we switched where the location labeled column was from the end to the top of the list. This effectively brought it from the left to the right columns. Next are the groupings we added including unit date, destabilization, and row numbering. Without selecting a unit as a branch, our table would summarize parking for all units by selecting this we’ve broken those down into separate branches.
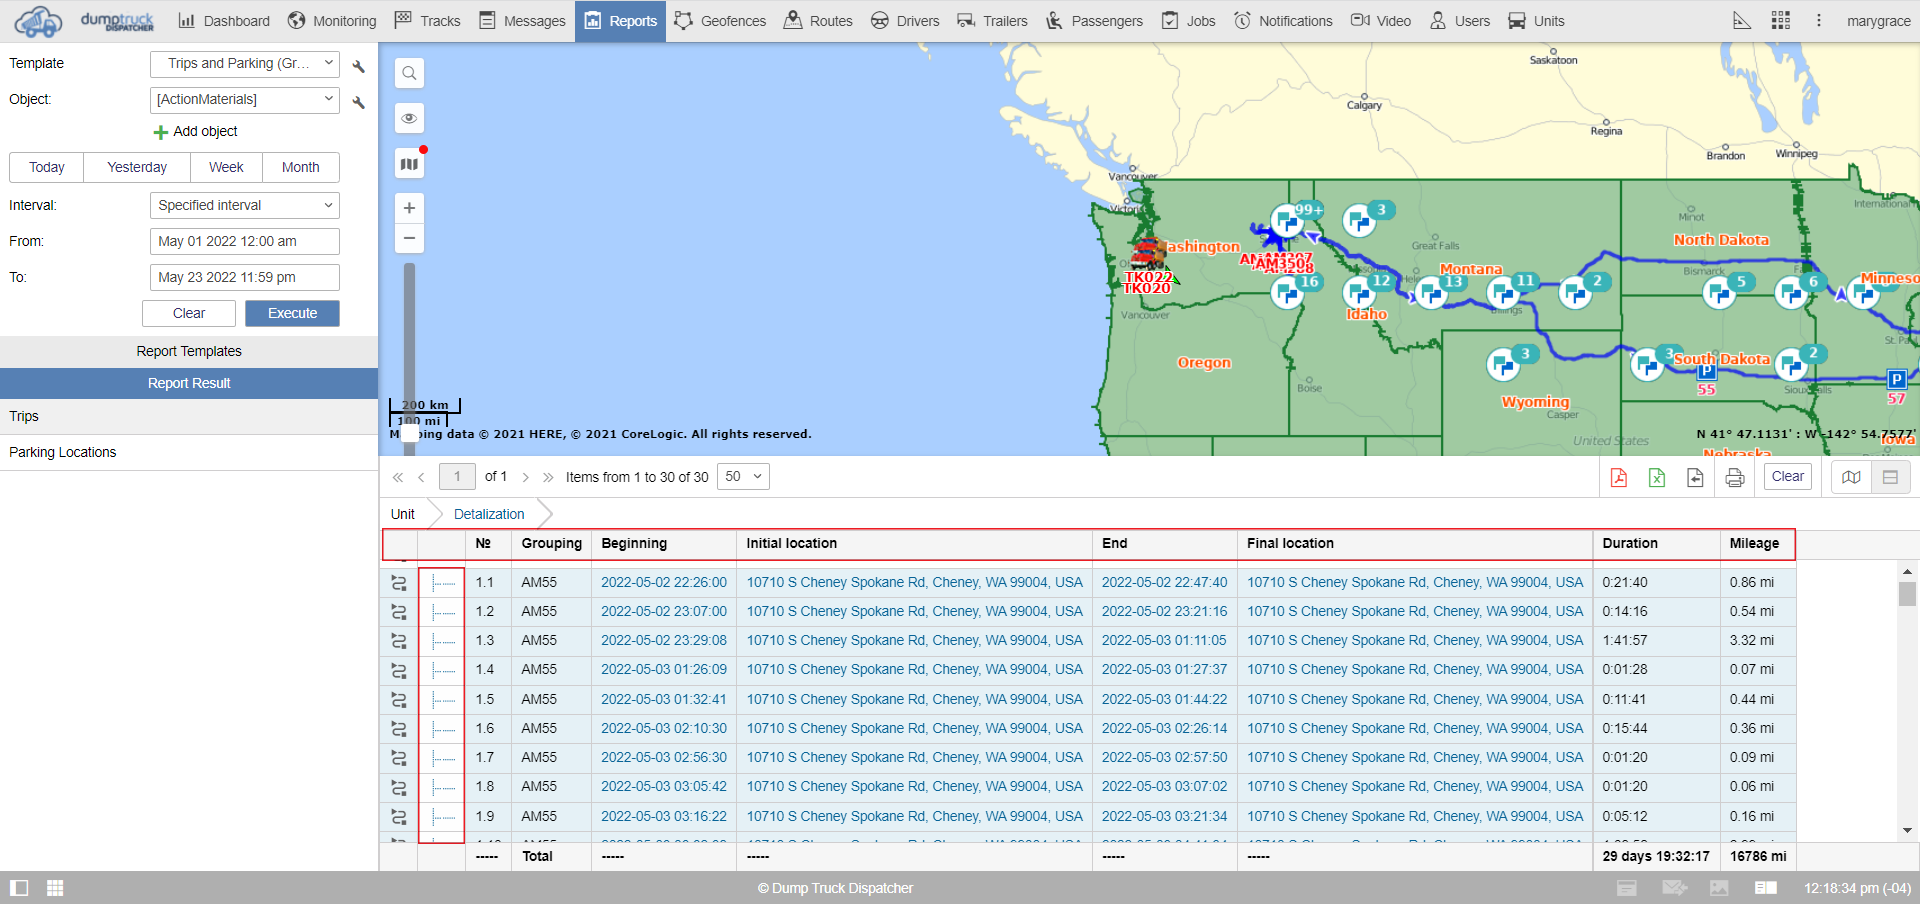
Detalization breaks down the tree even further into individual advance so that way we don’t just summarize parking for a whole date.
Row numbering is a useful tool that makes sense of all the different rows. Every time a branch is expanded it creates a point one and every time it goes down the row it counts up.
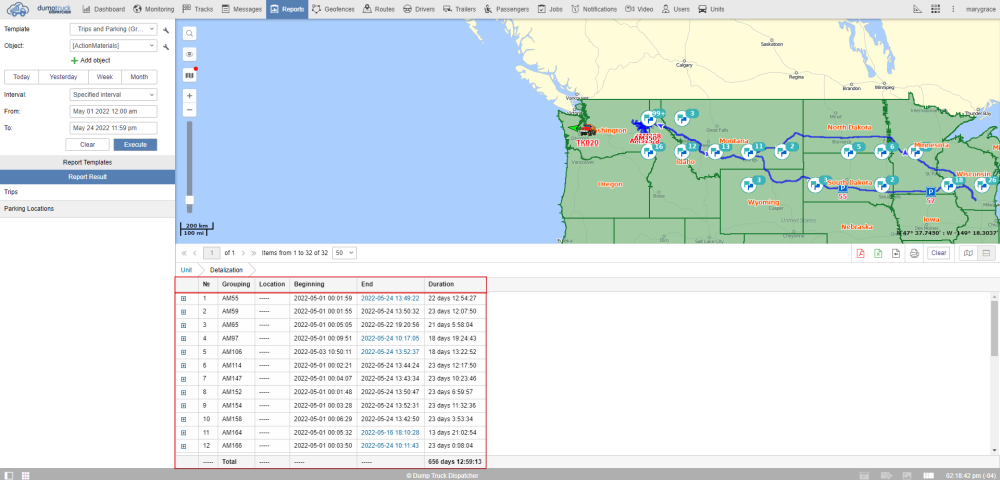
Now that we’ve gone over the tables themselves, the last thing to go over is the map outputs we’ve created in the report creation tutorial. If you remember we’ve selected parking markers and trip routes this is the result of us checking those checkboxes when creating this report.