First, choose the drivers tab on the top panel.
Let's start by creating a new driver. Type in the driver's name and try to choose unique names so it's easier to identify the driver in the list later on. You can also add a picture of the driver for quick identification. Just click on the wheel icon and upload the image.
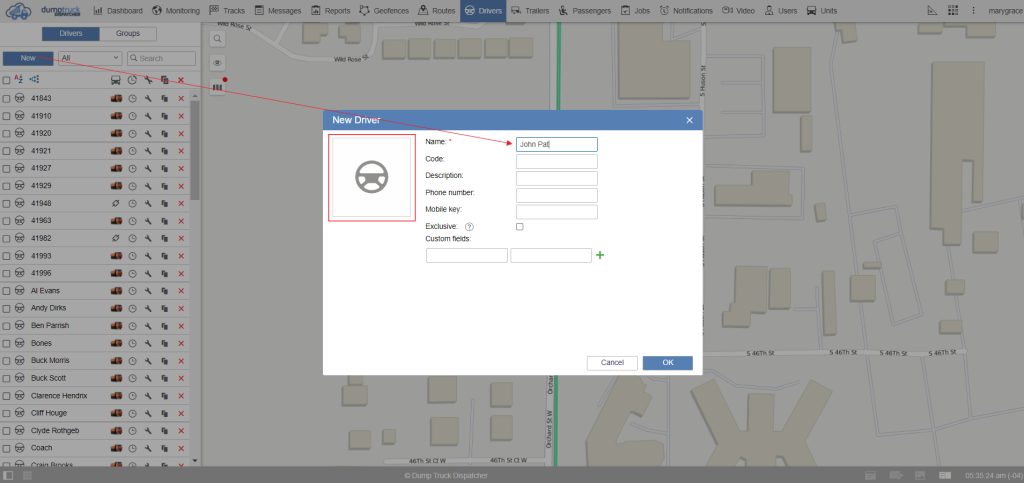
To use automatic binding and unbinding of the driver on a unit. Type the identification number of an employee in the code field. As a rule, this number is an RFID card, NFC, or I-Button key number which will be received from the terminal when the driver starts his shift.
It allows the owners of the vehicle fleets to collect data about driver schedules, the length of their rest and ensure that standards are met.
If you want to add comments about the driver, you can use the description field. This data will be displayed in the driver's tooltip. In the phone number field. You can type the driver's phone number. With this information, you can send the driver a short message from the monitoring interface.
The driver may use this number to log in to the logistics application.
The mobile key is a password that the driver may also use to log into the logistics app. (If you're not using this application, you can leave this field empty.)
The exclusive option is a way of automatically unbinding the driver from the unit. When the driver has an exclusive option enabled, the other drivers who are bound to the unit will be unbound automatically. In the custom fields, you can add any unique information.
In the description field, you can type the information into 2 columns. Save the changes
Now you can find the created driver in the working area, in order to display the driver's location. Activate the checkbox next to his name.
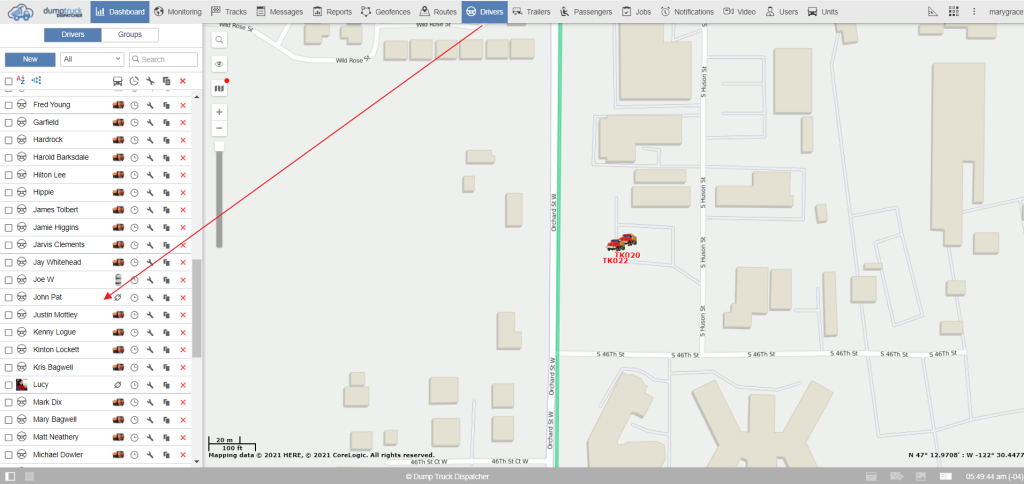
The driver will show coordinates of the unit for which he was bound. If the driver was a new one and he wasn’t bound to any of the units, his position won’t be displayed on the map.
By clicking on the driver's name, The map will be centered according to his current position or where he is unbound from the unit.
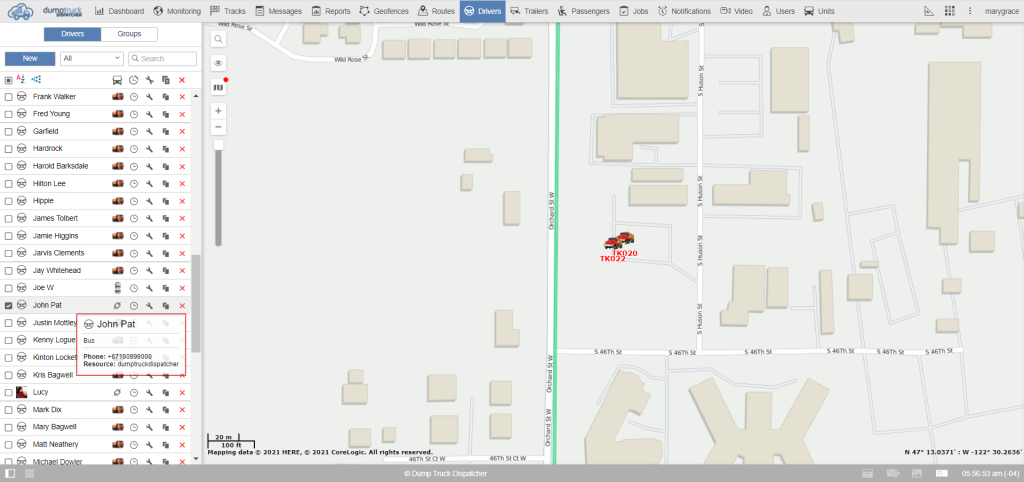
When you hover over the picture icon or driver's name you will see all the added information about the element in the tooltip.
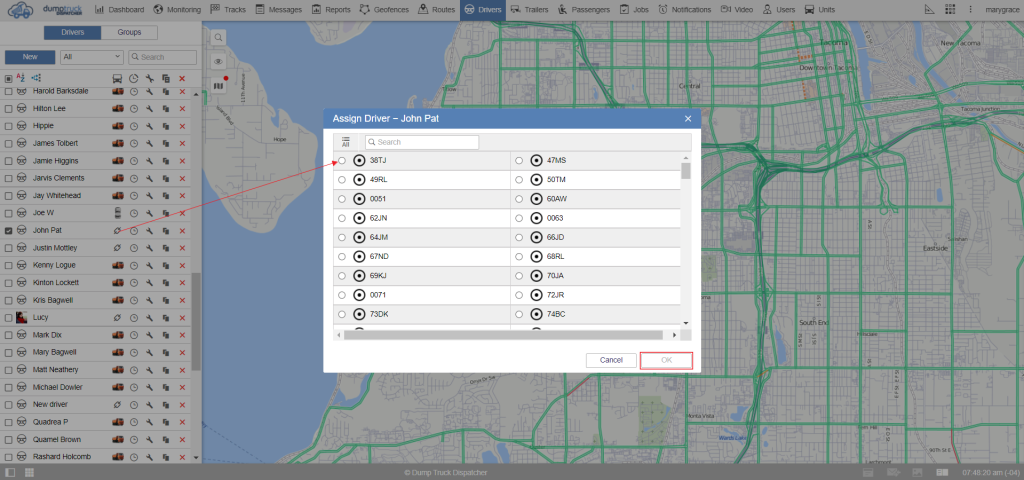
The driver can be bound to the unit not only automatically with the help of the code but also manually. To do this click on the first icon in the right part of the working area.
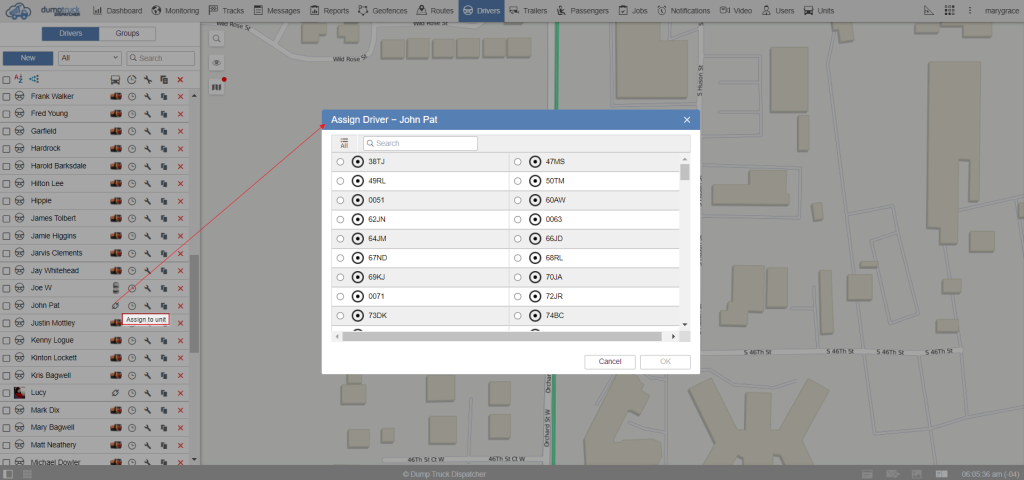
Select the unit which is going to be bound and save the changes.
At the binding icon, There is an icon to which the driver was bound.
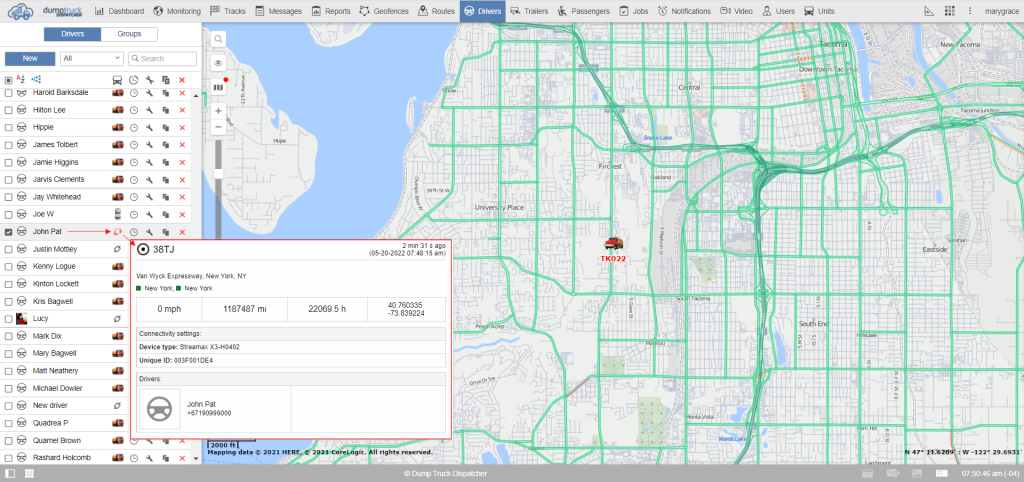
When you hover over this icon, you will see information about the unit and the icon itself will change its appearance. Click on it once again to unbind the driver.

The following icon is intended for manual bindings and viewing the history of bindings.

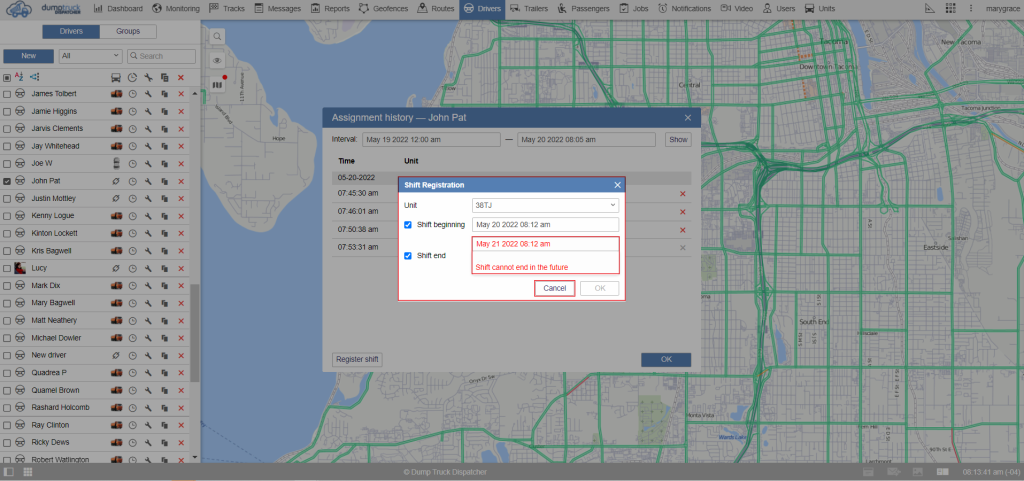
For example, if the automatic binding didn’t work, you may register the driver shift manually. Click on the register shift button. Select the unit and establish the beginning of the interval.
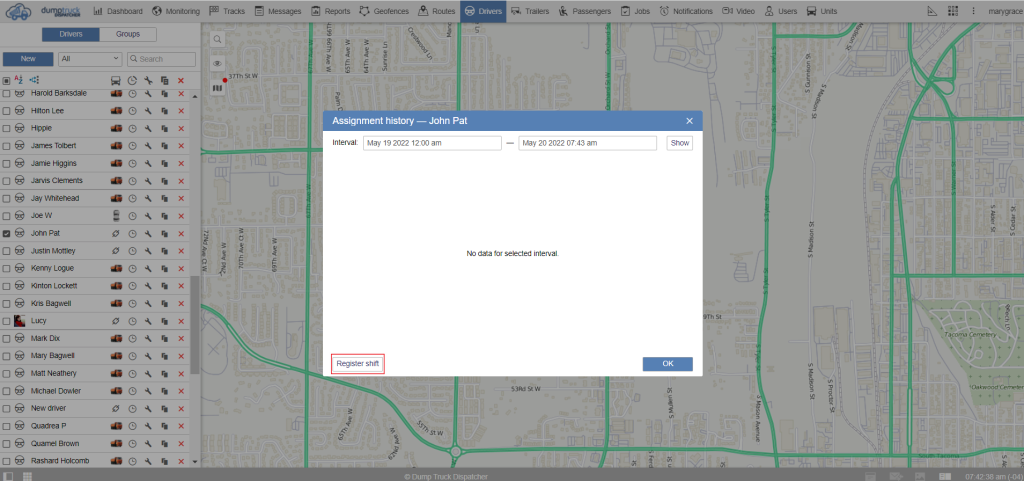
Also, you can add the end of the shift if needed. Remember that you can only register past or current shifts, not the future ones.
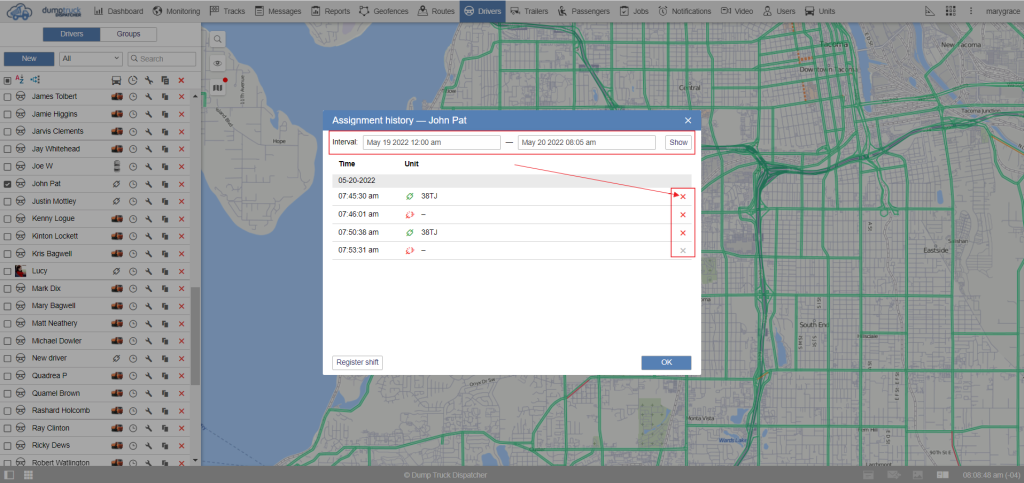
To look through the history of bindings, establish the time interval, and press the Show button. And to delete the binding, click on the red cross on the left of the unit's name.
You can edit the driver's properties, copy and also delete the element from the list.

Trailers are any mechanisms attached to or driven by the main vehicle unit and do not have their trackers or controllers.
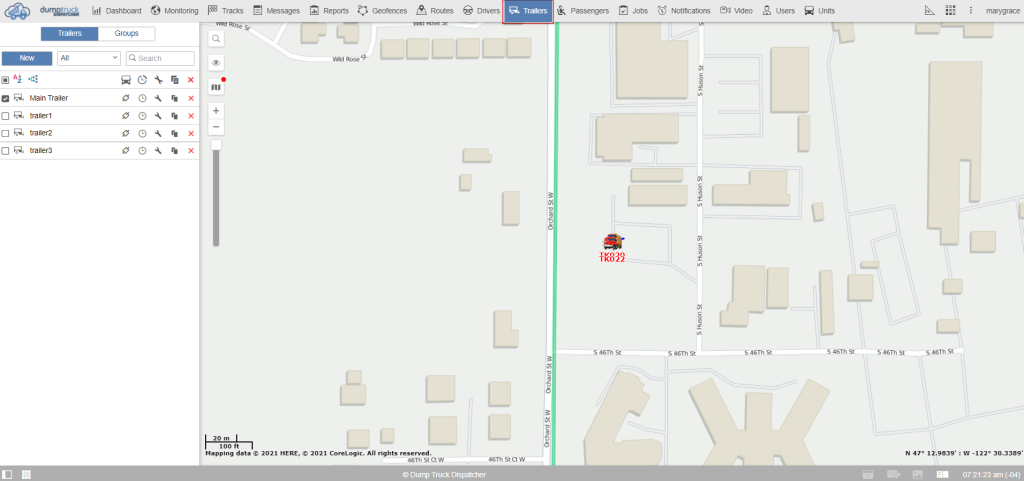
Creating a setting and working with a trailer is essentially the same with drivers but there's a small difference. There are fewer fields in the trailer's properties.
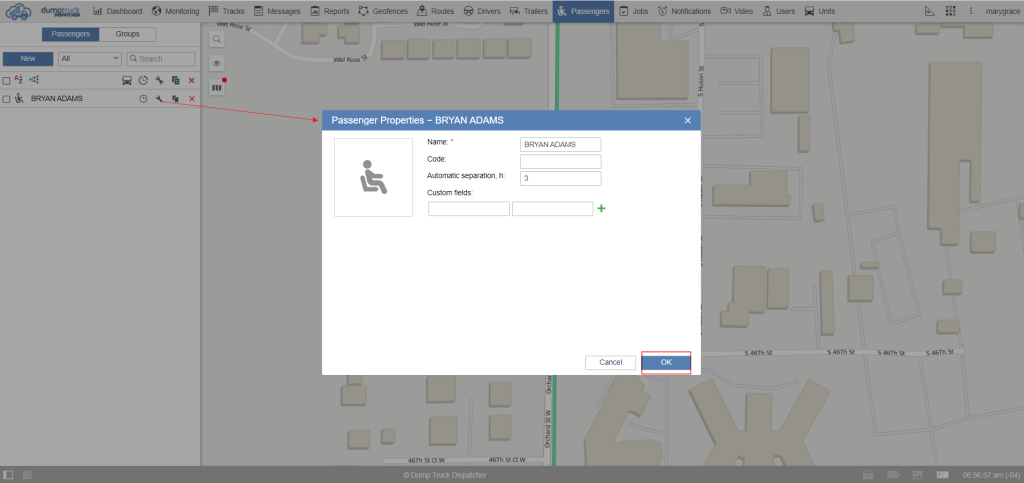
The drivers and trailers can be bound to the unit automatically or manually. Passengers can only be bound automatically using an RFID card or other device which is going to be attached to the card reader at the entrance.
Passengers have a special option of automatic unbinding. In the field you need to type in what time after binding the passenger should be unbound in case he forgot to attached his RFID to the card reader when he left the vehicle.