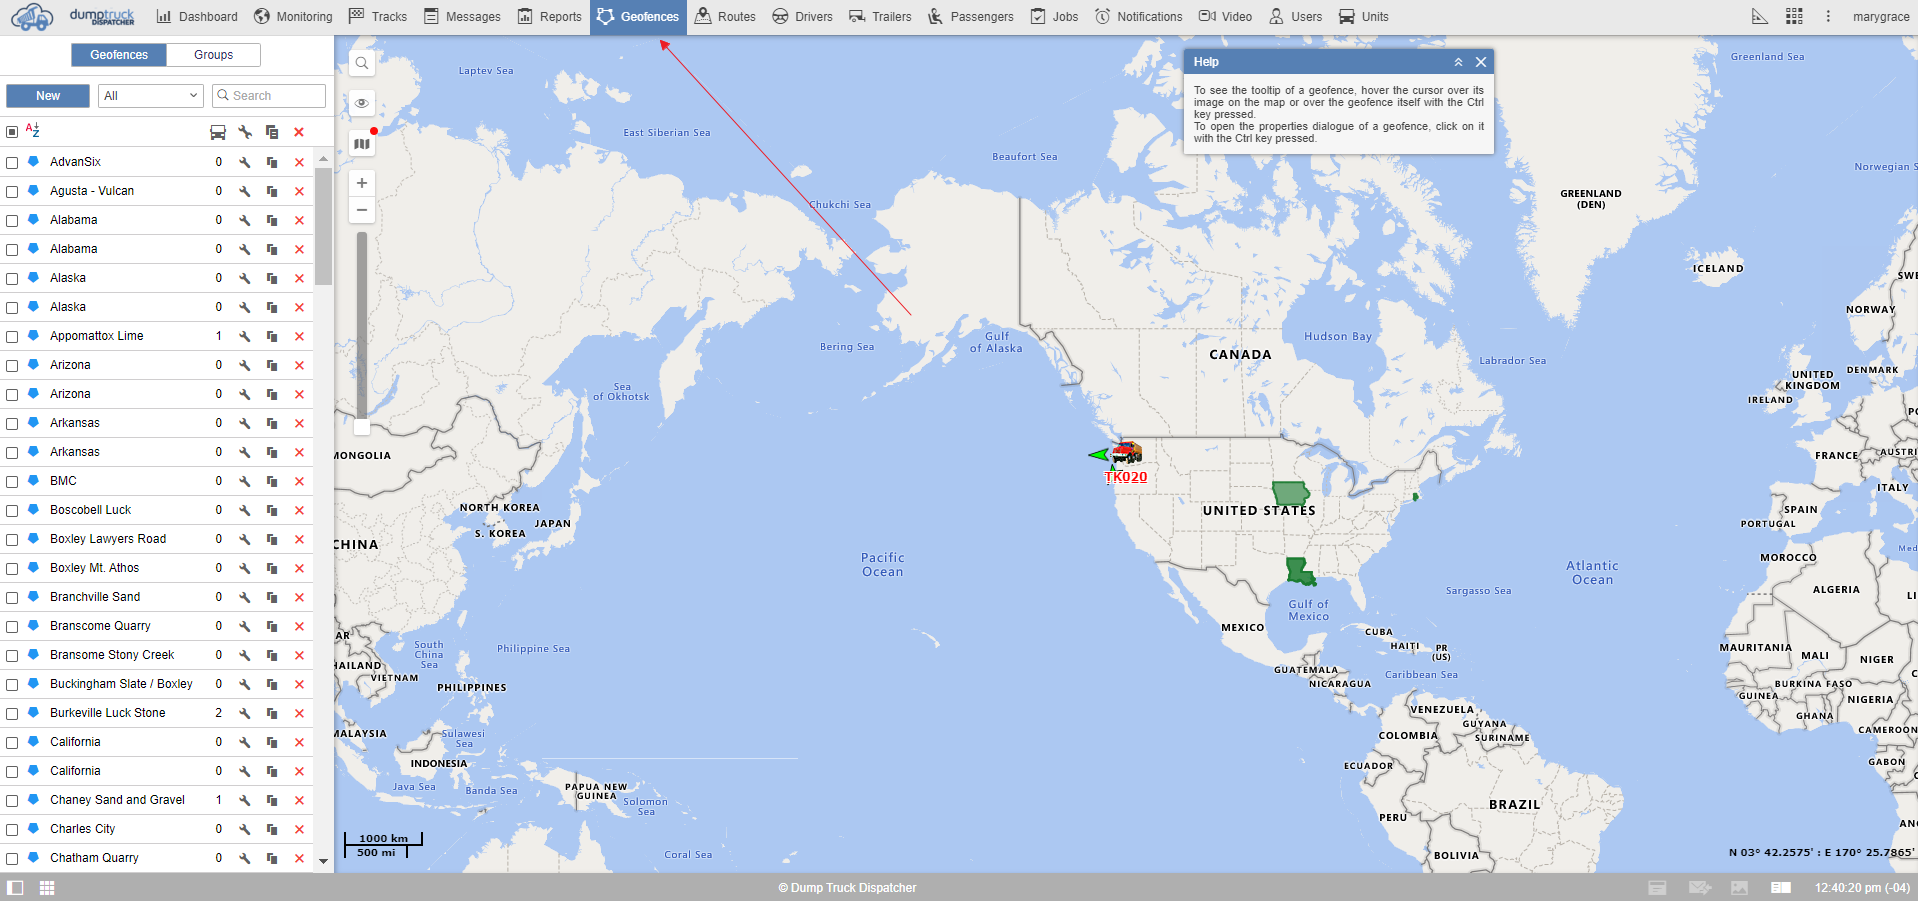
Geofence is an area on the map that is important for user tracking purposes and requires special attention. At the geofence tab located at the top bar, we can see two different list selections, the Geofence, and Groups.
Click on the new button. This settings area is referred to as the geofence properties dialog.
Label the geofence by typing in the name textbox and selecting the color and font size. In the description, you can put some extra details about the geofence.
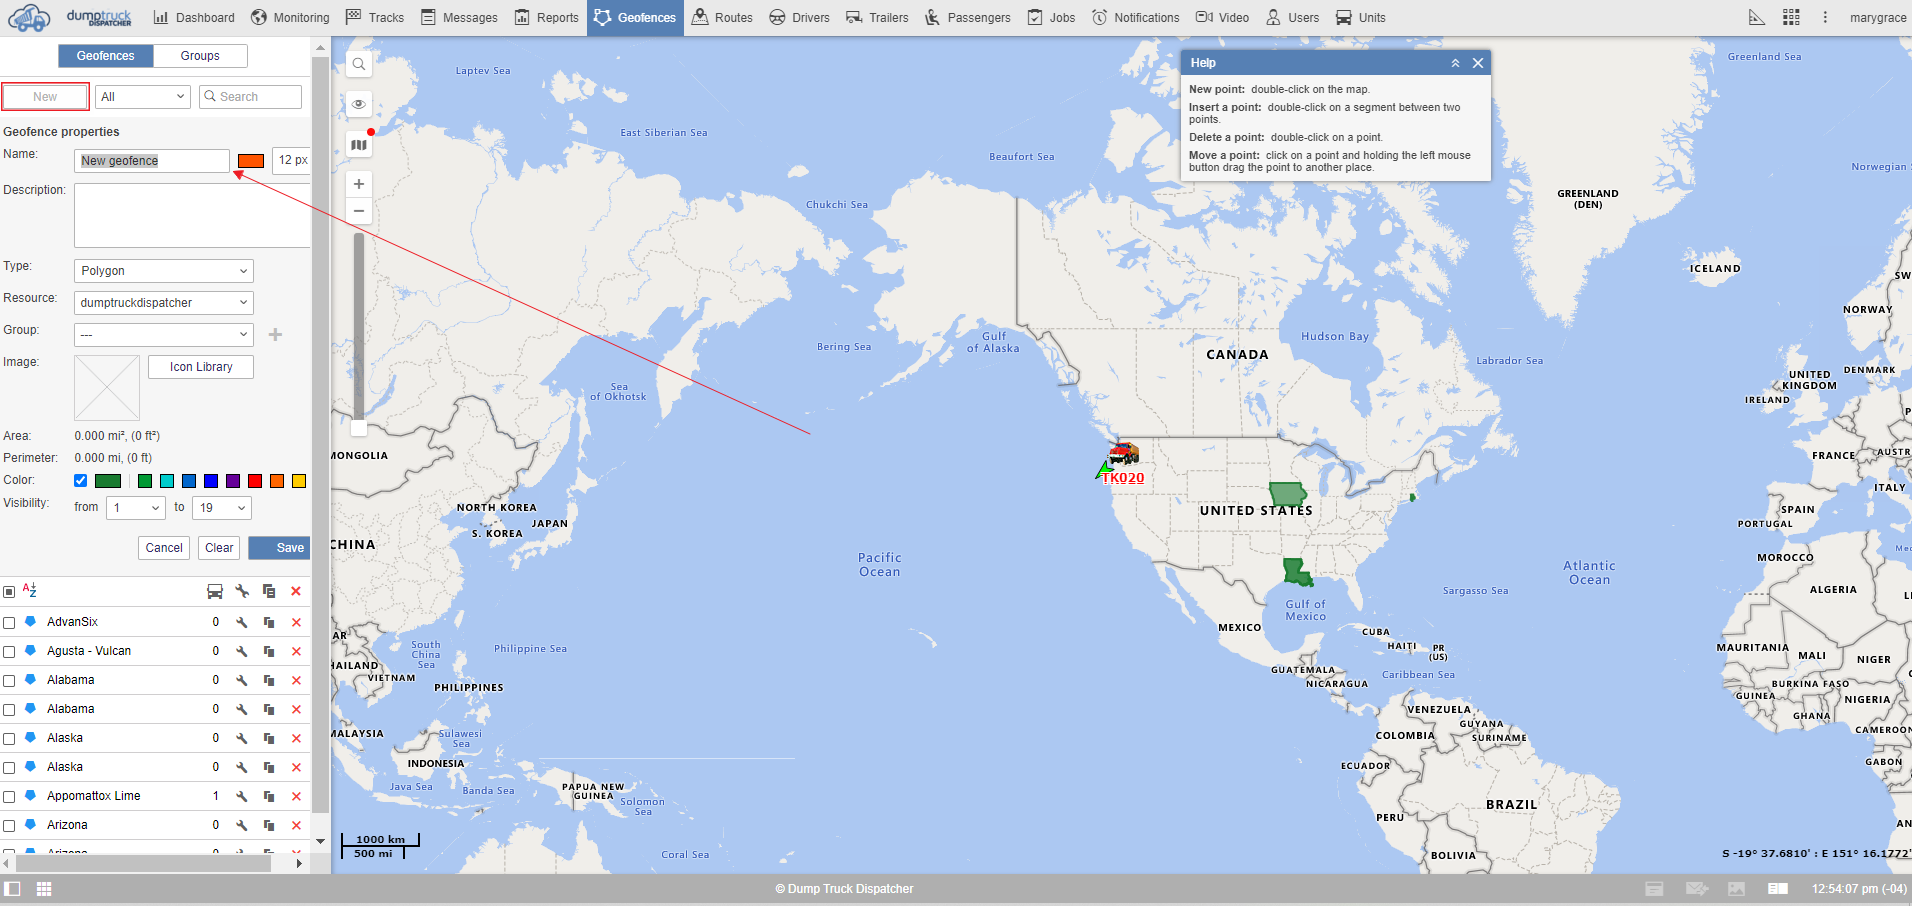
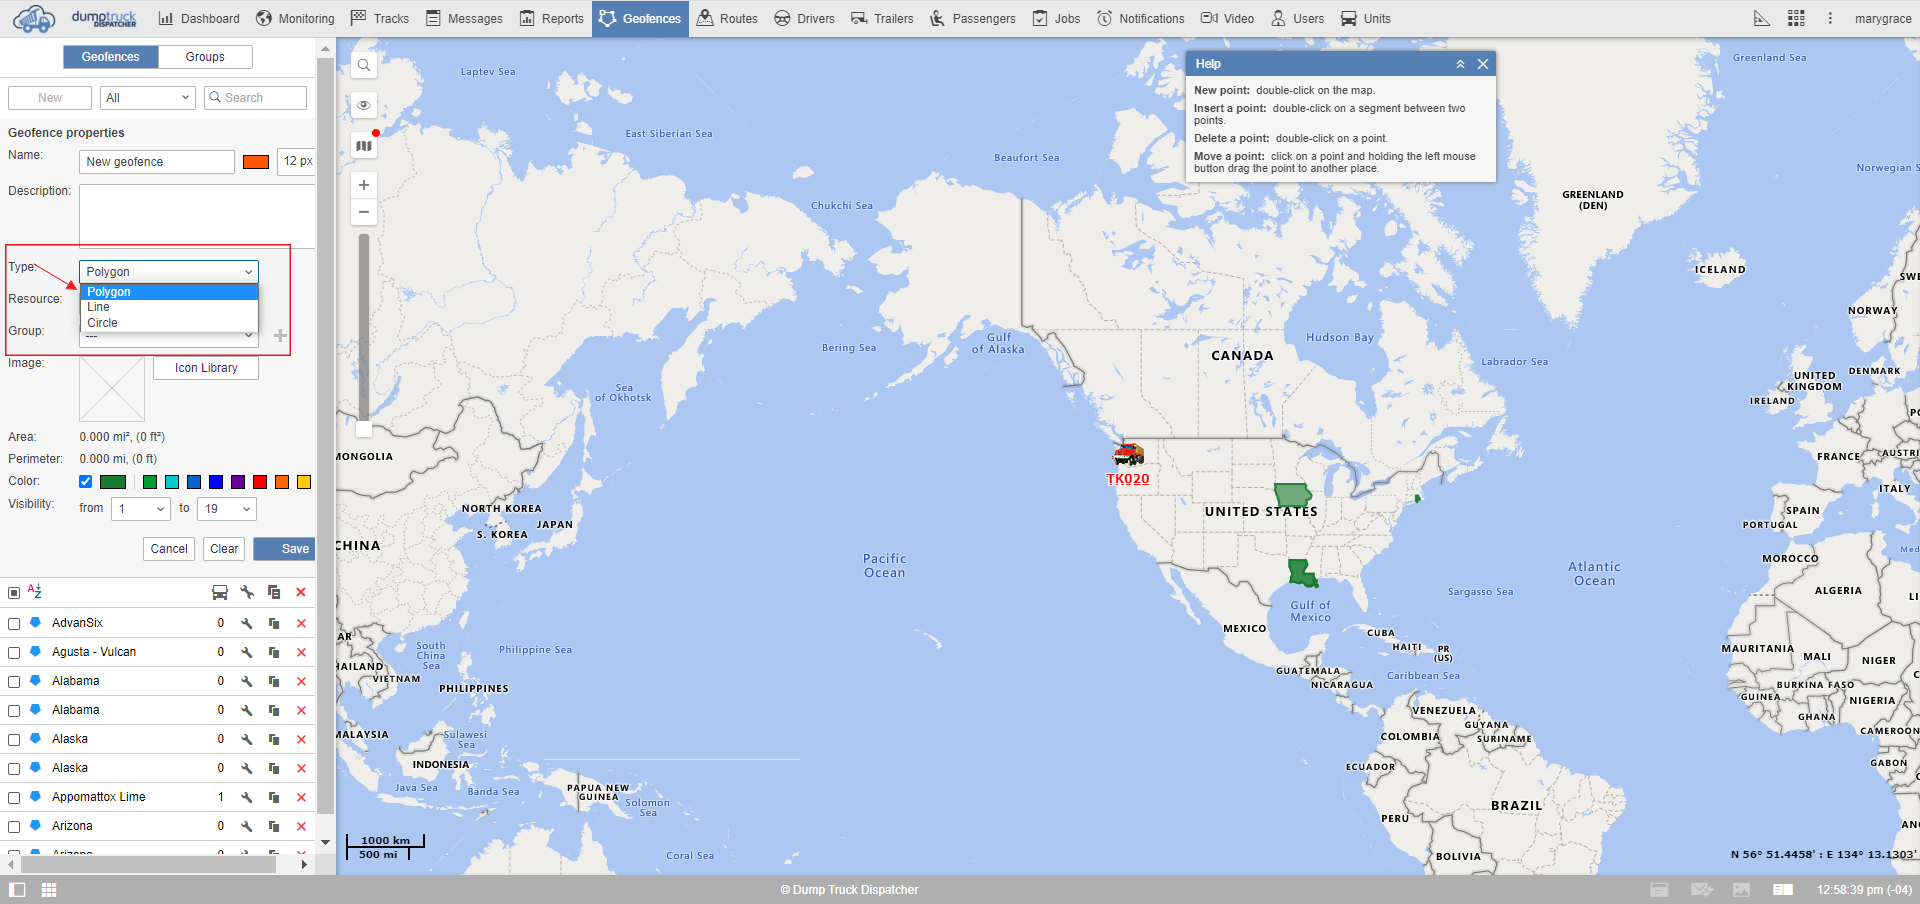
Select the type of geofence. It is whether a polygon, which covers an area based on the points you click.
Line allows you to cover roads easily by clicking along a path and making the line thick enough to cover the road.
A Circle allows the creation of a geofence by selecting a point in building the geofence based on a radius input.
For example, you select the polygon type of geofence.
You can create the geofence by double-clicking the land around the location you wish to geofence and make sure to fill out the corners by clicking and pulling the points closer to the edges of the land. You can create a new point by double-clicking on the existing geofence line and then pulling it over to the edge.
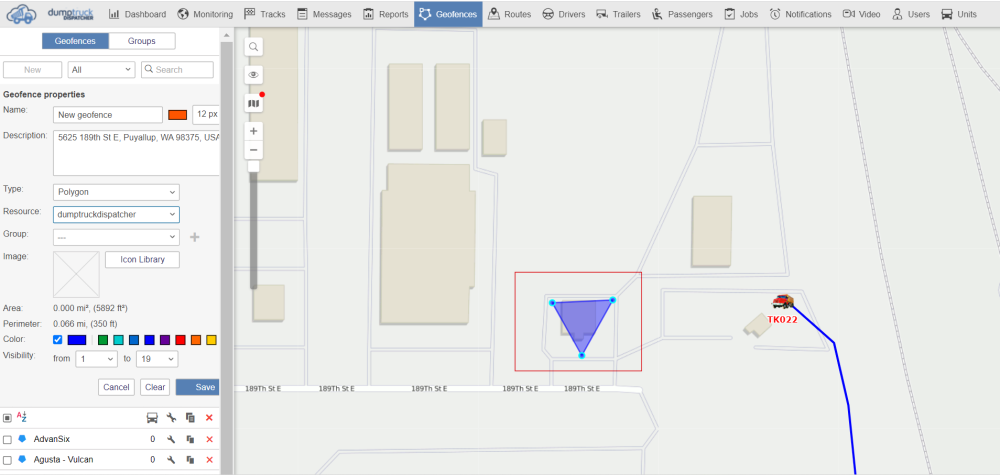
Then decide what group it’ll go in, You can either choose to select an image from the desktop or choose one from your existing library. In the working area, you can see the area as well as the perimeter of the geofence that we’re creating. Then select the color of the geofence based on your preference.

If you wish to leave the icon on the map but hide the outline, you can uncheck the display shape on the matte box located below.
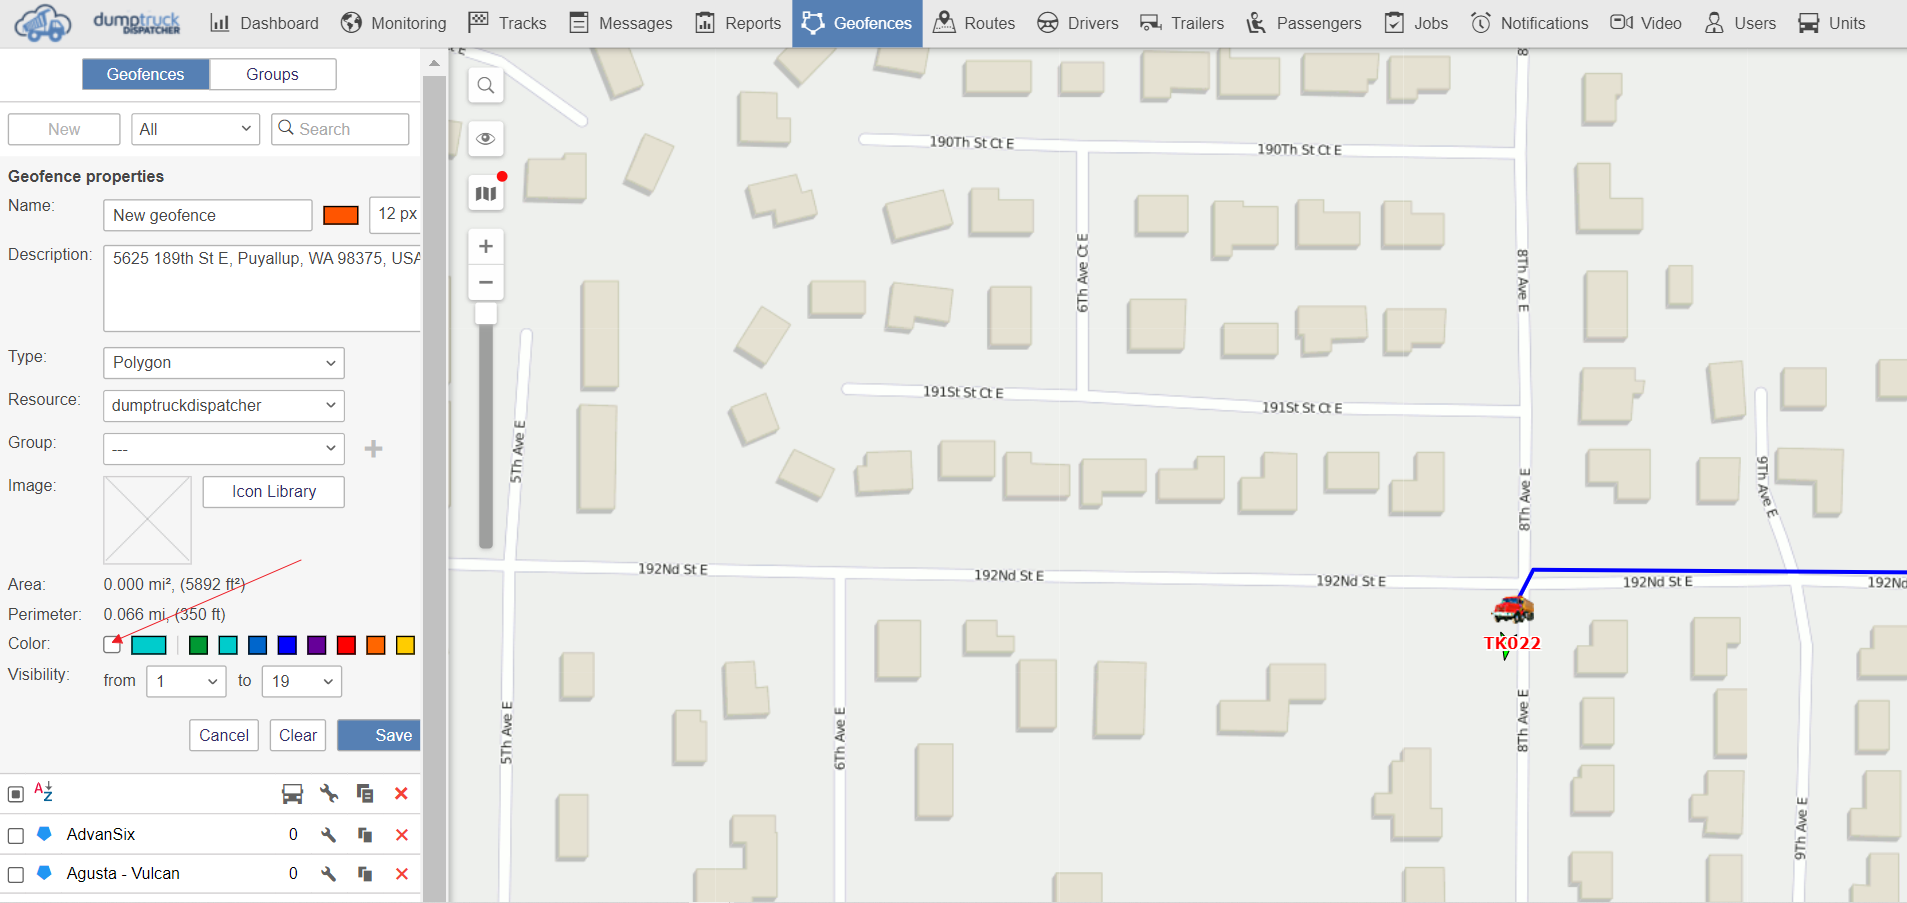
Under visibility, you can specify map zooms at which geofences will be displayed or not.
Different map types, such as Google Maps or Bing Maps can have different graduations of map scales.

However, all possible values fall into a range of 1 to 19. One is the most detailed scale, by choosing it you will see small streets and houses. 19 is the largest scale and by choosing it you’ll see an overview of the whole world. If a geofence is a city it makes sense to see it on larger scales such as 8 to 14 whereas if it’s a building it's more logical to see it on more detailed scales.

Lastly, you can choose to cancel, clear the information you put in, or save the geofence you’ve created.
![]()
This is what information looks like when completed. To the left of the geofence name, we can see the visibility check box. This box decides whether or not the geofence appears on the map.
It should be noted that geofence's visibility does not affect its existence in notifications or reports.
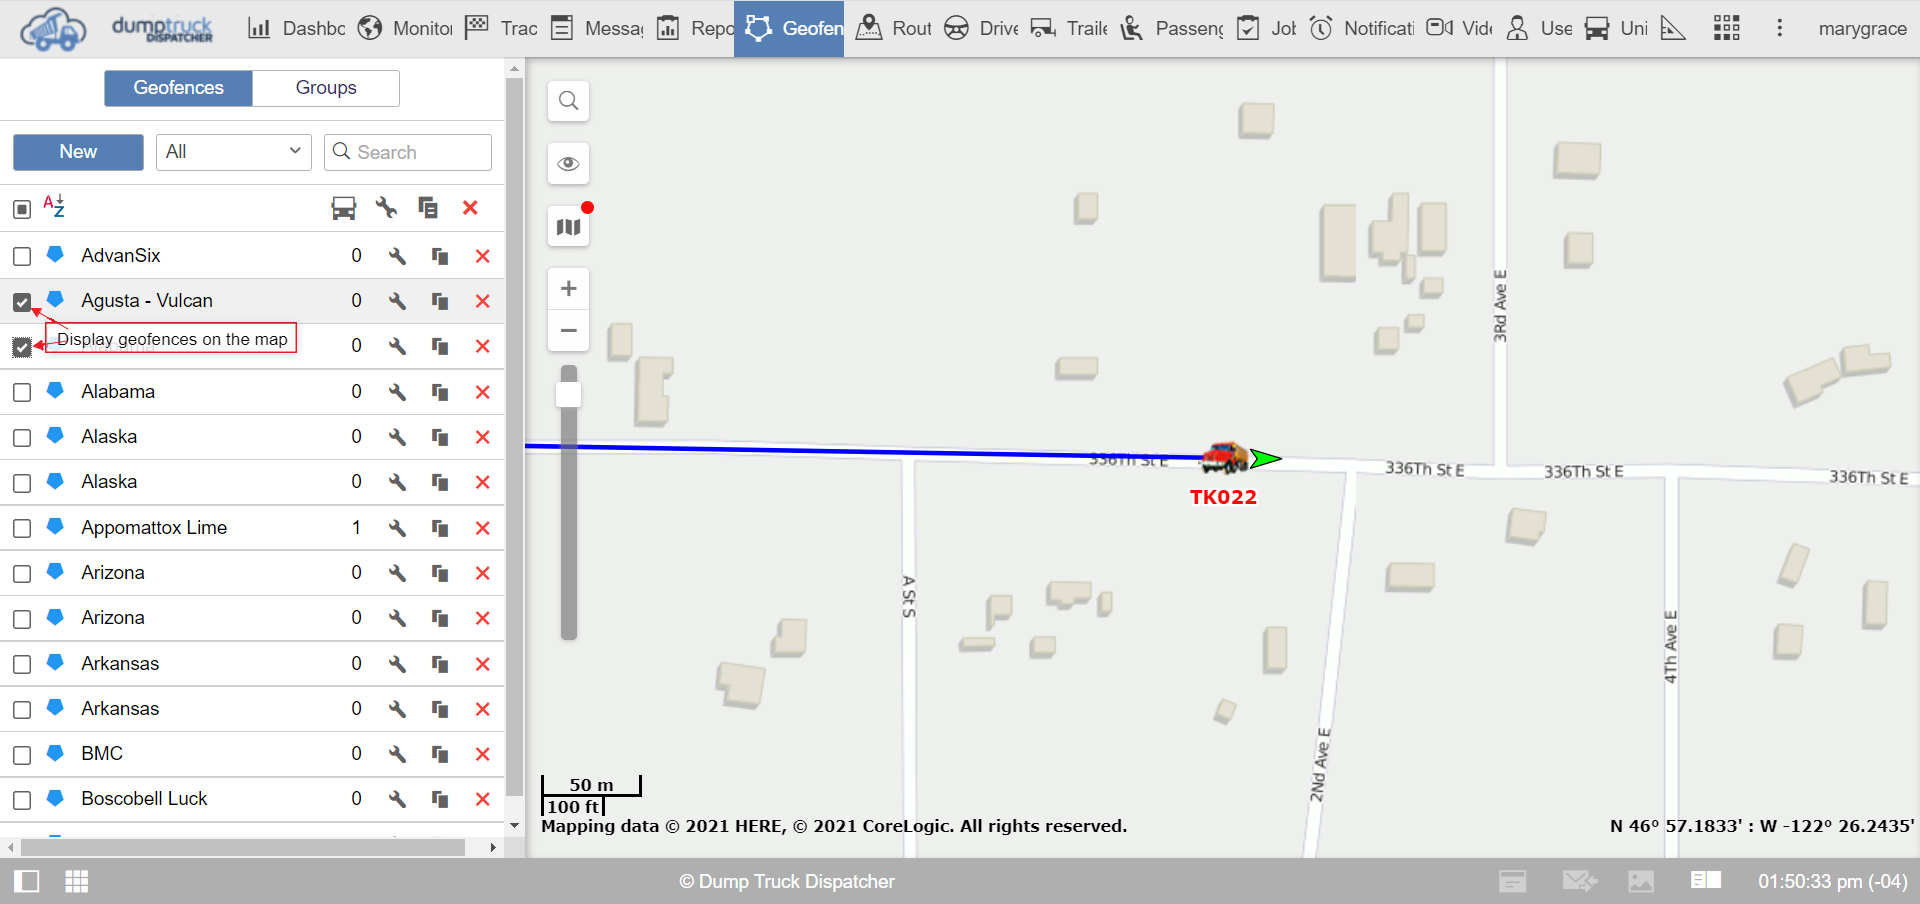
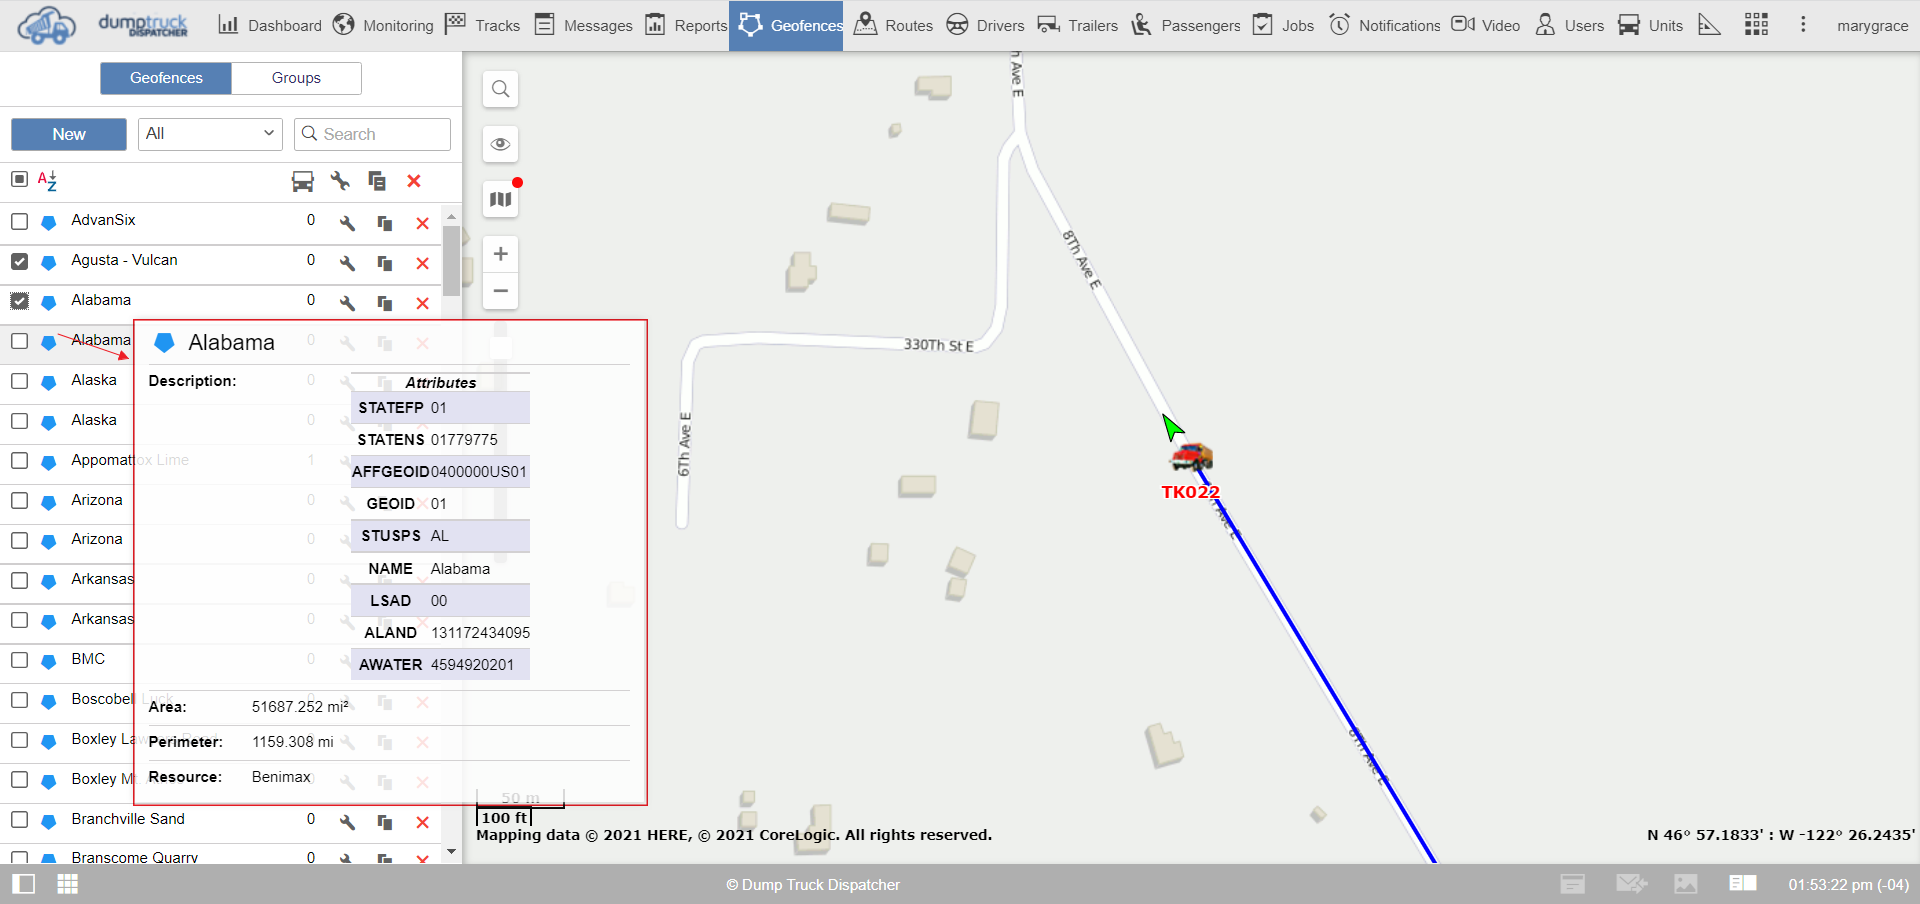
If we hover over the name of the geofence, we can see all the details of it in the tooltip box below.
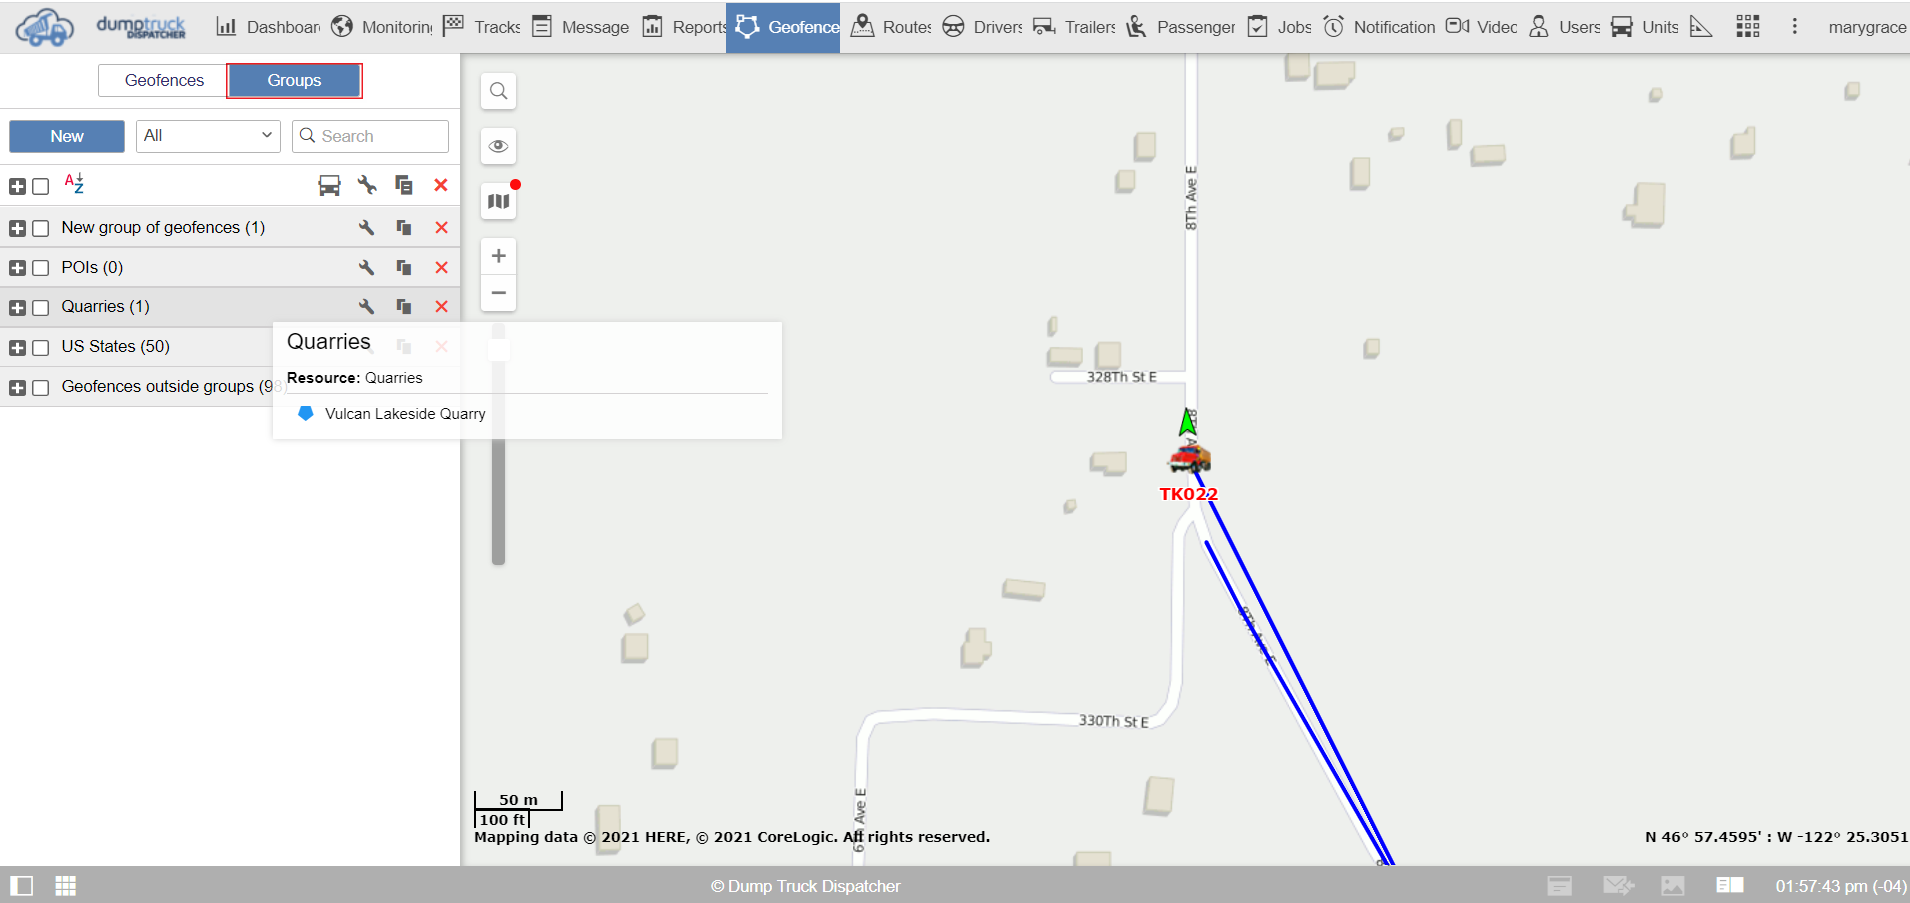
To the right of the geofence, we can see a number under the vehicle icon. This number represents the number of units within that geofence.
You can also copy the existing geofence and remake it with a new location by clicking on the copy button.

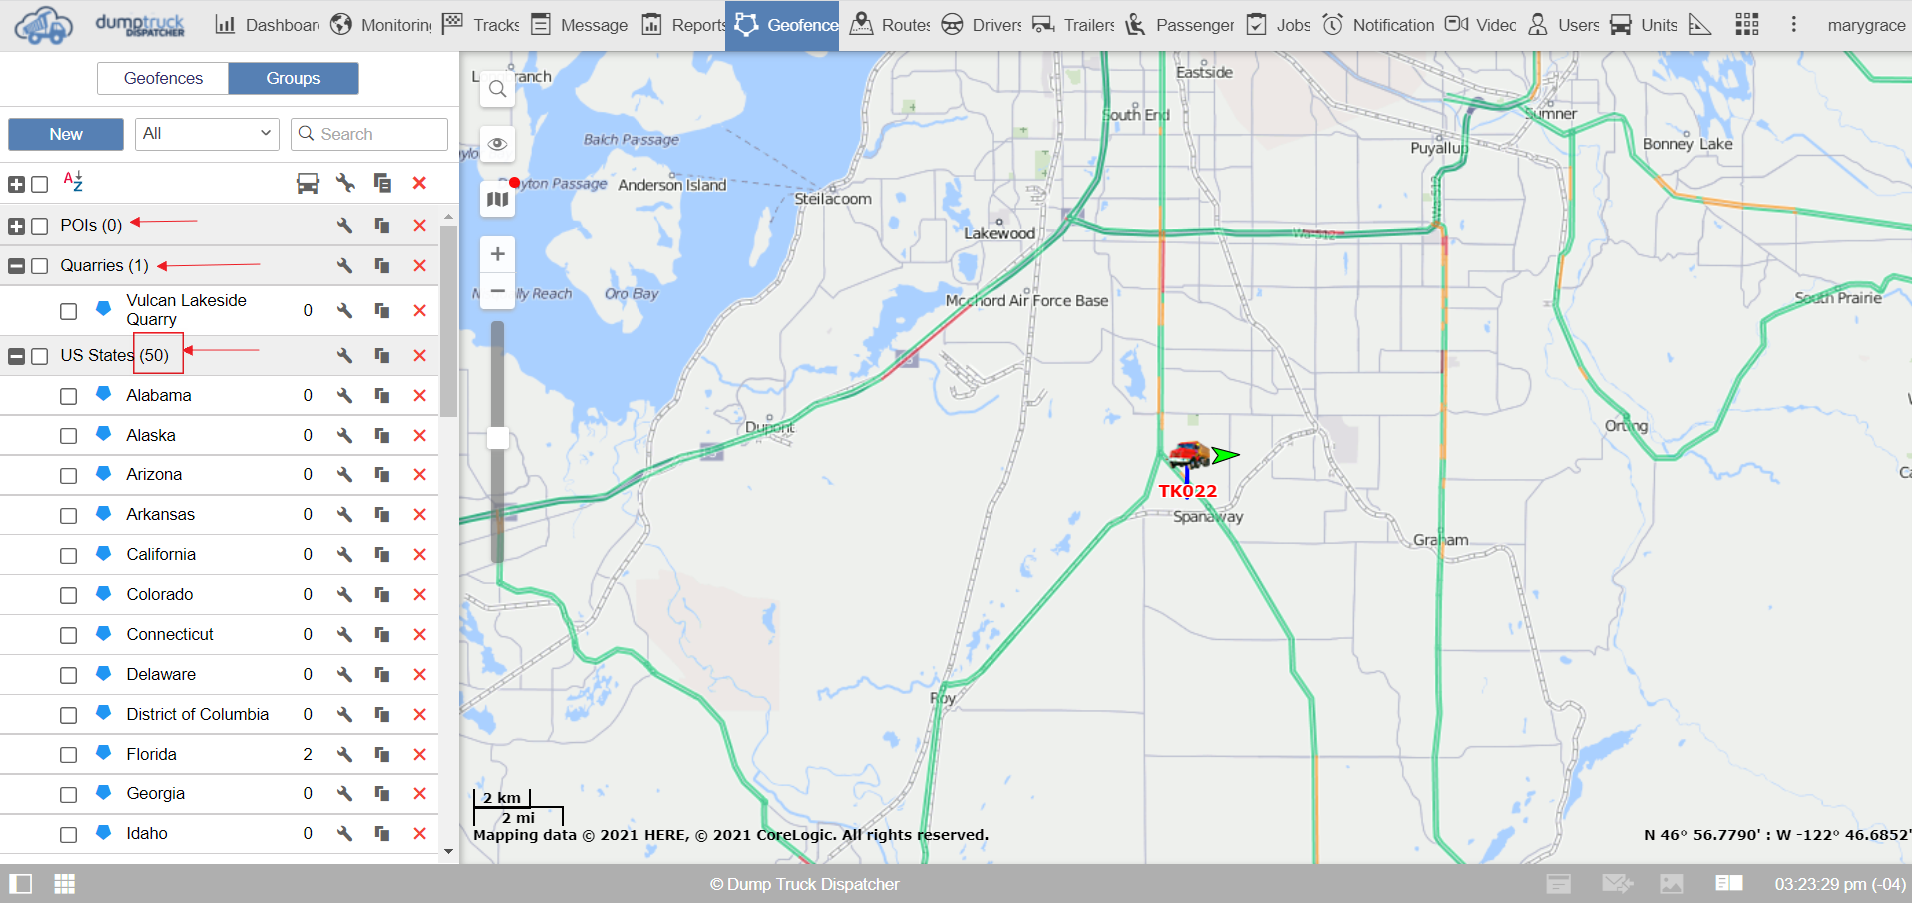
At the top of the work area, you can see the group list.
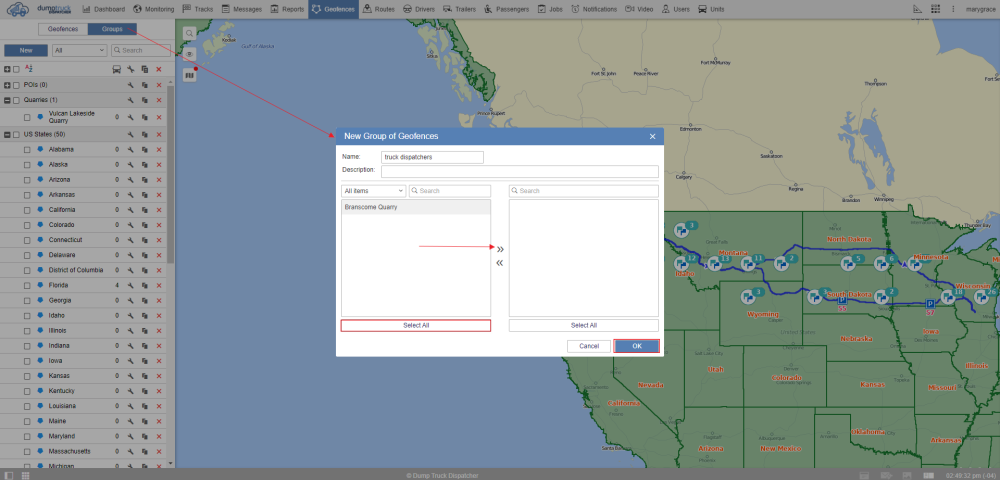
Select the new button. Decide on the name of the group and you can also describe the group in more detail in the description.
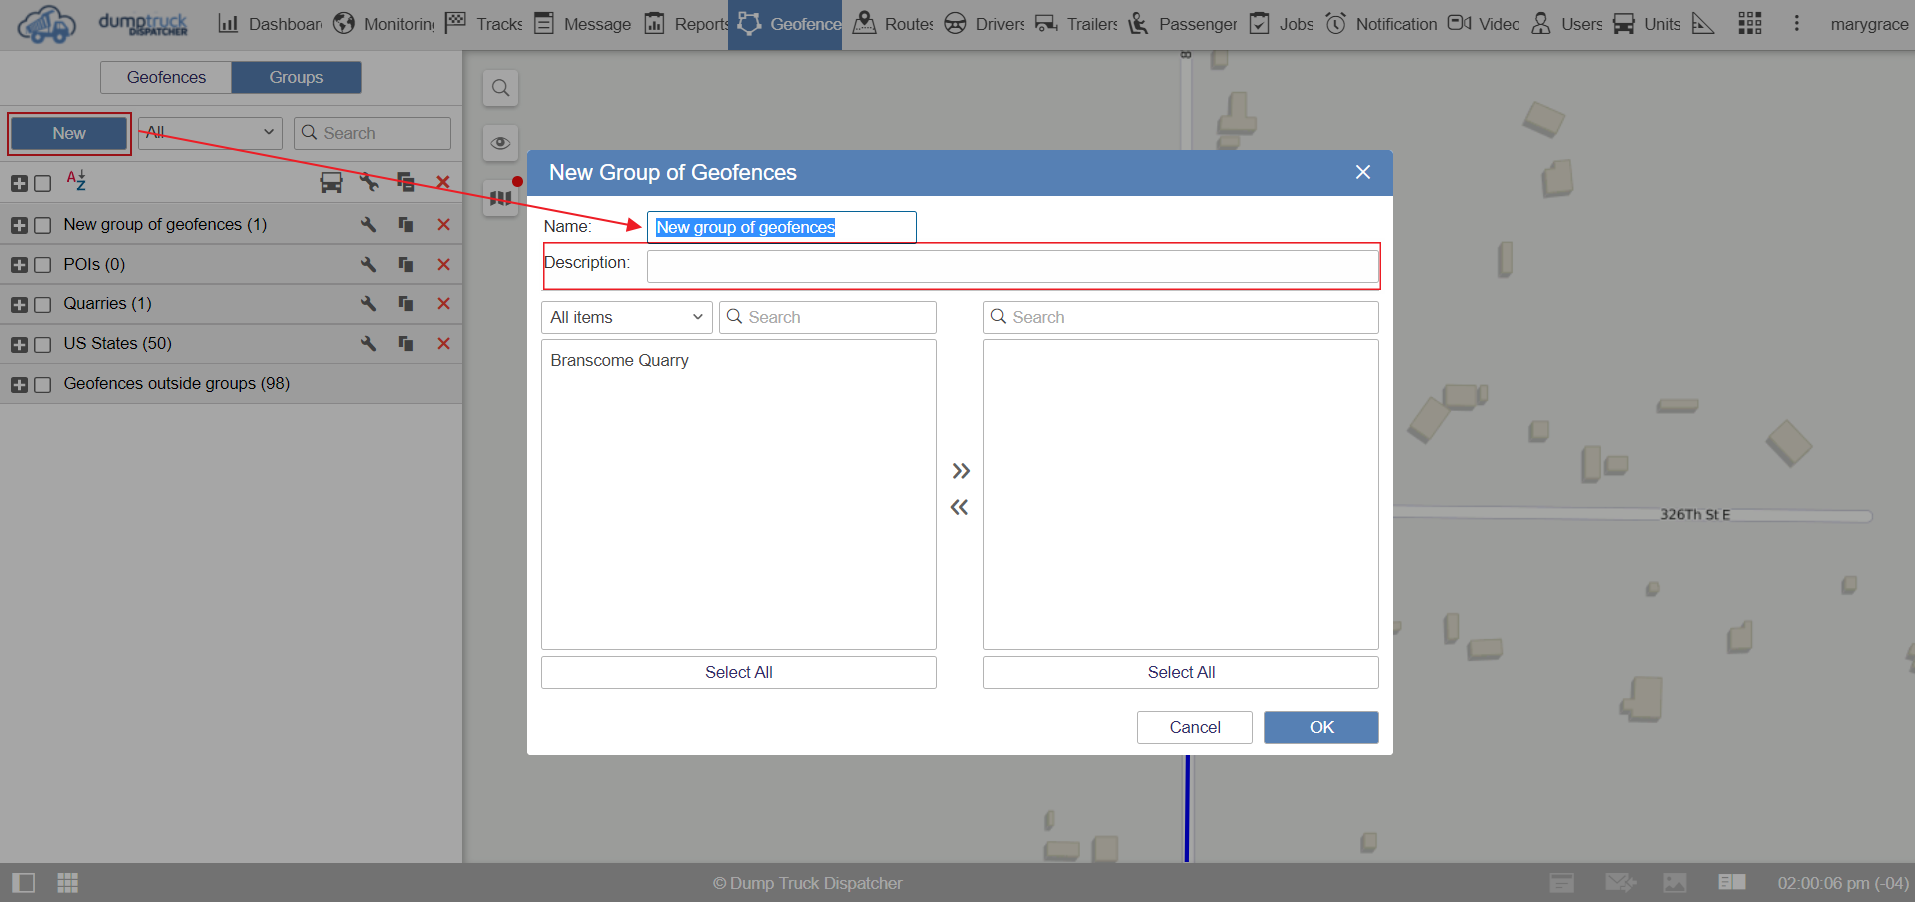
The quickest way is to double click on the individual geofence found on the left side of the pop-up window. Or you can also highlight multiple geofences by holding ctrl and clicking each once then click the arrow in the middle to send them on the right side.
![]()
If you have several geo fences next to each other click on the top geofence hold shift and select the bottom geofence, this will highlight everything in between your clicks, Then you can add them to the right.

And last if you are search worked extremely well you can click the Select all button to highlight all the geofences at once and move them all over by selecting the move arrow. After creating your group click the Ok button at the bottom.
On the list, you can see the groups as well as the geofences. In order to show the geofences all you need to do is hit the expand list button on the left of the geofence to the right of the geo-fence group name.
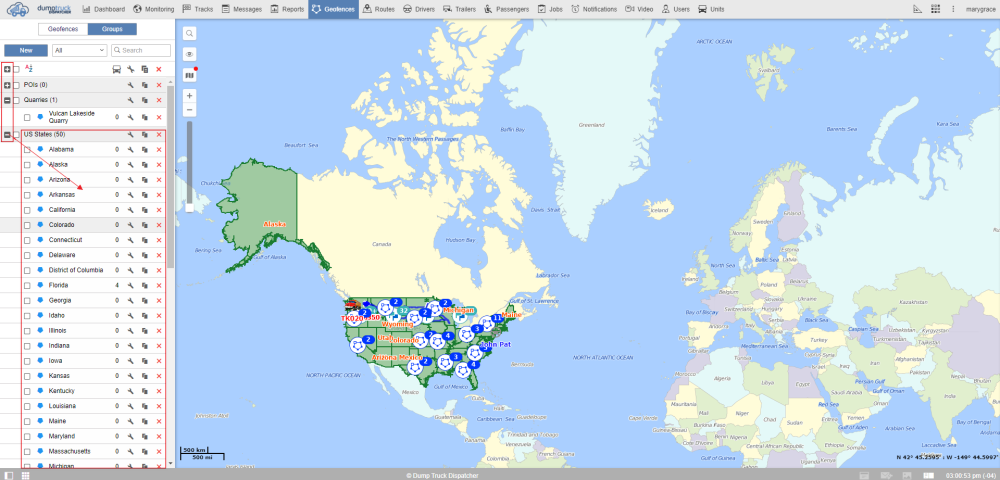
There is a number in parentheses, this number indicated the number of geofences within the group.