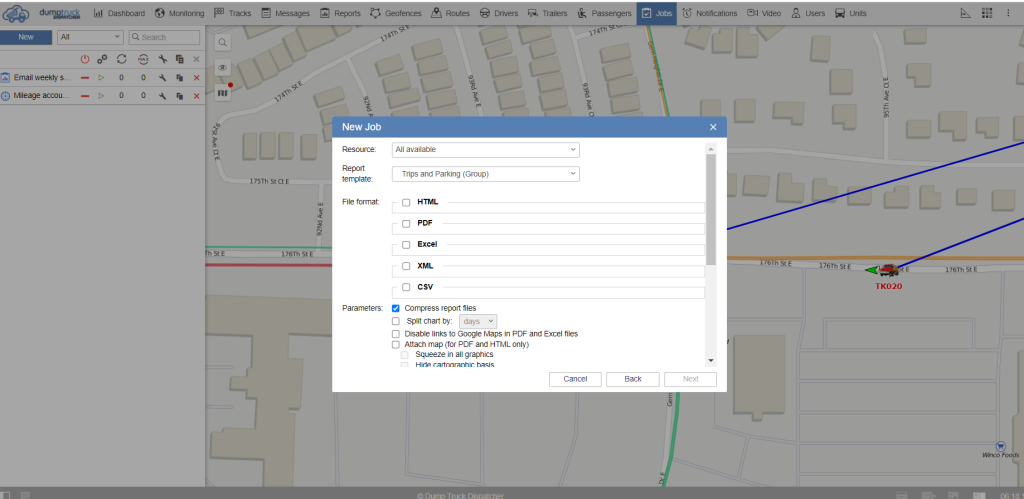
Then choose the file format in which the information is going to be sent. You can also apply a page orientation to it if you like.

You can apply additional options below by clicking on the checkbox. You can compress the report files to make the downloading of the report faster. Also, you can establish the displaying of charts for a particular period of time on a single page.

It is necessary to establish the time interval for which the report should be activated. If you would like the job for executing the report daily then it is convenient to establish the interval for the previous day. And if the report should be executed weekly the interval might be for the previous week.
Select whether you want to export the report file/archive or receive a link for the report. And last, you need to insert the recipient's email.
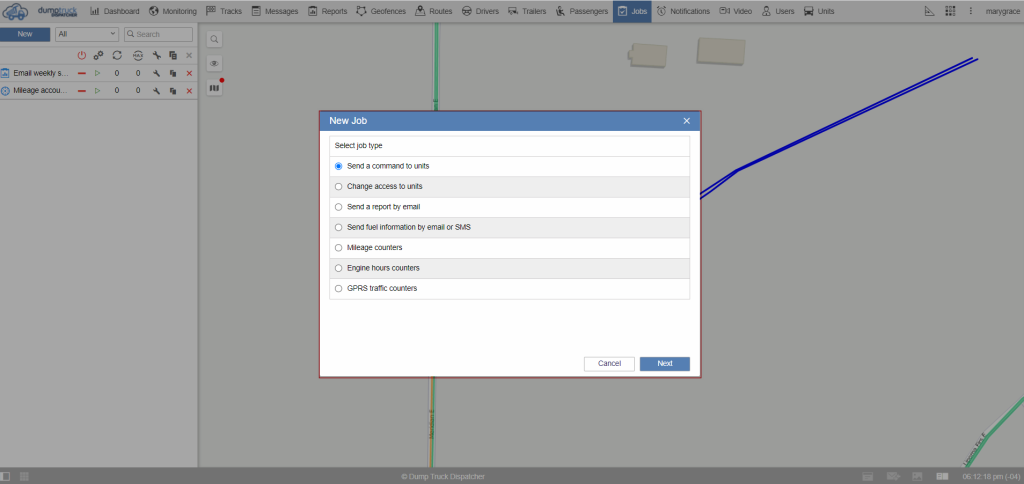
On the next page, you can choose a unit or a group for which the job is dedicated.

The final page is necessary for establishing the schedule of the job. This page is the same for each type of job. Type the name and the description. Then define the schedule for when the report should be sent to the email we have already established. You can set it to trigger every several hours/ minutes, or you can specify the exact time below.

To make the job activated not every day but weekly, Click on the time limitation icon. Move to the weekday tab and choose the day you like. You can also specify the month and particular day in that same way.

The activation time is relevant to apply if you would like the job to start working not at the moment of its creation but later.
On maximum execution field, it allows you to type the number of times you want a job to be activated. The enable checkbox is the same as the deactivated/activated icon in the working area.
Save the settings by clicking OK.
The created job will be displayed in the working area.